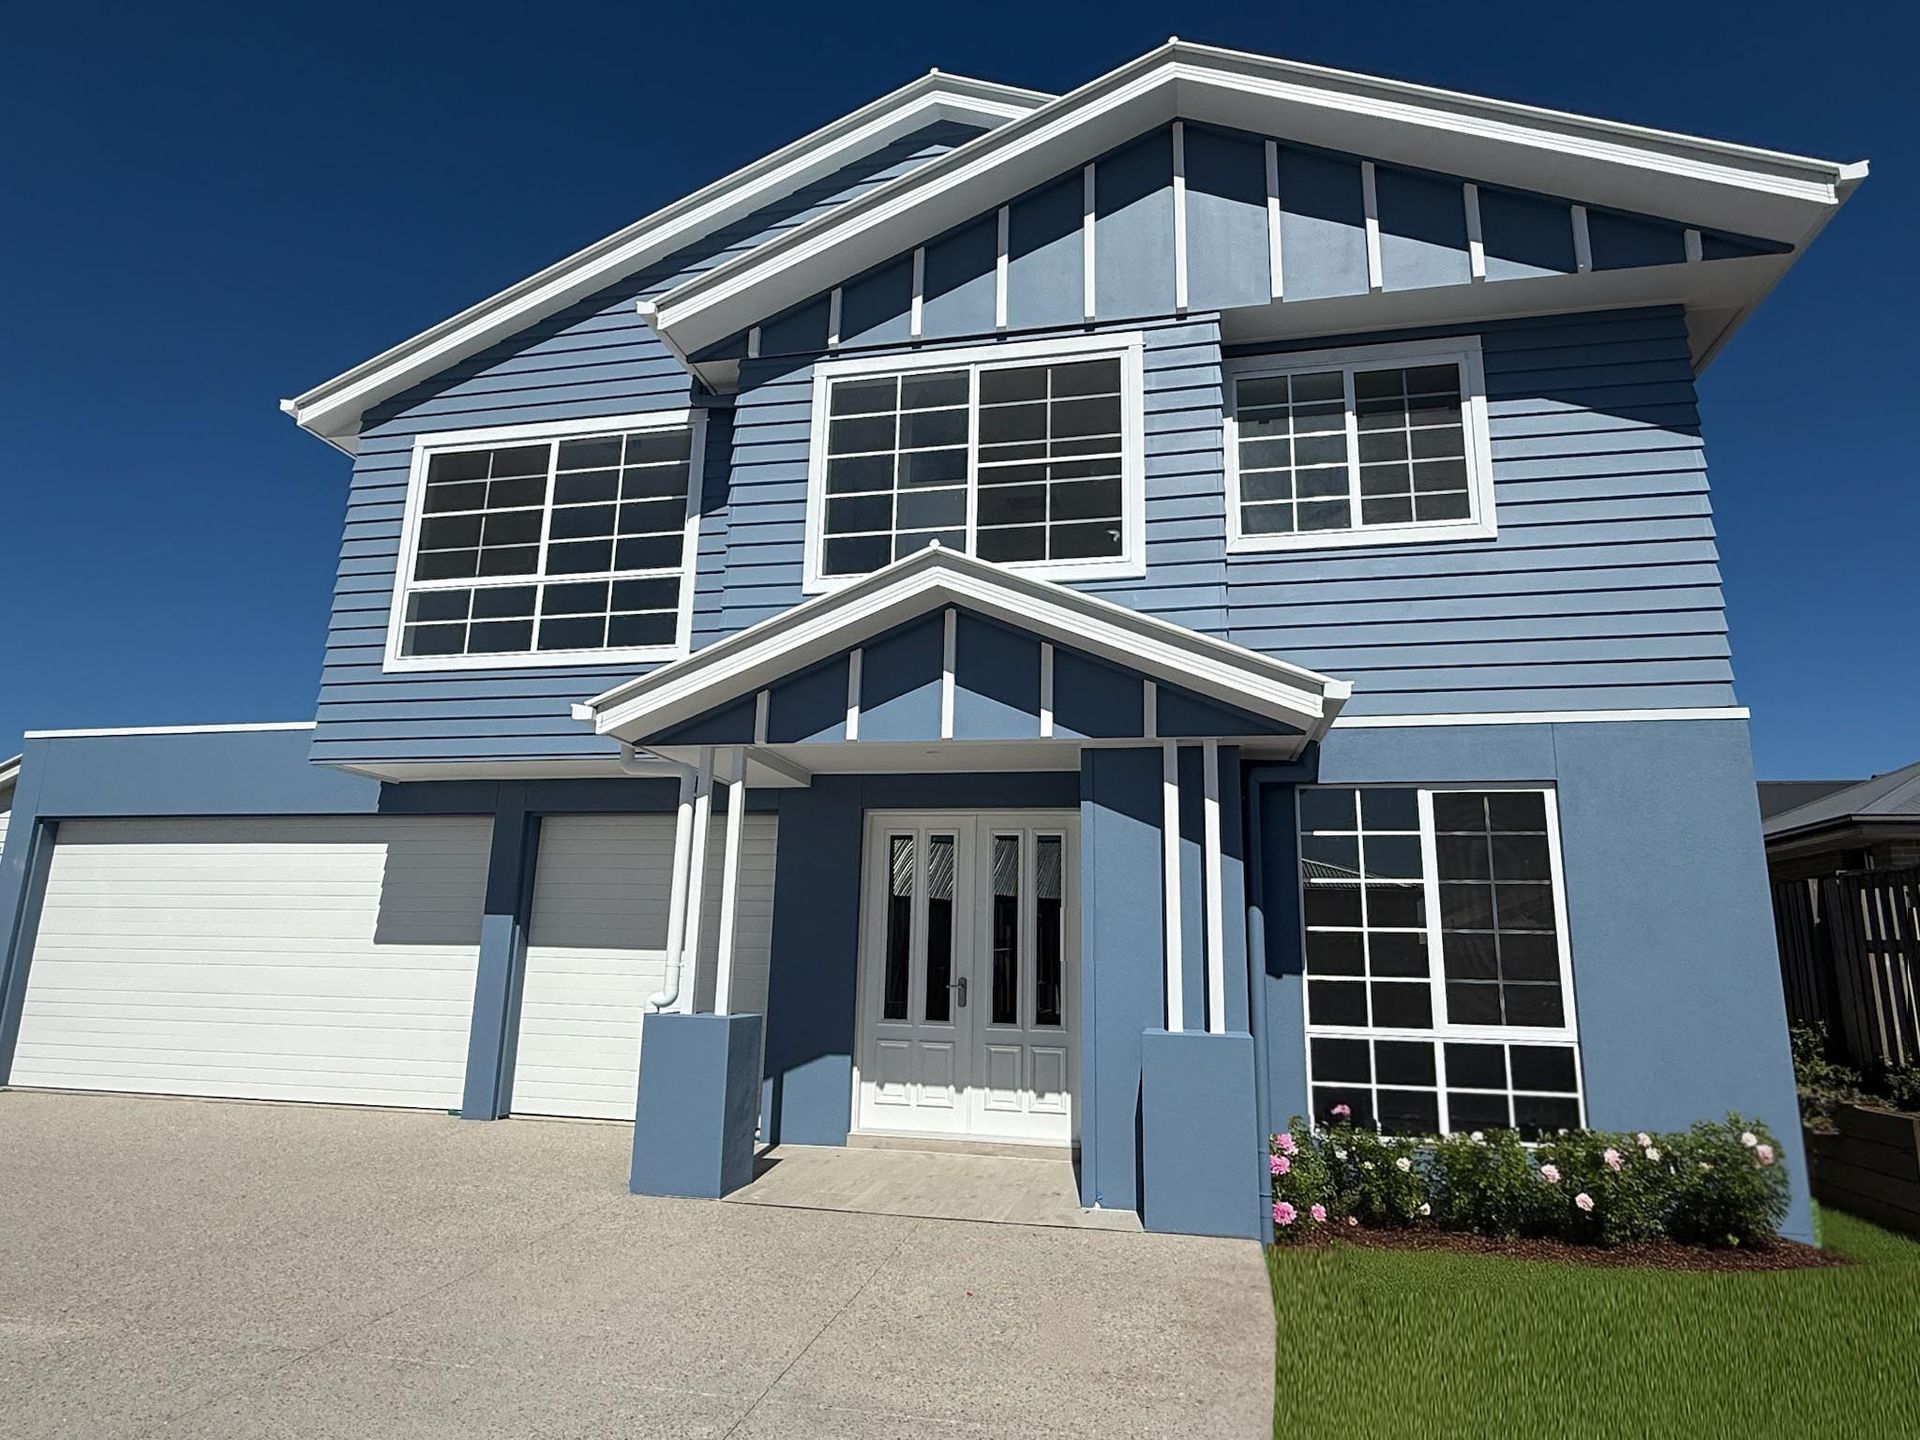
Light, bright, and timeless—the Hamptons aesthetic has captured the hearts of Australian homeowners for good reason. With its crisp white façades, elegant proportions, and relaxed coastal charm, it's a style that feels both aspirational and approachable. But here's the thing: achieving authentic Hamptons style in Queensland isn't just about copying what looks good in a magazine. It's about understanding how to adapt those beautiful design principles to our unique climate—our intense sun, high humidity, summer storms, and coastal conditions. At Homes by Markon, we've been designing and building custom homes for over 30 years in NSW and QLD, and we've learned exactly what it takes to create a Hamptons-inspired home that doesn't just look stunning on day one, but stays that way for decades. In this comprehensive guide, we'll walk you through everything you need to know about bringing Hamptons style to your Queensland home—from choosing the right cladding materials and colour palettes to understanding the architectural details that make this style so enduring. Whether you're planning your first custom build, considering a knock-down and rebuild, or simply exploring design options for your dream home, this article will help you understand how to achieve that coveted coastal elegance while building smart for our Queensland lifestyle. What Is Hamptons Style, Really? Before we dive into the Queensland-specific considerations, let's establish what we mean by "Hamptons style." Originating from the affluent beach communities of Long Island, New York, the Hamptons aesthetic is characterised by: Crisp white or neutral colour palettes – predominantly whites, soft greys, navy blues, and natural timber tones. Weatherboard or board-and-batten cladding – creating texture and visual interest through horizontal or vertical lines. Symmetrical façades – balanced window placement and central entry points that create a sense of order and grandeur. Generous verandahs and porches – often with decorative columns or posts, designed for outdoor relaxation. Pitched rooflines – typically with a steeper pitch than standard contemporary homes to create a classic silhouette. Shutters and architectural detailing – functional or decorative window shutters, corbels, and intricate trim work. Large windows – maximising natural light and creating that signature bright, airy interior feel. Quality materials and finishes – an emphasis on craftsmanship and attention to detail that suggests longevity. The overall effect is one of understated elegance—a home that feels relaxed and welcoming, yet undeniably sophisticated. It's coastal without being kitschy, classic without being stuffy, and luxurious without being ostentatious. Why Hamptons Style Works So Well in Queensland You might wonder why a style born in the northeastern United States translates so beautifully to Queensland. The answer lies in some surprising parallels between the two environments and how we choose to live. Climate Considerations Both the Hamptons and Queensland coastal regions experience high humidity levels and proximity to salt air. We both deal with strong sun exposure and the need for homes that stay cool and comfortable during the warmer months. Lifestyle Alignment The Hamptons aesthetic celebrates indoor-outdoor living and relaxed, family-friendly spaces. This connection to natural surroundings and the focus on entertaining and gathering are exactly the same priorities that Queensland families have when building their dream homes. Timeless Appeal Unlike trend-driven styles that can date quickly, Hamptons design has proven its staying power. It's been popular for decades and shows no signs of fading, which means your home will look just as elegant in 20 years as it does today. Building Hamptons Style for Queensland Conditions: The Critical Considerations Here's where many homeowners and even some builders get it wrong: they focus purely on aesthetics without considering how materials and design choices will perform in our Queensland climate. A true Hamptons home for Queensland needs to be built with our conditions front of mind. 1. Cladding Choices: Beauty That Endures The signature look of a Hamptons home comes largely from its cladding—those crisp, clean lines of weatherboard or board-and-batten. But in Queensland, your cladding choice is about far more than looks. Traditional Timber Weatherboard The classic choice, timber weatherboard delivers authentic Hamptons character with beautiful texture and depth. However, in Queensland's climate, timber requires regular maintenance, including painting or staining every few years. It also requires proper treatment for termite resistance and quality paint systems designed for high UV exposure. Fibre Cement Weatherboard A common option for Queensland Hamptons homes. It is low maintenance and requires repainting far less frequently than timber. Crucially for our region, it is termite resistant and dimensionally stable, meaning it won't warp, twist, or split in our humidity. Modern fibre cement products beautifully replicate the look of timber while offering superior durability. Board-and-Batten This vertical cladding style creates striking visual interest and is particularly effective on upper levels or feature walls. The same material considerations apply—fibre cement board-and-batten offers durability and low maintenance while delivering that classic Hamptons look. 2. Colour Palettes: Staying Bright in the Queensland Sun The Hamptons palette is famously light and bright, but Queensland's intense UV exposure means your colour choices need to be strategic to ensure they don't fade or cause the home to overheat. Exterior Colours The signature Hamptons white façade is absolutely achievable in Queensland, but you need premium exterior paint with high UV resistance. Popular tones include crisp bright whites, warm whites with subtle cream undertones, and soft grey-whites like Surfmist. Roof Colours Here's a Queensland-specific consideration: while traditional Hamptons homes might feature dark grey or charcoal roofs, in Queensland we use white COLORBOND® roofing. White roofs reflect heat rather than absorbing it, keeping your home cooler and significantly improving energy efficiency. This is one area where adapting the style for our climate actually enhances both the look and the performance of your home. 3. Architectural Detailing: Getting the Proportions Right The devil—and the delight—is in the details when it comes to Hamptons style. These architectural elements create the character and elegance that define the aesthetic. Window Proportions and Placement Hamptons homes feature generous window sizes to maximise natural light. In Queensland, your windows also need to deliver thermal performance through low-E glass and proper shading to handle the summer heat. Verandahs and Porches These outdoor spaces are where Hamptons style and Queensland lifestyle perfectly align. We design them with generous proportions, deep enough for furniture and entertaining, often featuring white painted VJ panelling on the ceilings and essential ceiling fans for comfort. Trim and Mouldings The crisp, clean lines of Hamptons style come from wide architraves around windows and doors and skirting boards with classic profiles. In Queensland's humidity, we ensure all timber trim is properly primed and painted with quality systems to prevent warping. 4. Material Quality: Building for Longevity A true Hamptons home isn't just about the look—it's about quality construction that stands the test of time. At Homes by Markon, this means focusing on structural integrity. We predominantly use BlueScope TRUECORE® steel framing because it offers superior strength and durability. Most importantly for Queenslanders, it is 100% termite proof and won't warp or twist over time, ensuring those Hamptons lines stay straight and true. Designing Your Hamptons Home: Room by Room The Kitchen The heart of a Hamptons home usually features white or soft grey Shaker-style cabinetry. We pair these with quality stone benchtops and subway tile splashbacks. Feature pendant lighting over a large island bench is a must-have for that classic look. Living Areas Hamptons living spaces are all about light and connection. We focus on open-plan layouts with high ceilings (2.7m minimum) and large doors that connect to outdoor spaces. Light timber-look flooring or pale tiles help maintain that airy feel. Outdoor Spaces In Queensland, the "outdoor room" is essential. We create covered alfresco areas that extend your living space, often incorporating outdoor kitchens and ensuring all swimming pools are fenced with glass for a seamless, compliant look. The Homes by Markon Approach to Hamptons Design When you work with Homes by Markon to create your Hamptons-inspired home, you're getting more than just a builder—you're getting experienced Queensland builders who understand how to adapt this beautiful style to our unique conditions. Discovery and Feasibility We start by understanding your lifestyle, your vision, and your block. We look at the opportunities and constraints of your site to ensure the design works with the land. Transparent Pricing We provide clear, detailed pricing with realistic allowances. We don't believe in "smoke and mirrors"—we want you to know exactly what is included in your build from the beginning. Quality Construction Our QBCC-licensed team builds your home with attention to detail at every stage. With over 30 years of experience in NSW and QLD, we have the hands-on knowledge to ensure your home is built to the highest standards. Final Thoughts: Coastal Elegance That Truly Lasts Hamptons style has endured because it represents something we all want: a home that's beautiful, comfortable, welcoming, and timeless. When adapted thoughtfully for Queensland conditions—with the right materials, proper detailing, and quality construction—it delivers all of that and more. At Homes by Markon, we've spent decades learning how to create homes that don't just look good in photos, but perform beautifully in real life, year after year. Your home is one of the most significant investments you'll ever make, and it deserves to be designed and built properly by people who care about getting every detail right. If you're dreaming of a Hamptons-inspired home that captures that coastal elegance while being perfectly suited to Queensland living, we'd love to help you explore what's possible. Ready to Design Your Hamptons-Inspired Home? At Homes by Markon, we specialise in creating custom homes that are designed by you, for your lifestyle, your block, and your budget. With over 30 years of experience in NSW and QLD, we understand exactly what it takes to deliver a Hamptons-style home that looks stunning and performs beautifully in our climate. Whether you're planning your first home, considering a knock-down and rebuild, or exploring options for your dream custom build, we'd love to start a conversation about how we can help you achieve the right outcome. Contact The Markon Group today: 📍 Location : 20–24 Commerce Drive, Browns Plains, Brisbane 📞 Phone : +61 7 3153 2000 🌐 Website : www.markongroup.com.au ✉️ Email : info@homesbymarkon.com.au Let's create a Hamptons home that's uniquely yours—spaces that matter, built to last, designed for how you actually live. Building futures for Queensland families.
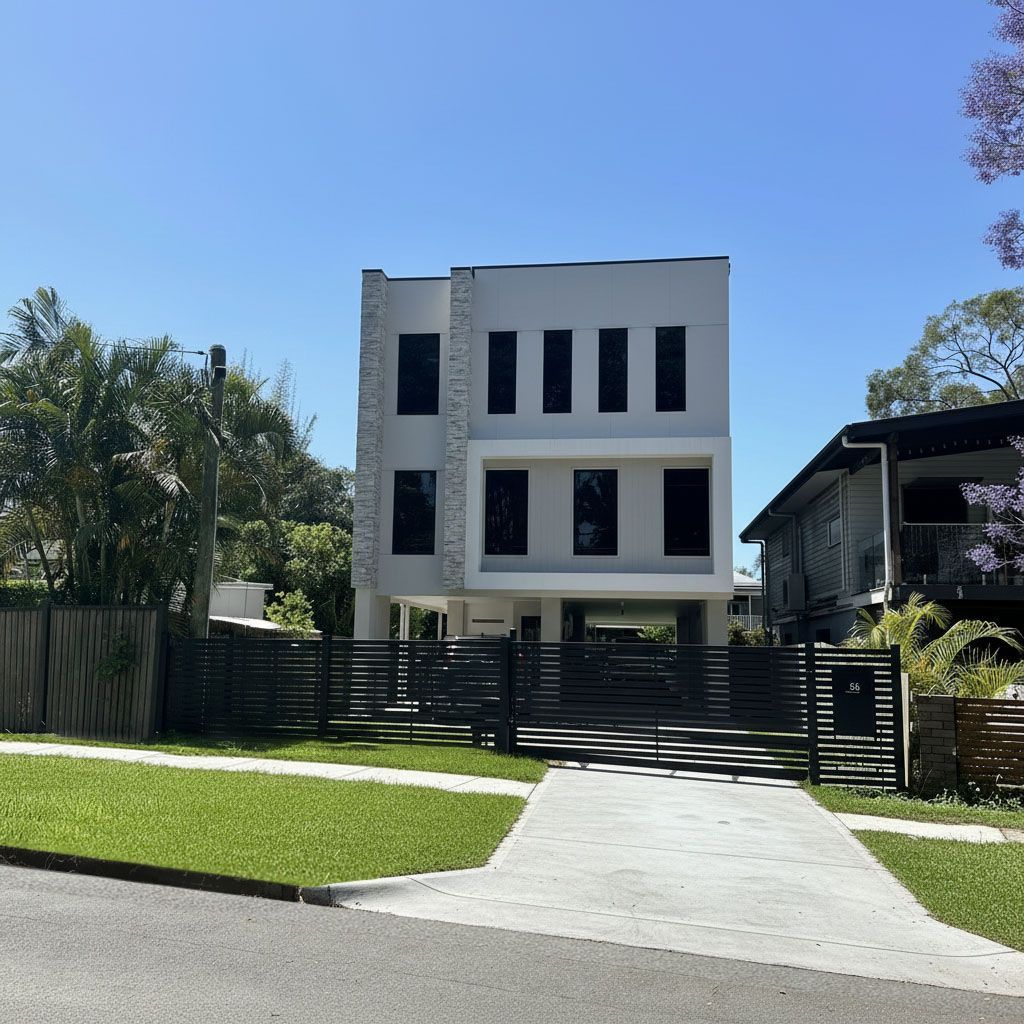
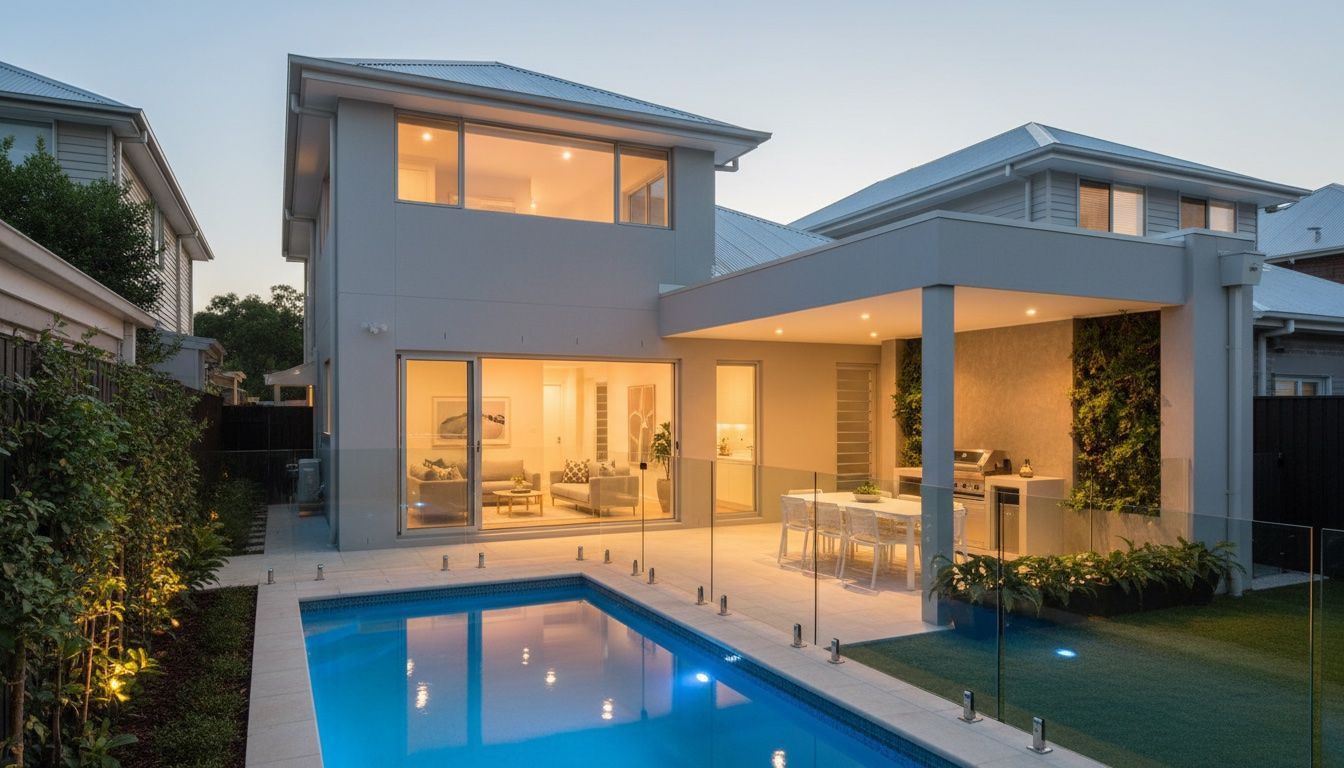
Building Futures on Brisbane's 10-Metre Lots – Why The Markon Group is South-East Queensland's Trusted Narrow Lot and Three Storey Custom Home Expert There's a quiet revolution happening across Brisbane's established suburbs. From Mitchelton to Kedron, Paddington to Everton Park, Gaythorne to Grange – and right across the southside too – homeowners and investors are discovering the untapped potential hiding in plain sight: those classic 20-metre-wide Brisbane blocks that can be transformed into two separate 10-metre lots, each capable of holding a stunning, fully customised three storey home. If you've been researching narrow lot homes, splitter blocks, or three storey builds in Brisbane, you've probably already discovered that not every builder is willing – or able – to take on these projects. The truth is, narrow lot and three storey construction requires a particular set of skills, experience, and problem-solving ability that many builders simply don't have. That's exactly where The Markon Group comes in. We're not just another builder who happens to do the occasional narrow lot project. We are Brisbane's narrow lot and three storey custom home specialists – and in this blog, we're going to explain exactly what that means for you, your block, and your future home. What Exactly is a Narrow Lot? Before we dive into the details, let's make sure we're all on the same page about what a "narrow lot" actually is. In Queensland, a narrow lot is generally considered to be a block of land that is 10 metres wide or less. These blocks are sometimes called "splitter blocks" because they often result from subdividing a larger, traditional Brisbane block into two separate titles. If you've spent any time driving through Brisbane's inner and middle-ring suburbs, you'll have noticed the classic Queensland housing pattern: older homes sitting on generous 800 to 1,000 square metre blocks, typically measuring around 20 metres wide by 40 metres deep. These blocks were standard when Brisbane was growing in the mid-20th century, and many of them still have the original post-war or 1960s homes sitting on them today. Here's where it gets interesting. Under current Brisbane City Council planning rules, many of these larger blocks can be subdivided into two separate 10-metre-wide lots. This creates what we call "splitter blocks" – and it's opened up a whole new world of opportunity for homeowners, investors, and families looking to build in established suburbs close to the city. The Brisbane Splitter Block Opportunity The appeal of splitter blocks is easy to understand. Brisbane's inner suburbs – places like Mitchelton, Gaythorne, Kedron, Everton Park, Grange, Paddington, and many others – are highly desirable places to live. They're close to the city, well-serviced by public transport, and full of established trees, parks, schools, and amenities. The problem? Land in these suburbs is expensive, and finding a vacant block is almost impossible. Splitter blocks solve this problem. By purchasing an older home on a large block, knocking it down, and subdividing the land, you can create two separate building sites in a suburb where vacant land simply doesn't exist. You can then build two brand-new custom three storey homes – one to live in and one to sell, two to sell, or two to rent. The possibilities are significant. But here's the catch: building a three storey home on a 10-metre-wide block is not the same as building on a traditional suburban lot. It requires a completely different approach to design, construction, and project management. And that's where many builders fall short. Why Most Builders Won't Touch Three Storey Narrow Lots Let's be honest: three storey narrow lot construction is harder than building on a standard block. There are logistical challenges, design constraints, and construction complexities that simply don't exist on wider sites or single storey builds. Here are just a few of the issues that make three storey narrow lot builds more demanding: Site Access and Logistics On a 10-metre-wide block, there's very little room to move. Deliveries, crane lifts, scaffolding, and worker access all become more complicated. You're often working right up against boundary fences, which means you need to carefully manage relationships with neighbours and ensure that every aspect of the build is planned down to the last detail. When you're building three storeys high, these logistical challenges multiply significantly. Scaffolding and Three Storey Construction When you're building a three storey home on a narrow lot, scaffolding becomes a significant challenge. There's limited space to set up scaffolding on the sides of the building, and you need to think carefully about how tradespeople will access upper levels safely and efficiently. Three storey builds require more extensive scaffolding systems, longer installation times, and more complex safety management. This requires experience and careful planning – something that builders who only occasionally do narrow lot or multi-storey work often struggle with. Neighbour Interface Three storey narrow lot builds mean building close to existing homes on either side – and building significantly higher than those neighbouring properties in many cases. This creates challenges around privacy, overlooking, noise during construction, and ensuring that the new home doesn't negatively impact the neighbours' amenity. Experienced three storey narrow lot builders know how to navigate these issues and maintain good relationships with everyone involved. Council Requirements and Height Restrictions Brisbane City Council has specific rules about building heights, setbacks, and site coverage that apply to narrow lots. Understanding these rules – and knowing how to design a three storey home within them while still achieving a great outcome – is essential. We know how to work within these parameters and, where appropriate, how to achieve maximum height through clever design solutions. Structural Complexity Three storey homes require more sophisticated structural engineering than single or two storey builds. The loads are greater, the wind forces are higher, and the foundations need to be designed accordingly. On a narrow lot, where space is already constrained, integrating these structural requirements into an efficient and attractive design requires genuine expertise. Design Complexity Designing a three storey home for a narrow lot is fundamentally different from designing for a standard block. You need to think vertically, maximise natural light across three levels, create functional circulation between floors, design outdoor spaces in limited areas, and ensure that the home feels spacious and comfortable despite its narrower dimensions and greater height. This requires genuine design expertise and a deep understanding of how people actually live in their homes. Because of all these challenges, many builders simply choose not to do three storey narrow lot work. They stick to standard suburban blocks and single storey homes where the logistics are simpler and the margins are more predictable. Other builders will take on narrow lot projects but limit themselves to two storeys, or offer very limited customisation – essentially forcing you to choose from a small range of pre-designed plans that may or may not suit your block, your lifestyle, or your vision. At The Markon Group, we've taken a different approach. We've embraced three storey narrow lot construction as a core part of our business, invested in developing the expertise and systems needed to do it well, and built a reputation as Brisbane's go-to specialists for custom three storey homes on narrow blocks. The Markon Group: Brisbane's Three Storey Narrow Lot Specialists When we say we're specialists, we mean it. This isn't a marketing claim – it's a reflection of the work we do every day. Right now, we have five or six narrow lot projects actively under construction, with another four to six in the pipeline ready to commence. Many of these are three storey builds. These projects span suburbs across Brisbane's north and south, from Mitchelton and Kedron to Everton Park and beyond. We're not dabbling in three storey narrow lot construction; we're deeply immersed in it. This volume of work matters because it means we've developed genuine expertise. We've encountered and solved the problems that come with three storey narrow lot builds. We've refined our processes, built relationships with trades who understand the unique requirements of these projects, and developed design approaches that maximise the potential of every narrow block we work on. Our Director, Mark Uzzell, has over 30 years of hands-on experience in custom home building across NSW and Queensland. He personally assesses every narrow lot project we take on, visiting the site, reviewing the constraints and opportunities, and developing preliminary concepts that are tailored to the specific block and the client's needs. This isn't a cookie-cutter approach – it's genuine custom home building, applied to the unique challenges of three storey narrow lot construction. Three Storey Living: Maximising Your Narrow Block Why build three storeys on a narrow lot? The answer is simple: it's the smartest way to maximise your living space when your block width is limited. On a 10-metre-wide block, your building footprint is constrained. You can only spread so far sideways. But you can build up – and that's where three storey design comes into its own. A well-designed three storey home on a narrow lot can deliver the same living space as a sprawling single storey home on a much larger block. But it does so with a smaller footprint, leaving more room for outdoor living, gardens, and landscaping. It's an efficient, intelligent approach to making the most of valuable inner-suburban land. Three storey living also offers lifestyle benefits that single storey homes simply can't match: Separation of Spaces With three levels, you can create genuine separation between different areas of your home. A typical layout might include garaging, a laundry, and a multipurpose room on the ground floor; open-plan living, dining, and kitchen on the first floor; and bedrooms on the second floor. This vertical separation means that noise from living areas doesn't disturb sleeping areas, and different family members can have their own space when they need it. Capturing Views and Breezes In Brisbane's inner suburbs, a three storey home often rises above neighbouring properties, capturing views and breezes that simply aren't available at ground level. Your upper-level living areas can enjoy outlooks across the suburb, while elevated outdoor spaces catch cooling breezes that make Brisbane's climate so enjoyable. Natural Light Three storey homes can be designed to flood with natural light. With windows on multiple levels and the opportunity for voids and light wells, a well-designed three storey home can feel bright and airy throughout – even on a narrow block where side windows may be limited. Outdoor Living at Height Balconies and terraces on upper levels provide outdoor living spaces that feel private and elevated, even in a dense suburban setting. These spaces become extensions of your living areas, perfect for morning coffee, evening drinks, or simply enjoying the Queensland climate. Two Storey with Undercroft: The Three Storey Alternative In some Brisbane suburbs, council height restrictions mean that a true three storey home isn't permitted. But here's where experience and creativity come into play. In many cases, we can achieve the functional equivalent of a three storey home by incorporating an undercroft level. An undercroft is essentially a lower level that's partially below ground level. By excavating into the site, we can create a ground floor level that sits below the natural ground line, with two full storeys of living space above. From the street, the home appears as a three storey building, but technically it's classified as a two storey home with an undercroft – which often allows it to comply with height restrictions that would otherwise prevent a true three storey build. The undercroft level is incredibly useful. It's the perfect location for garaging – keeping cars off the street and freeing up the upper levels for living space. But it can also accommodate a laundry, storage rooms, a home gym, a workshop, or even additional living areas depending on the design and the site conditions. Not every site is suitable for an undercroft design. If there's rock close to the surface, excavation may be cost-prohibitive. If the water table is high, there may be drainage challenges to consider. But with our experience across dozens of narrow lot projects, we can quickly assess whether an undercroft is viable for your site and advise you on the best approach to achieving three levels of living. Custom Design for Every Block Here's something that sets The Markon Group apart from other builders who work on narrow lots: we don't believe in one-size-fits-all solutions. Some builders who do narrow lot work will offer you a limited range of pre-designed plans. You pick the one that's closest to what you want, make a few minor modifications, and that's your home. It's efficient for the builder, but it often results in homes that don't truly suit the block they're built on or the lifestyle of the people who'll live in them. And when it comes to three storey builds, these limitations become even more pronounced. We take a completely different approach. Every three storey narrow lot project we undertake starts with a thorough assessment of the specific block. We look at: Orientation: Where does the sun rise and set relative to the block? How can we position living areas across three levels to capture natural light and warmth in winter while providing shade and cooling in summer? Prevailing Winds: Brisbane's climate means that capturing natural breezes is essential for comfort. We assess wind patterns and design homes that maximise natural ventilation – particularly important when you have three levels to consider. Views and Outlook: With a three storey home, you have the opportunity to capture views that simply aren't available at ground level. We identify these opportunities and design homes that take advantage of them, positioning key living spaces and outdoor areas to maximise the outlook. Privacy: With neighbours close by on narrow lots, and with your home rising above neighbouring properties, privacy is a key consideration. We carefully position windows, outdoor spaces, and living areas to maximise privacy for both you and your neighbours. Site Constraints: Every block has its own constraints – slopes, easements, setback requirements, existing trees, and more. We work within these constraints to achieve the best possible three storey outcome. Your Lifestyle: Most importantly, we design around how you actually live. How does your family use space? Do you need a home office? Do you entertain frequently? Do you have children who need play areas? Do you value indoor-outdoor connection? How do you want to move between levels? We ask these questions and design three storey homes that genuinely fit your life. This custom approach takes more time and effort than simply offering a catalogue of standard plans. But it results in homes that are genuinely tailored to their sites and their owners – homes that feel right from the moment you walk in the door. The Splitter Block Process: From Purchase to Completion If you're considering purchasing a larger block with the intention of subdividing and building two three storey narrow lot homes, you might be wondering how the process works. Here's a general overview of the journey: Site Assessment and Feasibility Before you purchase a property, it's worth having a conversation with us about its potential. We can review the block, assess the planning rules that apply, and give you a preliminary view on what might be achievable – including whether three storey construction is permitted and what height you can realistically achieve. This helps you make an informed decision about whether to proceed with the purchase. Subdivision Once you own the property, the existing house (if there is one) needs to be demolished and the land subdivided into two separate titles. This involves surveying, lodging a subdivision application with council, and meeting various requirements around services, access, and infrastructure. We can guide you through this process and connect you with the right professionals to get it done efficiently. Design and Documentation With two separate lots created, we can begin the design process for your new three storey homes. This involves working with you to understand your needs, developing concept designs, refining those designs based on your feedback, and then preparing the detailed documentation needed for building approval and construction. Three storey homes require more extensive documentation, including detailed structural engineering, and we manage this entire process for you. Pricing and Selections We provide transparent, detailed pricing that clearly sets out what's included in your build. We guide you through the selections process – choosing finishes, fixtures, and fittings across all three levels – without overwhelming you with endless options. Our goal is to make this process enjoyable rather than stressful. Construction With approvals in place and selections finalised, construction begins. We manage the build from start to finish, keeping you informed at every stage and ensuring that quality is maintained throughout. Our experience with three storey narrow lot construction means we're well-prepared for the logistical challenges these sites present – from scaffolding and crane access to managing the extended build timeline that comes with multi-storey construction. Handover When construction is complete, we conduct thorough quality checks and walk you through your new three storey home, explaining how everything works and ensuring you're completely satisfied. We provide all the documentation, warranties, and information you need, including QBCC home warranty insurance. Why Experience Matters on Three Storey Narrow Lots We've mentioned experience several times in this blog, and there's a reason for that. On three storey narrow lot projects, experience isn't just nice to have – it's essential. Every three storey narrow lot presents its own unique challenges. Maybe the block slopes steeply from front to back. Maybe there's a large tree on the boundary that needs to be retained. Maybe the neighbours have concerns about overlooking from your upper levels. Maybe the soil conditions are unusual. Maybe access for construction vehicles and cranes is extremely tight. Builders who only occasionally work on three storey narrow lots often encounter these challenges for the first time and have to figure out solutions on the fly. That leads to delays, cost overruns, and sometimes compromised outcomes. At The Markon Group, we've seen it all. We've built three storey homes on blocks that slope dramatically. We've worked around significant trees. We've navigated complex neighbour relationships. We've dealt with challenging soil conditions. We've managed construction on sites where there's barely room to turn around – and we've done it while building three storeys high. This experience means we can anticipate problems before they occur, plan for contingencies, and deliver projects smoothly even when challenges arise. It also means we can give you realistic advice upfront about what's achievable on your specific block, what it's likely to cost, and what timeframe you can expect for a three storey build. Designing for Queensland Conditions Every home we build is designed for Queensland's unique climate and conditions. This is particularly important on three storey narrow lots, where getting the design right is essential for comfort and liveability across all levels. All our homes are designed and rated to current NatHERS energy-efficiency standards. We use white COLORBOND® roofs to support thermal performance in Queensland's warm climate. We predominantly use BlueScope TRUECORE® steel framing, which provides strength, durability, and termite resistance – particularly important in three storey construction where structural integrity is paramount. We incorporate proper insulation, smart glazing, and effective shading to keep homes comfortable year-round while minimising energy costs. On three storey narrow lots, where the building footprint is constrained and the home rises significantly above ground level, these design considerations become even more important. We need to maximise natural light without creating heat gain problems. We need to capture breezes for natural ventilation across all three levels. We need to create outdoor spaces that are usable and comfortable despite the limited width of the block and the height of the building. This is where our experience and design expertise really shine. We know how to create three storey narrow lot homes that feel spacious, light-filled, and comfortable – homes that work beautifully in Queensland's climate and suit the way Queensland families actually live. Investment and SMSF Builds on Narrow Lots Three storey narrow lot construction isn't just for owner-occupiers. Many of our clients are investors or self-managed super fund (SMSF) trustees who see the potential in Brisbane's splitter block market. The mathematics can be compelling. Purchase a larger block with an older home, demolish and subdivide, build two quality three storey homes, and you've potentially created significant value. You might sell both homes, sell one and keep one, or retain both as rental properties. The flexibility is considerable – and three storey homes typically command premium prices and rents due to their generous living space. For SMSF trustees, three storey narrow lot builds can be an effective way to grow retirement savings through property investment. The key is working with a builder who understands the specific requirements of SMSF builds and can deliver quality three storey homes that will perform well as investments over the long term. We work with investors and SMSF trustees regularly, and we understand the different priorities that apply to investment builds compared to owner-occupier homes. We can help you make smart decisions about specifications and finishes that will maximise rental returns or resale value while keeping construction costs under control. The Suburbs Where We're Building Three Storey Homes While we work across South-East Queensland, there are certain suburbs where three storey narrow lot and splitter block construction is particularly prevalent. These tend to be Brisbane's inner and middle-ring suburbs – established areas with older housing stock on larger blocks that are now being redeveloped. On Brisbane's northside, we're actively building three storey homes in suburbs including: Mitchelton Gaythorne Kedron Everton Park Grange Alderley Enoggera Keperra Stafford Gordon Park Lutwyche Windsor On the southside, similar opportunities exist in suburbs throughout the region. The specific planning rules vary from suburb to suburb, so it's always worth checking what's possible on any particular block before making assumptions about whether three storey construction is permitted. If you're looking at a property in any of these areas – or anywhere else in South-East Queensland – and wondering whether it might be suitable for a three storey narrow lot build or subdivision, we're happy to have a conversation and share our insights. Starting the Conversation If you've read this far, you're probably seriously considering a three storey narrow lot build. Maybe you've already purchased a block, or maybe you're still in the research phase, trying to understand what's possible and what it might cost. Either way, we'd love to hear from you. The best place to start is with a conversation. Tell us about your situation – the block you're looking at, what you're hoping to achieve, your budget parameters, your timeline. We'll listen carefully, ask questions to understand your needs, and give you honest, practical advice about what's achievable – including whether three storey construction is the right approach for your site. If it makes sense to proceed, we can visit your block, assess the opportunities and constraints, and develop preliminary concepts that show you what's possible. We'll give you realistic guidance on costs and timeframes for a three storey build, and we'll be upfront about any challenges we anticipate. There's no obligation and no pressure. We believe that the best client relationships start with open, honest conversations where everyone understands what they're getting into. If we're the right builder for your three storey project, that will become clear through the process. If we're not the right fit, we'll tell you that too. Building Futures on Brisbane's Narrow Lots Brisbane is changing. The days of endless suburban expansion are giving way to a new reality where established suburbs are being renewed and revitalised through thoughtful redevelopment. Three storey narrow lot construction is at the heart of this transformation, creating opportunities for families to build spacious, light-filled custom homes in suburbs they love, close to the city, schools, and amenities. At The Markon Group, we're proud to be Brisbane's three storey narrow lot custom home specialists. We've invested in developing the expertise, systems, and relationships needed to deliver outstanding outcomes on these challenging sites. We bring genuine passion to every project, approaching each new block with curiosity and creativity, always looking for ways to maximise its potential through intelligent three storey design. If you're ready to explore what's possible on your narrow lot, we're ready to help. Let's start a conversation about your vision, your block, and your future three storey home. Contact The Markon Group 📍 20–24 Commerce Drive, Browns Plains, Brisbane 📞 +61 7 3153 2000 🌐 www.markongroup.com.au ? ? info@homesbymarkon.com.au Building custom homes for families for over 30 years in NSW and QLD. Spaces that matter. Futures built.

Go up with comfort, safety, and amazing views.

Why Acoustic Comfort Matters in Your New Home
Live large on a compact footprint.
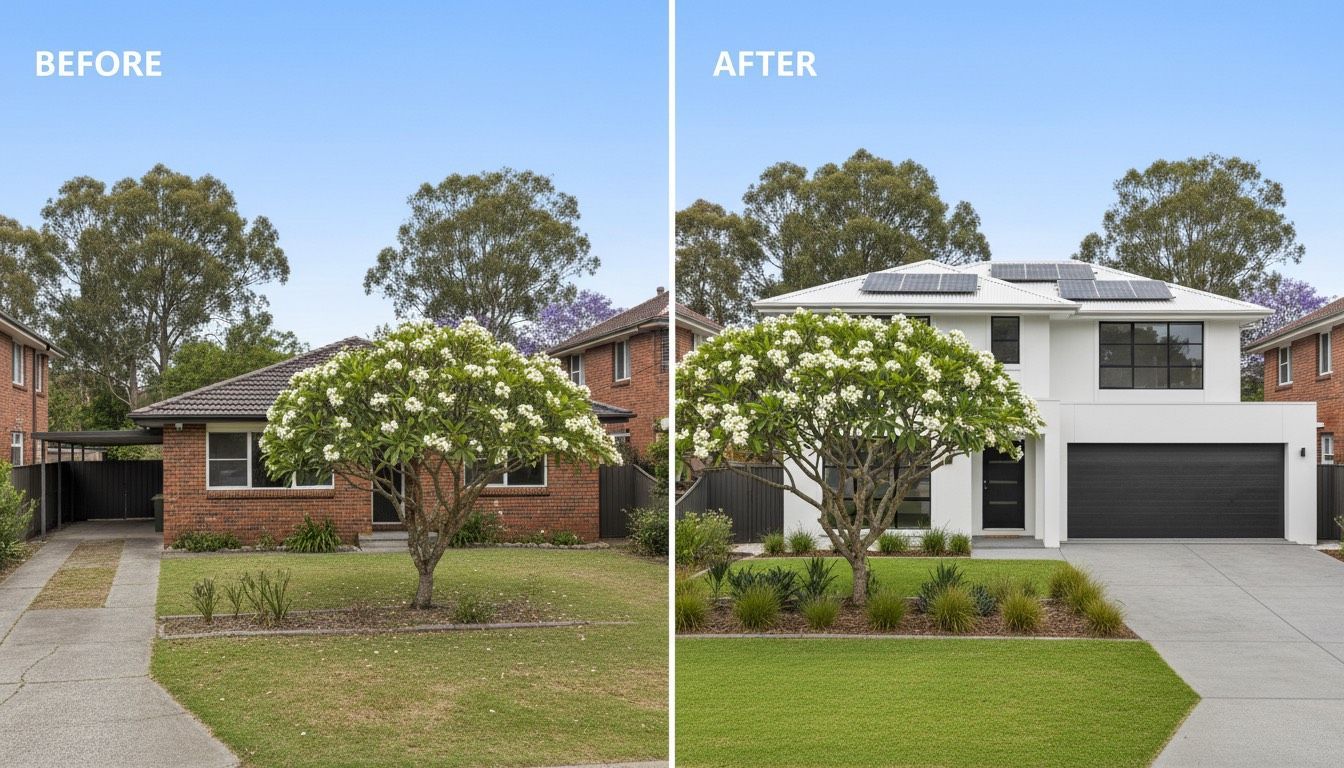
You love your location. The street, the neighbours, the school zone—it all works. But your house? Not so much.
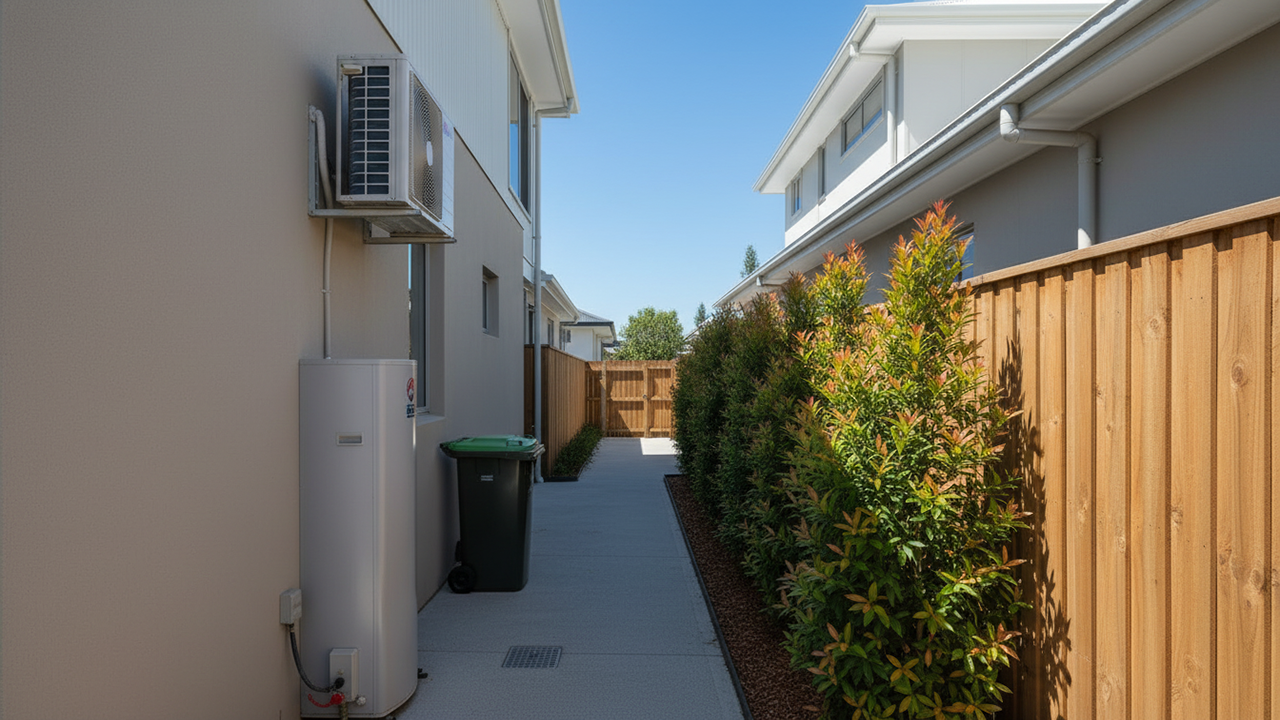
The Forgotten Strip: Why Your Side Yard Matters More Than You Think.
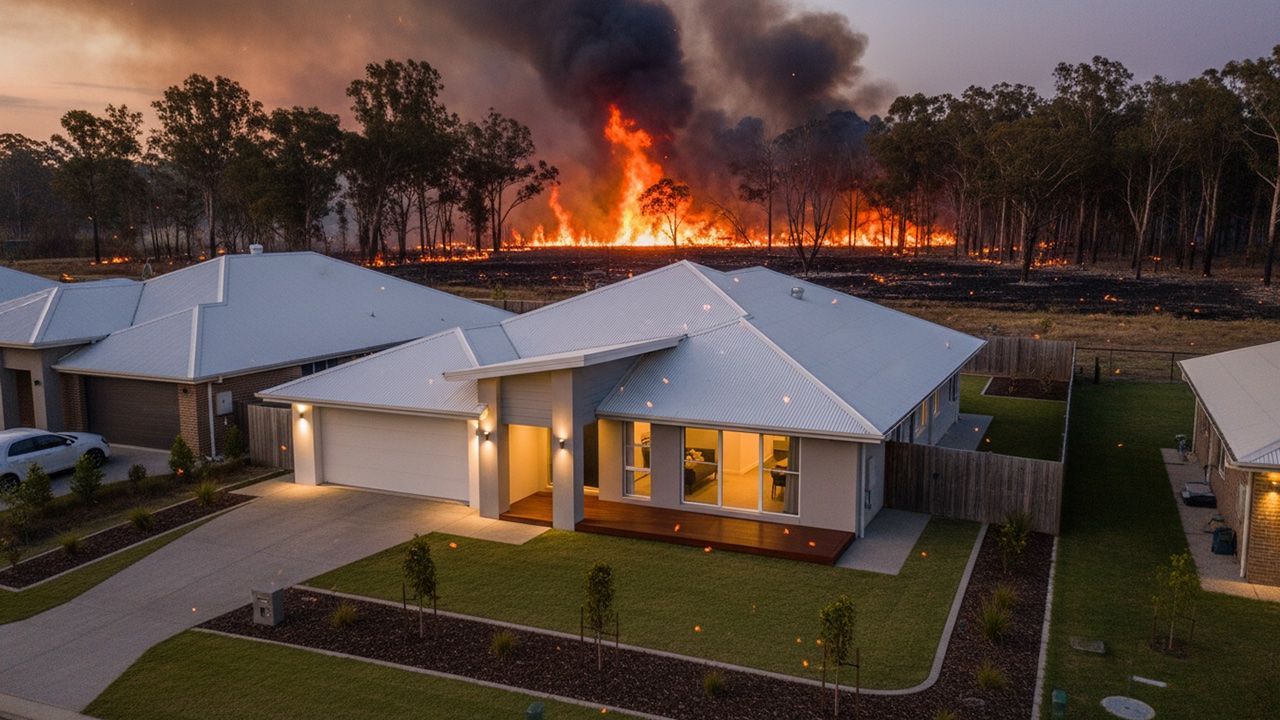
Build to withstand the extremes without sacrificing style.
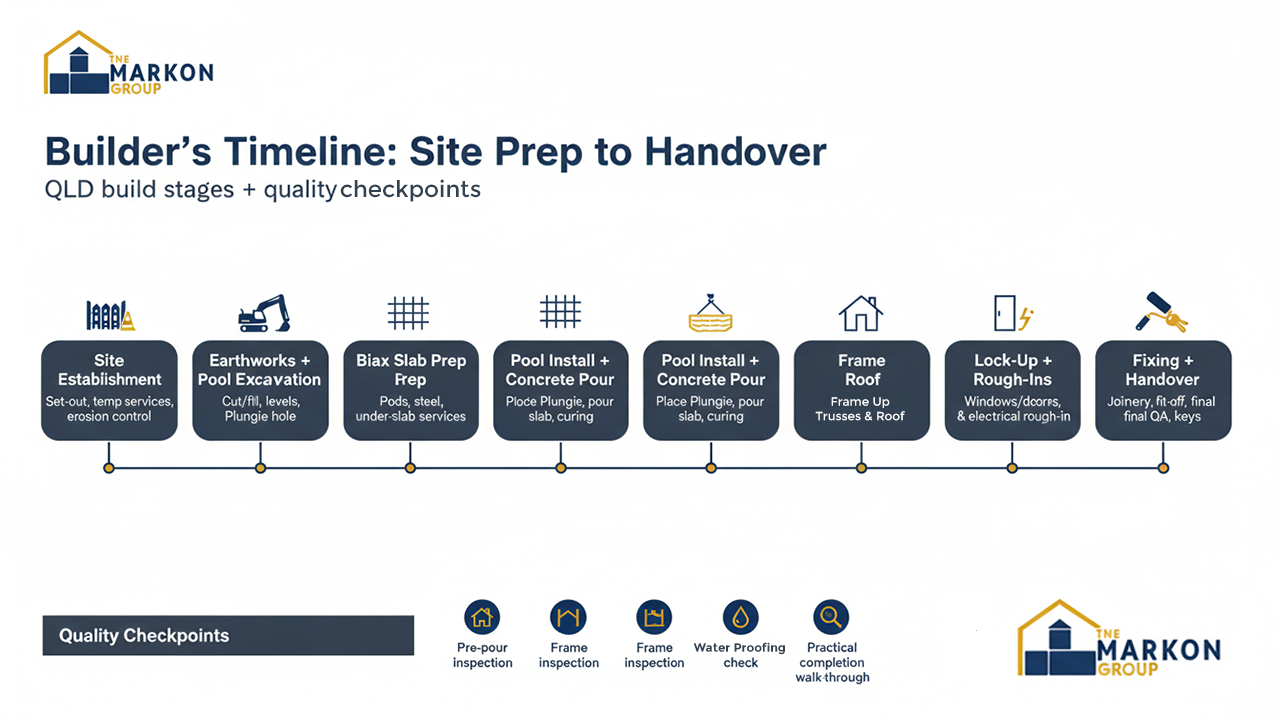
If you’ve ever driven past a building site and thought, “How is that house still at the same stage?”, you’re not alone.

Protect Your Investment from Queensland's Intense Downpours and Prevent Costly Water Damage

It's beginning to look a lot like Christmas.

Queensland's building approval system involves multiple parties, each with distinct responsibilities. Whether you're building in Brisbane, the Gold Coast, or regional Queensland, you'll navigate a similar framework—but the players and timelines can vary. The Key Players Council vs Private Certifier You have two pathways for building approvals in QLD: Council pathway : Your local council assesses and approves your building application Private certifier pathway : A licensed private certifier (building certifier) handles the assessment and approval process At The Markon Group, we work exclusively with trusted private certifiers who provide faster turnaround times, more personalized service, and expert guidance throughout your build. This streamlined approach is particularly valuable in Brisbane and Gold Coast regions where demand is high and council processing times can extend significantly. QBCC (Queensland Building and Construction Commission) The QBCC regulates the building industry, ensuring builders hold appropriate licenses and insurance. While they don't approve your specific plans, they're essential for verifying your builder's credentials. The Markon Group maintains full QBCC licensing and compliance, giving you peace of mind throughout your project. Your Builder Responsible for coordinating trades, managing construction, and ensuring work complies with approved plans and building codes. When you build with The Markon Group, we handle all coordination with our private certifier, consultants, and authorities—removing the administrative burden from your shoulders. Consultants and Specialists Depending on your site and design, you may need engineers (structural, geotechnical, hydraulic), surveyors, town planners, and environmental consultants. The Markon Group has established relationships with qualified professionals across all disciplines, ensuring seamless coordination and faster approvals. The Complete Approvals Checklist for Your Custom Home Here are the typical approvals required for a suburban new custom home build in Queensland. Each project is unique, and the specific approvals you'll need depend on your site location, design complexity, and local council requirements: 1. Development Approval (Planning Approval) What it is : Permission to use the land for your intended purpose (residential dwelling) and confirmation that your proposed home complies with local planning schemes When you need it : Before building approval, if your project requires it Who asseses : Local council or private certifier (limited scope) Timeline : 15-60 days depending on complexity The Markon Group's experience : Because we work extensively with newly released land in master-planned estates, development approval is often a straightforward process for standard single and double-storey homes. These estates typically have pre-approved design guidelines that streamline the approval pathway. However, we still carefully assess development approval requirements, particularly for triple-storey homes, knock-down rebuilds, and newly subdivided land. These situations must be thoroughly evaluated to ensure your new build meets all council regulations, zoning requirements, and planning scheme provisions. When development approval is typically required: Triple-storey homes (height restrictions and neighbourhood character considerations) Knock-down rebuilds (especially in established suburbs with specific character overlays) Newly subdivided land (ensuring compliance with subdivision conditions) Properties with site constraints (steep slopes, flood zones, bushfire areas) Homes that vary from standard estate design guidelines Properties in heritage or character protection areas How The Markon Group helps : We assess your site early to determine if development approval is required, and coordinate the entire application process if needed. Our experience with local councils across Brisbane and the Gold Coast means we understand regional variations in planning requirements. Common pitfall : Assuming you don't need development approval and proceeding straight to building approval, only to discover planning permission is required—causing significant delays 2. Building Approval (Development Permit for Building Work) What it is: Certification that your building design complies with the Building Code of Australia, Queensland Development Code, and relevant Australian Standards When you need it: Before any construction work begins Who assesses: The Markon Group's private certifier Timeline: 10-20 business days with our private certifier (compared to 20-40 business days with council) Documents required: Architectural plans and specifications Site plan and survey Structural engineering certification Energy efficiency (NatHERS) report Soil test/geotechnical report Hydraulic plans Bushfire Attack Level (BAL) assessment (if applicable) Wind classification report (if in cyclonic region) Termite management plan How The Markon Group helps: We prepare comprehensive documentation packages and work directly with our private certifier to ensure first-time approval. Our established relationship means faster communication and expert guidance throughout the assessment process. Common pitfall: Incomplete documentation causing delays and resubmissions—our thorough preparation process eliminates this issue 3. Plumbing and Drainage Approval What it is : Approval for all plumbing, drainage, and sanitary systems including water supply, sewerage, and stormwater management When you need it : Before plumbing work commences Who assesses: Our private certifier Timeline: 5-10 business days Documents required: Hydraulic plans showing water supply, sewerage connections, stormwater drainage, and compliance with Queensland Plumbing and Wastewater Code How The Markon Group helps: Our hydraulic consultants prepare detailed plans that meet all requirements, and we coordinate timing with building approval for seamless progression. We ensure stormwater management complies with council requirements, particularly important in newly released estates with specific drainage infrastructure. Common pitfall: Not coordinating with building approval, causing scheduling delays and work stoppages 4. Soil Test and Engineering Certifications What it is : Geotechnical assessment of your site's soil conditions and structural engineering designs for footings, foundations, and structural elements When you need it: Before building approval submission Who provides: Geotechnical engineer and structural engineer (coordinated by The Markon Group) Timeline: 1-2 weeks for soil test, 2-4 weeks for engineering designs What's assessed: Soil classification, bearing capacity, reactivity, drainage characteristics, and appropriate foundation design How The Markon Group helps: We arrange soil testing early in the design phase, allowing our structural engineers to design appropriate foundations from the outset. This is particularly important in newly released estates where soil conditions can vary significantly across the development. Common pitfall: Discovering poor soil conditions (highly reactive clay, fill, or low bearing capacity) late in the process, requiring expensive foundation solutions and design modifications 5. Bushfire Assessment (BAL Rating) What it is: Assessment of bushfire attack level and required construction standards under Australian Standard AS 3959 When you need it: If your property is in a bushfire-prone area (check council bushfire hazard mapping) Who provides: Accredited bushfire consultant (arranged by The Markon Group) Timeline: 1-2 weeks BAL ratings: Range from BAL-LOW (lowest risk) to BAL-FZ (flame zone), with each level requiring specific construction standards How The Markon Group helps: We identify bushfire requirements during initial site assessment and incorporate appropriate construction standards into your design from the beginning. Many newly released estates on the urban fringe have bushfire considerations that must be addressed. Common pitfall: Not identifying bushfire requirements early, leading to design changes, upgraded materials, and significant cost increases 6. Energy Efficiency Assessment (NatHERS) What it is: Rating of your home's thermal performance using the Nationwide House Energy Rating Scheme (must achieve minimum 7 stars in QLD as of May 2024) When you need it: Before building approval Who provides: Accredited energy assessor (coordinated by The Markon Group) Timeline: 1-2 weeks What's assessed: Insulation, glazing, orientation, shading, ventilation, and overall thermal performance How The Markon Group helps: Our designs incorporate energy-efficient features that easily meet or exceed the 7-star requirement, and we coordinate the assessment as part of our standard process. We optimize orientation and design elements to maximize natural energy efficiency, ensuring your home is comfortable year-round while minimizing energy costs. Common pitfall: Failing to meet minimum standards, requiring design modifications such as upgraded glazing, additional insulation, or shading devices 7. Sewer and Water Connection Approvals What it is : Permission to connect to council water supply and sewerage infrastructure When you need it : Before connections are made during construction Who approves : Local council or water authority (e.g., Urban Utilities, Unitywater, Queensland Urban Utilities) Timeline : 2-4 weeks Documents required : Hydraulic plans, connection application forms, compliance certificates How The Markon Group helps : We submit connection applications at the optimal time and follow up to ensure timely approvals. In newly released estates, we coordinate with developers and water authorities to ensure infrastructure is available when needed, preventing delays at practical completion. Common pitfall : Not applying early enough or discovering infrastructure isn't yet available, delaying practical completion and your move-in date 8. Electrical Connection Approval What it is : Permission to connect to the electricity distribution network and installation of meter box When you need it : Before electrical connection and energization Who approves : Energy provider (Energex in South East Queensland, Ergon Energy in regional areas) Timeline : 2-6 weeks depending on service type (standard connection vs. upgraded service) How The Markon Group helps : We apply for electrical connections early in the construction phase, accounting for extended timelines when upgrades or new services are required. We specify the appropriate service size based on your home's electrical load requirements. Common pitfall : Underestimating timeline for new or upgraded connections, particularly in newly released estates where network capacity may require augmentation 9. Driveway Crossover Approval What it is : Permission to construct a driveway crossing the footpath, nature strip, or council-controlled land When you need it : Before constructing the driveway and crossover Who approves : Local council Timeline : 2-4 weeks Requirements : Compliance with council standards for width, gradient, materials, and sight lines How The Markon Group helps : We include driveway crossover applications in our initial approvals package, ensuring this doesn't become a last-minute obstacle. We design crossovers that meet council specifications while complementing your home's aesthetic. Common pitfall : Constructing without approval, resulting in removal and reconstruction at your expense 10. Telecommunications Connection What it is : Connection to NBN or other telecommunications infrastructure When you need it : During construction phase (typically before lock-up stage) Who coordinates : NBN Co or service provider (application managed by The Markon Group) Timeline : 4-12 weeks (can be longer in some newly released areas) How The Markon Group helps : We lodge telecommunications applications early and follow up regularly to ensure connection is ready for your move-in date. In newly released estates, we coordinate with developers to understand NBN rollout schedules and infrastructure availability. Common pitfall : Not applying early, discovering infrastructure delays, and postponing your move-in date due to lack of telecommunications services 11. Stormwater Drainage Approval What it is : Approval for stormwater management system ensuring proper drainage and compliance with council requirements When you need it : Typically included with plumbing approval, but may require separate assessment Who approves : Council or private certifier Timeline : Included in plumbing approval timeline Requirements : Proper collection, conveyance, and disposal of stormwater; may require on-site detention in some areas How The Markon Group helps : We design stormwater systems that comply with council requirements and estate covenants. In newly released estates, we ensure integration with the development's overall drainage infrastructure. Common pitfall : Inadequate stormwater management causing flooding, erosion, or drainage onto neighboring properties 12. Retaining Wall Approval (If Applicable) What it is : Approval for retaining walls, particularly those over certain heights or near boundaries When you need it : Before constructing retaining walls (typically included in building approval for walls over 1 meter) Who approves : Private certifier or council (depending on height and location) Requirements : Structural engineering certification for walls over 1 meter; compliance with boundary setbacks How The Markon Group helps : Our structural engineers design compliant retaining walls, and we include these in our building approval documentation. This is particularly relevant for sloping sites in newly released estates. Common pitfall : Constructing retaining walls without approval or engineering certification, creating safety risks and compliance issues 13. Mandatory Inspections During Construction What they are : Required inspections at critical construction stages to verify compliance with approved plans and building standards When you need them : Throughout construction at specified stages Who conducts : The Markon Group's private certifier Mandatory inspection stages (as per Building Regulation 2021): Excavation (after excavation of foundation material, before concrete pour) Footings inspection (after formwork and reinforcement placement, before concrete pour) Slab inspection (after formwork and reinforcement placement, before concrete pour) Frame inspection (structural framing complete) Final inspection (completed building with all certificates) Additional inspections may include : Wet area waterproofing (bathrooms, laundry, balconies) Pre-plasterboard/lining inspection (services and framing) Termite protection verification Smoke alarm installation How The Markon Group helps : We schedule all mandatory inspections in advance and ensure work is ready for inspection, preventing delays and failed inspections. Our quality control processes mean we consistently pass inspections on the first attempt. Common pitfall : Not scheduling inspections in advance, causing work stoppages, or failing inspections due to non-compliant work requiring costly rectification 14. Pool Compliance Certificate (If Applicable) What it is : Certification that pool fencing and safety barriers meet Queensland pool safety standards When you need it : Before pool can be filled and used; required for final inspection Who assesses : Licensed pool safety inspector or our private certifier (depending on council requirements) Requirements : Pool barriers must comply with Queensland Development Code MP 3.4 and Australian Standard AS 1926.2007, including: Glass fences or government-certified fencing systems Minimum 1200mm height Self-closing, self-latching gates Non-climbable zones No gaps greater than 100mm CPR signage displayed How The Markon Group helps : If your custom home includes a pool, we ensure all fencing meets government certification requirements from the design stage. We coordinate pool safety inspections and provide you with the required compliance certificate. All pool fencing—whether glass fences or other certified barrier systems—is designed and installed to meet Queensland's strict safety standards. Common pitfall : Installing non-compliant fencing (incorrect height, climbable zones, faulty latches, excessive gaps) that must be replaced before pool approval, or discovering compliance issues at final inspection 15. Final Inspection and Certificate of Occupancy What it is : Final verification that construction complies with approved plans, building standards, and all relevant codes When you need it : Before occupying the home Who provides : The Markon Group's private certifier Timeline : 1-2 weeks after final inspection (assuming no defects identified) What's inspected : Overall compliance with approved plans, structural integrity, fire safety, accessibility, services installation, energy efficiency, termite protection, wet area waterproofing, glazing, smoke alarms, and completion of all required work How The Markon Group helps : We conduct pre-final inspections internally to identify and rectify any issues before the official final inspection, ensuring a smooth path to occupancy. Our quality assurance processes minimize the risk of failed final inspections. Common pitfall : Discovering defects or non-compliances at final inspection, delaying occupancy and requiring costly rectification work 16. Form 15 (Certificate of Classification) What it is : Official classification of your completed building lodged with the council When you need it : After final inspection and before settlement (if applicable) Who provides : The Markon Group's private certifier Purpose : Required for insurance, council records, and property settlement; confirms building classification and compliance How The Markon Group helps : We ensure all documentation is complete and lodged promptly, providing you with all necessary certificates for insurance and settlement purposes. This is the final step in the approvals journey. 17. Occupancy Permit What it is : Official permission to occupy the completed building When you need it : Before moving in Who provides : The Markon Group's private certifier Timeline : Issued following successful final inspection How The Markon Group helps : We coordinate all final requirements to ensure your occupancy permit is issued without delay, allowing you to move into your new home on schedule. Common pitfall : Attempting to occupy the home before receiving the occupancy permit, which can affect insurance coverage and create legal issues Timeline Overview: What to Expect Pre-construction phase (8-14 weeks with The Markon Group) : Initial site assessment and feasibility: 1 week Site-specific consultant reports (soil, bushfire, energy): 2-3 weeks Design and documentation: 4-6 weeks Development approval (if required): 4-8 weeks (concurrent with design) Building approval through private certifier: 2-3 weeks Construction phase (20-30 weeks for typical home) : Site preparation and excavation: 1-2 weeks Foundation and footings: 2-3 weeks Slab construction: 1-2 weeks Frame construction: 4-6 weeks Lock-up stage (roof, windows, doors): 12-18 weeks cumulative Internal fit-out and fixing: 18-26 weeks cumulative Practical completion: 20-30 weeks total Post-construction (1-3 weeks) : Pre-final inspection and defect rectification: 1-2 weeks Final inspection: 1 day Certificate of occupancy and Form 15: 3-5 days The Markon Group's use of private certifiers and established consultant relationships typically reduces the pre-construction approval phase by 2-4 weeks compared to the council pathway, getting you into your new home faster. Common Pitfalls to Avoid 1. Incomplete Documentation Submitting building applications without all required reports and certifications causes delays and resubmissions. The Markon Group's comprehensive documentation process ensures first-time approval success, saving you weeks of waiting. 2. Choosing the Wrong Approval Pathway Not understanding whether you need development approval wastes time and money. Our early site assessment identifies all approval requirements upfront, particularly important for triple-storey homes, knock-down rebuilds, and newly subdivided land. 3. Poor Coordination Between Consultants When engineers, architects, and certifiers don't communicate, inconsistencies arise in documentation. The Markon Group manages all consultant coordination, ensuring seamless integration of all reports and plans. 4. Missing Inspection Windows Failing to schedule mandatory inspections in advance stops work and delays your project. We maintain a detailed inspection schedule and coordinate with our private certifier to prevent work stoppages. 5. Underestimating Connection Timelines Utility connections (especially electrical and telecommunications) take longer than most homeowners expect. We apply for all connections early and build buffer time into our construction schedule, particularly important in newly released estates. 6. Not Engaging a Private Certifier Early Waiting until plans are complete misses opportunities for guidance that could streamline approvals. The Markon Group involves our private certifier from the design phase, identifying potential issues before they become problems. 7. Ignoring Bushfire and Flood Requirements Discovering these requirements late can mean significant design changes and cost blowouts. Our initial site assessment identifies all environmental constraints, allowing us to design appropriately from the start—particularly relevant in newly released estates on the urban fringe. 8. Non-Compliant Pool Fencing Installing pool fencing that doesn't meet government certification requirements results in costly replacements and delays. When pools are part of your build, we ensure all fencing—whether glass fences or other certified systems—meets Queensland safety standards including proper height, self-closing gates, non-climbable zones, and appropriate gap specifications before final inspection. 9. Assuming Estate Approvals Are Automatic Even in newly released estates with design guidelines, approvals aren't guaranteed. We ensure your design complies with both estate covenants and council requirements, preventing rejection and redesign costs. 10. Overlooking Subdivision Conditions Newly subdivided land often comes with specific conditions that must be satisfied before building approval. We review all subdivision conditions early to ensure compliance and avoid surprises. 11. Failing to Meet Updated Energy Standards The increase from 6-star to 7-star NatHERS requirements means homes need better thermal performance. Designs that would have passed previously may now require upgrades to insulation, glazing, or shading to meet current standards. The Markon Group Advantage: Streamlined Approvals When you build with The Markon Group, you benefit from our established approvals framework: Trusted Private Certifier Relationships : Our long-standing partnerships with private certifiers in Brisbane and the Gold Coast mean faster processing, expert guidance, and fewer complications. We've built hundreds of homes through these relationships, creating efficient communication channels that benefit every client. Comprehensive Documentation : We prepare complete, accurate documentation packages that achieve first-time approval, eliminating costly resubmissions and delays. Our systematic approach ensures nothing is overlooked. Proactive Coordination : We manage all consultant relationships, inspection scheduling, and authority communications, removing the administrative burden from you. You'll never need to chase approvals or wonder about the status of your application. Early Issue Identification : Our experience allows us to identify potential approval obstacles during the design phase, when solutions are simpler and less expensive. This is particularly valuable for triple-storey homes, knock-down rebuilds, and challenging sites. Estate Expertise : Working extensively with newly released land developments gives us deep knowledge of estate-specific requirements, developer coordination, and infrastructure timing. We understand the nuances of building in master-planned communities. Current Standards Compliance : We stay updated on all regulatory changes, including the recent increase to 7-star NatHERS requirements and evolving pool safety standards, ensuring your home meets current codes without costly mid-project modifications. Transparent Timeline Management : We provide realistic timelines with built-in buffers, keeping you informed at every stage of the approvals process. You'll always know what's happening and what's coming next. Full QBCC Compliance : As a fully licensed QBCC builder, we maintain all required insurance and compliance standards, protecting your investment throughout the build. Understanding Your Specific Approval Needs Every site and project is unique. The approvals you'll need depend on several factors: Site Location : Newly released estates (typically streamlined approvals for standard designs) Established suburbs (may require development approval) Bushfire-prone areas (BAL assessment required) Flood-affected areas (additional engineering and approvals) Coastal areas (cyclonic wind ratings, corrosion protection) Project Type : Single or double-storey homes (standard approvals) Triple-storey homes (development approval typically required) Knock-down rebuilds (development and building approvals) Newly subdivided land (compliance with subdivision conditions) Design Complexity : Standard designs (straightforward approvals) Custom architectural designs (may require additional assessments) Homes with pools (pool safety compliance with certified fencing) Homes with significant earthworks (retaining wall approvals) The Markon Group assesses your specific situation during our initial consultation, providing a clear roadmap of required approvals and realistic timelines. Your Stress-Free Path to Approval Building a custom home involves numerous approvals, inspections, and certifications—but you shouldn't have to navigate this complexity alone. The Markon Group's comprehensive approvals management means you can focus on the exciting aspects of creating your dream home while we handle the paperwork, coordination, and compliance. From initial site assessment through to your certificate of occupancy, our experienced team works with our trusted private certifier and specialist consultants to keep your project moving forward smoothly. We've refined our approvals process over countless successful builds across Brisbane, the Gold Coast, and beyond, and we bring this expertise to every new project. Whether you're building on newly released land where approvals are typically straightforward, or tackling a triple-storey home or knock-down rebuild that requires more detailed assessment, we have the experience and relationships to navigate the process efficiently. We ensure your home meets all current standards, including the updated 7-star energy efficiency requirements and comprehensive pool safety regulations. Ready to build without the approval headaches? Contact Homes by Markon today and experience the difference of working with a builder who manages every aspect of the approvals pathway. Let us handle the complexity while you focus on the excitement of creating your custom home. Building approvals QLD | Private certifier Brisbane | QBCC Gold Coast | Custom home approvals | Building permits Queensland | QLD building certifier | Development approval Queensland | NatHERS 7 star rating

Build a home that's tough on pests from slab to soffit.
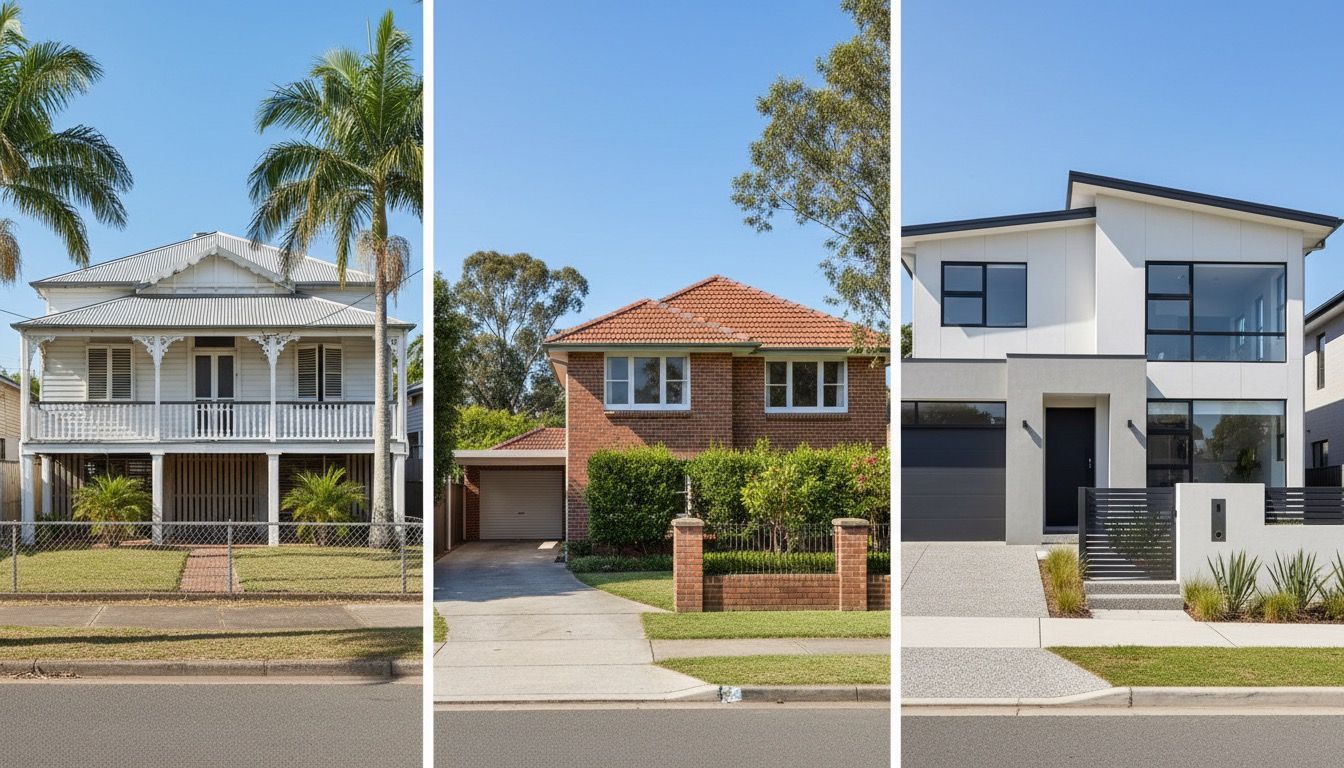
Why Queensland homes evolved—and how to choose your look.

Transform Your Brisbane Backyard: Where Innovation Meets Excellence There's something magical about a pool that transforms an ordinary backyard into an extraordinary living space. At The Markon Group, we've witnessed countless Brisbane families create their dream outdoor sanctuaries, and we're proud to say that Plungie Pools has become our exclusive partner in making these dreams a reality. As Brisbane's trusted Plungie Pool Partner and Installer, we've discovered a pool solution that doesn't just meet expectations—it exceeds them in every possible way. Let us share why we've made Plungie Pools our only choice, and how proper pool planning can make your backyard safer, more energy-efficient, and absolutely spectacular to be around. Why We Exclusively Partner with Plungie Pools When we first encountered Plungie Pools, we knew we'd found something special. After years of working with various pool manufacturers and witnessing the frustrations of traditional pool construction, Plungie represented a revolutionary approach that aligned perfectly with our commitment to quality, efficiency, and customer satisfaction. The Traditional Pool Problem Let's be honest—traditional pool construction has been plagued with challenges for decades. We've seen our Brisbane clients endure months of disruption, watching their backyards transform into construction zones that seem to stretch on endlessly. Weather delays, trade coordination nightmares, and timeline uncertainties have made pool ownership feel more like a burden than a blessing. That's precisely why we made the strategic decision to partner exclusively with Plungie Pools. The Plungie Difference: Speed Without Compromise What sets Plungie apart isn't just one feature—it's a complete reimagining of how pools should be built. While traditional concrete pools can take three to four months to complete, we're installing beautiful, premium Plungie pools in a matter of days. Yes, you read that correctly—days, not months. This isn't about cutting corners or sacrificing quality. Plungie's revolutionary approach involves manufacturing each pool in a controlled factory environment using high-strength 8000 PSI concrete. Every pool is a monolithic, single-pour masterpiece that arrives at your Brisbane property ready for installation. This factory-controlled process ensures consistent, superior quality that simply cannot be matched by on-site construction methods. For our custom home builder clients across Brisbane, this speed advantage is transformative. Project timelines remain on track, homeowners move into completed properties faster, and the entire construction process becomes more predictable and manageable. We've installed Plungie pools that were swimming-ready within a week of the shell arriving on-site—a timeline that would have been impossible just a few years ago. The Quality That Made Us Believers As Brisbane's preferred Plungie Pool Partner, we don't just sell pools—we stake our reputation on every installation. That's why the exceptional quality of Plungie pools was non-negotiable for us. Engineered for Brisbane's Climate Brisbane's subtropical climate is perfect for pool ownership, but it also demands pools that can withstand our unique environmental conditions. Plungie's precast concrete construction offers unmatched durability and longevity. These aren't lightweight alternatives—they're robust, permanent structures designed to last 50 years or more. The high-strength concrete provides superior structural integrity compared to other pool types. The thermal mass of concrete is particularly beneficial in Brisbane's climate, helping maintain stable water temperatures and reducing heating costs. During our warm summers, this means your pool stays refreshingly cool, while in the milder winter months, the concrete retains heat more efficiently than alternative materials. The ecoFinish Advantage One of the features that truly impressed us about Plungie pools is the innovative ecoFinish interior coating. Traditionally, concrete pools have been criticized for their rough, porous surfaces that require intensive maintenance and can harbor algae. Plungie has completely solved this challenge. The ecoFinish high-performance polymer coating is applied in the factory, creating a smooth, non-porous, slip-resistant surface that's softer to the touch than traditional pebblecrete. This means less time scrubbing and balancing chemicals, and more time enjoying your pool with family and friends. For busy Brisbane families, this maintenance advantage is invaluable. Built-In Protection: The Hydrostatic Valve Here's a technical feature that showcases Plungie's commitment to engineering excellence: every single Plungie pool comes standard with a hydrostatic valve. Many of our clients don't initially understand the significance of this feature, but it's absolutely critical. Brisbane experiences significant rainfall, particularly during our summer storm season. When groundwater levels rise, an empty in-ground pool can actually pop out of the ground due to hydrostatic pressure—a catastrophic and expensive failure. The hydrostatic valve automatically relieves this pressure, protecting your investment. While other pool manufacturers offer this as an expensive optional extra, Plungie includes it as standard because they understand it's not optional—it's essential. A Pool for Every Brisbane Backyard One of the reasons we're so passionate about Plungie is their thoughtfully designed range. Brisbane's residential landscape is diverse—from compact inner-city courtyards to expansive acreage properties—and Plungie has created solutions for every scenario. The Plungie Quad: Maximizing Minimal Spaces For Brisbane's increasingly popular urban infill developments and townhouses, the Plungie Quad is a revelation. At just 2.2 meters square, this compact powerhouse proves that you don't need a massive backyard to enjoy pool ownership. We've installed Quad pools in side yards, courtyards, and small patios where clients never imagined a pool was possible. Despite its compact footprint, the Quad offers a generous 1.5-meter depth and includes integrated bench seating. It's perfect for cooling off after a hot Brisbane day, and many of our wellness-focused clients use it as a cold plunge pool for recovery and rejuvenation. The Plungie Studio: Slimline Sophistication Brisbane's traditional Queenslander homes and modern narrow-lot developments often have long, linear spaces that are challenging to utilize effectively. The Plungie Studio, measuring 3.6 meters by 2.2 meters, is our go-to solution for these properties. Its slimline rectangular design fits beautifully alongside homes or within tight backyard spaces, providing a genuine swimming experience without overwhelming the area. The Plungie Arena: Social Swimming Redefined The circular Plungie Arena is a conversation starter—literally. Its 3.5-meter diameter creates a natural social hub that encourages interaction and relaxation. We've found this model particularly popular with Brisbane families who love to entertain. The round design offers a resort-style aesthetic that serves as a stunning centerpiece in landscape designs, breaking away from the traditional rectangular pool format. The Plungie Original: The Brisbane Favourite The Plungie Original has become our most popular installation across Brisbane's suburban landscape. At 4.6 meters by 2.5 meters, it strikes the perfect balance between generous swimming space and backyard practicality. This is the pool that fits beautifully into typical Brisbane quarter-acre blocks and modern estate lots, providing ample room for family fun without dominating the entire outdoor area. With 2.2 square meters of integrated bench space and a 14,000-liter capacity, the Original delivers everything a Brisbane family needs for years of enjoyment. The Plungie Max: Maximum Enjoyment For our clients with larger properties or those who want a more expansive swimming experience, the Plungie Max is the ultimate choice. As the world's largest monolithic precast plunge pool at 6 meters by 3 meters, it bridges the gap between a plunge pool and a traditional full-sized pool. The Max offers 4 square meters of bench space and holds over 20,000 liters—perfect for larger families, serious swimmers, and those who love to entertain in style. Pool Planning Essentials: Making Your Pool Safer, Cheaper to Run, and Great to Be Around Installing a pool is about more than just dropping a shell in the ground. At The Markon Group, we take a holistic approach to pool planning that considers safety, efficiency, and lifestyle. Proper planning makes your pool safer for your family, significantly cheaper to operate, and infinitely more enjoyable to be around. Strategic Pool Placement: The Foundation of Success The location of your pool within your Brisbane property is one of the most critical decisions you'll make, and it's where our expertise as both Plungie installers and landscape specialists becomes invaluable. Shade and Sun Considerations Brisbane's intense summer sun is both a blessing and a consideration. While we all love our sunny days, strategic placement relative to shade can dramatically impact your pool's usability and running costs. We carefully assess your property's sun path throughout the day and across seasons. A pool that receives morning sun but afternoon shade from your home or strategically placed structures will be more comfortable during Brisbane's hottest months. This doesn't mean hiding your pool in complete shade—that can lead to excessive leaf litter and reduced solar heating benefits. Instead, we look for the sweet spot that provides sun when you want it and relief when you need it. Wind Protection: Comfort and Efficiency Brisbane's prevailing breezes are generally delightful, but wind across your pool surface accelerates evaporation, increases heating costs, and can make swimming less comfortable. During our site assessments, we evaluate wind patterns and recommend positioning that provides natural wind breaks through existing structures, fencing, or strategic landscaping. A well-positioned pool protected from prevailing winds can reduce water evaporation by up to 30 percent, translating directly into lower water bills and reduced chemical usage. It also means your pool maintains temperature more effectively, reducing heating costs if you choose to add a heating system. Minimizing Leaf Load: Less Maintenance, More Enjoyment One of the most common complaints we hear from pool owners is the constant battle with leaves and debris. Strategic placement away from large deciduous trees is crucial. While we love Brisbane's beautiful trees, positioning your pool directly under a large tree creates endless maintenance headaches. During our planning process, we map existing vegetation and consider future growth. We also evaluate the prevailing wind direction—leaves don't just fall straight down; they blow across your property. By understanding these patterns, we can position your Plungie pool to minimize debris accumulation, meaning you spend less time cleaning and more time swimming. Energy Efficiency: Building a Pool That Pays You Back At The Markon Group, we're committed to creating outdoor spaces that are not only beautiful but also sustainable and cost-effective to operate. The energy efficiency of your pool system is a crucial consideration that impacts both your environmental footprint and your ongoing costs. The Concrete Advantage This is where Plungie's precast concrete construction provides a significant advantage. Concrete's thermal mass means it absorbs heat during the day and releases it slowly, helping maintain stable water temperatures. Compared to thinner-walled pool materials, this thermal stability reduces the energy required for heating and creates a more comfortable swimming experience. Equipment Placement and Efficiency The location of your pool equipment is more important than many people realize. We position filtration systems, pumps, and heaters to minimize pipe runs, which reduces friction loss and allows your system to operate more efficiently. Shorter pipe runs mean your pump works less hard, consuming less electricity while maintaining optimal water circulation. We exclusively recommend and install variable-speed pumps for all our Plungie installations. These modern pumps can reduce energy consumption by up to 75 percent compared to traditional single-speed models. Over the life of your pool, this single decision can save thousands of dollars in electricity costs. Solar Positioning for Future Heating Even if you're not installing pool heating immediately, we plan for the future. Brisbane's abundant sunshine makes solar pool heating an excellent option, and we ensure your pool's orientation and equipment placement accommodate future solar panel installation. This forward-thinking approach means you're not locked out of cost-effective heating options down the track. LED Lighting: Ambiance and Efficiency All Plungie pools come with options for multi-colored LED lighting, and we strongly recommend including this feature. Modern LED pool lights consume a fraction of the energy of traditional pool lighting while providing stunning visual effects that extend your pool's usability into the evening. There's nothing quite like a Brisbane summer evening with your beautifully lit pool as the centerpiece of your outdoor entertaining area. Pool Safety and Compliance: Protecting What Matters Most As Brisbane pool installation specialists, we take pool safety with the utmost seriousness. Queensland has some of the strictest pool safety regulations in Australia, and for good reason—these regulations save lives. Understanding Queensland Pool Fencing Requirements Every pool in Queensland that can hold more than 300mm of water must be surrounded by compliant safety fencing. This isn't optional, and it's not negotiable. As your Plungie Pool Partner and Installer, we guide you through every aspect of compliance, ensuring your pool meets all current regulations. Queensland pool fencing must be at least 1.2 meters high and constructed to prevent a young child from climbing over, under, or through it. The regulations specify exact requirements for gaps, non-climbable zones, and the distance of potential climbing aids from the fence line. Gates and Latches: Critical Safety Features Pool gates must be self-closing and self-latching, with latches positioned at least 1.5 meters above ground level or fitted with a child-resistant mechanism. We ensure every pool installation includes compliant gates that function smoothly while providing maximum security. During our installations, we don't just meet the minimum requirements—we exceed them. We position gates for convenient access while maintaining security, and we ensure the self-closing mechanism is properly adjusted and tested. CPR Signage and Emergency Equipment Queensland regulations require clearly visible CPR signage at every pool. We provide and install appropriate signage as part of our comprehensive installation service. We also recommend positioning emergency equipment, such as a reaching pole and first aid kit, in an easily accessible location near your pool. Ongoing Compliance and Inspections Pool safety doesn't end at installation. Queensland requires pool safety certificates when properties are sold or leased, and pools must be registered on the QBCC Pool Safety Register. We provide all necessary documentation and ensure your pool is properly registered from day one. We also offer ongoing compliance checks and can arrange for licensed pool safety inspectors to conduct regular assessments, giving you peace of mind that your pool remains compliant as regulations evolve. The Markon Group Installation Process: Excellence at Every Step As Brisbane's preferred Plungie Pool Partner and Installer, we've refined our installation process to deliver exceptional results with minimal disruption to your property and lifestyle. Comprehensive Site Assessment Every successful pool installation begins with a thorough site assessment. Our team visits your Brisbane property to evaluate access, soil conditions, existing services, drainage, and all the factors we've discussed—sun, shade, wind, and vegetation. We use this information to create a detailed installation plan that addresses every potential challenge before work begins. Council Approvals Made Simple Navigating Brisbane council approvals can be daunting, but we handle this entire process for you. Plungie provides pre-engineered specifications and compliance documents that streamline approvals, and our experience with Brisbane councils means we know exactly what's required. We manage all submissions, respond to any council queries, and ensure all necessary permits are in place before installation begins. Precision Excavation and Base Preparation The foundation of any successful pool installation is proper site preparation. We excavate to exact specifications and create a stable, engineered base—typically a concrete slab or compacted crushed stone with proper drainage. This precision ensures your Plungie pool sits perfectly level and remains structurally sound for decades. The Crane Day: Precision and Excitement The day your Plungie pool arrives is genuinely exciting. We coordinate crane logistics meticulously, ensuring the heavy concrete shell is lifted safely and positioned with millimeter precision. Our experienced team guides the pool into place, and within hours, what was an empty excavation becomes a stunning pool ready for the next phase. Professional Connections: Plumbing and Electrical We engage only licensed, experienced tradespeople for all plumbing and electrical work. The pre-fitted plumbing returns and skimmer box on your Plungie pool make connections straightforward, but precision is still essential. We ensure all equipment is properly installed, tested, and commissioned. Licensed electricians connect the pre-fitted earthing bolts and all pool equipment, ensuring complete safety and compliance with Queensland electrical regulations. Backfilling and Stabilization Once your pool is positioned and connected, we carefully backfill around the shell using appropriate granular material. This process is critical for long-term stability and must be done correctly to maintain your warranty and ensure structural integrity. Integrated Landscape Design: Creating Complete Outdoor Living Spaces At The Markon Group, we understand that a pool is just one element of a complete outdoor living environment. Our landscape design services ensure your Plungie pool is beautifully integrated into a cohesive, functional space that enhances your entire property. Basic Landscaping Packages: Turnkey Solutions We offer comprehensive basic landscaping packages that include everything needed to complete your pool area. These packages typically include: • Coping tiles or pavers around the pool edge for a finished, professional appearance • Surrounding paving or decking to create functional pool access and lounging areas • Strategic planting to provide privacy, shade, and visual appeal • Turf or garden bed installation to complete the space • Basic outdoor lighting to extend usability into the evening These packages are designed to provide a complete, move-in-ready pool area without the stress of coordinating multiple contractors or making countless design decisions. Custom Landscape Design: Bringing Your Vision to Life For clients who want something truly special, we offer detailed custom landscape design services. Our design team works with you to create outdoor spaces that reflect your lifestyle, aesthetic preferences, and how you envision using your pool area. Custom designs might include: • Extensive decking or paving in premium materials • Outdoor kitchens and entertaining areas • Fire pits or fireplaces for year-round outdoor living • Pergolas or shade structures for comfort and architectural interest • Water features that complement your pool • Sophisticated lighting design for ambiance and functionality • Comprehensive planting schemes that provide privacy, shade, and seasonal interest We provide detailed landscape plans, 3D visualizations, and comprehensive quotes so you can see exactly what your completed outdoor space will look like before construction begins. The Integrated Approach Advantage By handling both pool installation and landscape design, we eliminate the coordination challenges that plague many pool projects. There's no finger-pointing between contractors, no scheduling conflicts, and no confusion about who's responsible for what. We manage the entire process from initial concept through final completion, ensuring every element works together seamlessly. This integrated approach also allows us to plan for future additions. Perhaps you want to start with a basic package and add an outdoor kitchen next year, or install a pergola down the track. We design with these future possibilities in mind, ensuring your space can evolve as your needs and budget allow. Sustainability: Building Responsibly for Brisbane Future Sustainability isn't just a buzzword for us—it's a core value that influences every decision we make. Our partnership with Plungie Pools reflects this commitment, as Plungie has demonstrated genuine leadership in environmental responsibility. A Verified Lower Carbon Footprint Plungie commissioned an independent, comprehensive life cycle assessment by Pangolin Associates that examined the environmental impact of their pools from manufacturing through to end-of-life. The results were remarkable: a Plungie pool has a 61 percent lower carbon footprint compared to a traditionally built concrete pool of equivalent size. This dramatic reduction comes from multiple factors. The factory-controlled manufacturing process is inherently more efficient and produces less waste than on-site construction. The optimized monolithic design uses less concrete while maintaining superior strength. The prefabrication model drastically reduces vehicle trips and on-site machinery operation, cutting transportation emissions significantly. For our environmentally conscious Brisbane clients—and increasingly, that's most of our clients—this verified environmental advantage is compelling. You can enjoy your pool knowing you've made a responsible choice that significantly reduces your environmental impact. Water Conservation Through Design Plungie pools' compact designs inherently conserve water compared to traditional large pools. Less water volume means less evaporation, less water needed for backwashing, and less water lost to splashing and play. Over the life of the pool, this adds up to thousands of liters of water saved—a significant consideration in a country where water is precious. We enhance this conservation through strategic placement that minimizes wind exposure and evaporation, and by recommending pool covers that can reduce water loss by up to 95 percent. End-of-Life Recyclability Unlike fiberglass pools, which typically end up in landfills at the end of their life, concrete Plungie pools can be crushed and recycled. This circular economy approach means your pool doesn't become an environmental burden decades from now—it becomes aggregate for future construction projects. Energy Efficiency Over the Pool Lifetime The thermal mass of Plungie's concrete construction provides ongoing energy benefits throughout the pool's life. Better heat retention means less energy required for heating, and the stable temperature reduces the workload on your filtration system. Combined with modern variable-speed pumps and LED lighting, a properly installed Plungie pool is remarkably efficient to operate. The Time-Saving Advantage: Why Speed Matters In our years of working with Brisbane custom home builders and homeowners, we've learned that time is often the most valuable commodity. The speed advantage of Plungie pools isn't just about convenience—it's about reducing stress, maintaining project momentum, and getting to enjoy your investment sooner. For Custom Home Builders: Project Timeline Certainty Brisbane's custom home builders face constant pressure to deliver projects on time and on budget. Traditional pool construction introduces significant uncertainty into project timelines. Weather delays, trade availability, and the sequential nature of on-site construction can push completion dates back by months. With Plungie pools, we provide timeline certainty. Once your home is ready for the pool installation, we can typically complete the entire process—from excavation to swimming-ready—within one to two weeks. This predictability allows builders to coordinate other trades more effectively, schedule final inspections with confidence, and hand over completed homes to delighted clients on schedule. For Homeowners: Minimal Disruption If you're adding a pool to an existing Brisbane property, the disruption of traditional construction can be overwhelming. Months of noise, dust, and contractors tramping through your home takes a toll on your quality of life. Our Plungie installation process minimizes this disruption dramatically. The most intensive work—excavation and crane day—happens quickly. Within days, your backyard transforms from construction zone to beautiful pool area. You're not living in a construction site for months; you're enjoying your new pool while your neighbors are still watching their traditional pool slowly take shape. Faster to Market for Investment Properties For investors and developers, time literally is money. Every week a property sits unsold or unleased represents carrying costs and lost opportunity. A Plungie pool allows you to complete properties faster, photograph them at their best sooner, and get them to market while demand is strong. We've worked with numerous Brisbane developers who've used Plungie pools as a key differentiator in their developments, and the speed advantage has been crucial to their project success. Quality Assurance: Our Commitment to Excellence At The Markon Group, our reputation is built on the quality of every installation we complete. Our partnership with Plungie Pools reflects our uncompromising standards, and we back every installation with comprehensive quality assurance. Factory-Controlled Manufacturing Every Plungie pool is manufactured in a controlled factory environment using precision molds and exact specifications. This controlled process eliminates the variables that affect on-site construction—weather, inconsistent workmanship, and material variations. The result is a consistently superior product that meets rigorous engineering standards. Plungie pools undergo regular performance testing in NATA-approved laboratories and have achieved ICC certification, providing third-party validation of their structural integrity and long-term durability. Our Installation Standards We've developed comprehensive installation protocols that ensure every Plungie pool we install meets our exacting standards. Our team is fully trained in Plungie's installation requirements, and we follow detailed checklists that cover every aspect of the process. We don't cut corners, we don't rush, and we don't compromise. Every excavation is precise, every connection is tested, every backfill is properly compacted, and every finish is perfect. This attention to detail is what separates a good installation from a great one. Comprehensive Warranty Protection Plungie provides a 10-year structural warranty on the monolithic concrete pool shell, reflecting their confidence in the manufacturing process and materials. This long-term warranty provides peace of mind that your investment is protected. As your installer, we also stand behind our work. We ensure all installation work is completed to the highest standards and complies with all manufacturer requirements to maintain your warranty coverage. Post-Installation Support Our relationship with you doesn't end when your pool is filled with water. We provide comprehensive handover training, explaining how to operate your equipment, maintain water chemistry, and care for your pool. We're always available to answer questions, provide guidance, or arrange service if needed. Investment Value: Pools That Pay Dividends A pool is a significant investment, and our Brisbane clients rightly want to understand the financial implications. While we focus on the lifestyle benefits—the joy, the memories, the daily pleasure of having a beautiful pool—the financial case for a well-planned Plungie pool is also compelling. Property Value Enhancement Research consistently shows that pools add value to Brisbane properties. In our subtropical climate where pools are highly desirable, a well-integrated pool can increase property value by up to 7 percent. The key phrase is well-integrated—a pool that looks like an afterthought or doesn't suit the property can actually detract from value. This is where our integrated approach to pool installation and landscape design provides real financial benefits. We create complete outdoor living spaces that enhance your property's appeal and value, not just add a pool. Lifestyle Return on Investment Beyond the financial numbers, there's an immeasurable lifestyle return on investment. The countless hours of family time, the summer gatherings with friends, the daily refreshment after work, the exercise and wellness benefits—these experiences are what make a pool truly valuable. Our clients consistently tell us their Plungie pool is the best investment they've made in their home. It's the feature they use most, enjoy most, and wouldn't want to live without. Lower Operating Costs The energy efficiency we build into every installation, combined with Plungie's low-maintenance ecoFinish surface, means your ongoing costs are minimized. Modern variable-speed pumps, LED lighting, and strategic placement that reduces heating needs all contribute to lower operating costs over the pool's lifetime. Why The Markon Group Is Your Trusted Plungie Partner Choosing the right installer is just as important as choosing the right pool. As Brisbane's preferred Plungie Pool Partner and Installer, we bring unique advantages that ensure your project's success. Comprehensive Expertise We're not just pool installers—we're complete outdoor living specialists. Our team includes licensed builders, experienced landscapers, and design professionals who understand how all the elements of your outdoor space work together. This comprehensive expertise means we can guide you through every decision, anticipate challenges before they arise, and deliver results that exceed expectations. Local Knowledge and Relationships Our years of working across Brisbane mean we understand local conditions, council requirements, and the unique characteristics of different suburbs and soil types. We have established relationships with Brisbane councils, which streamlines the approval process. We know which suppliers provide the best materials, which tradespeople deliver quality work, and how to navigate the inevitable challenges that arise in any construction project. Project Management Excellence We manage every aspect of your pool installation, coordinating all trades, scheduling deliveries, conducting inspections, and ensuring quality at every step. You have a single point of contact who keeps you informed, answers your questions, and ensures your project stays on track. This project management expertise is particularly valuable for our custom home builder clients, who need reliable partners who can integrate seamlessly into larger construction projects. Commitment to Client Satisfaction Our business is built on referrals and reputation. Every project we complete is a reflection of our commitment to excellence, and we treat every installation—whether it's a compact Quad or an expansive Max—with the same attention to detail and dedication to client satisfaction. We're not satisfied until you're delighted, and we'll go above and beyond to ensure your Plungie pool installation exceeds your expectations. Your Brisbane Pool Journey Starts Here At The Markon Group, we've made Plungie Pools our exclusive partner because we believe they represent the absolute best pool solution available today. The combination of superior quality, revolutionary speed, environmental responsibility, and design versatility aligns perfectly with our commitment to delivering exceptional results for our Brisbane clients. Whether you're a custom home builder looking for a reliable pool partner who can keep projects on schedule, or a homeowner dreaming of transforming your backyard into a personal oasis, we're here to make it happen. We've shared our expertise in pool planning—the importance of strategic placement for shade, wind protection, and minimal leaf load; the energy efficiency advantages that make your pool cheaper to run; and the critical safety and compliance requirements that protect your family. But knowledge is only valuable when it's applied, and that's where our experience and dedication make all the difference. Every Plungie pool we install is more than just a construction project—it's the beginning of countless memories, the creation of a space where families gather, where children learn to swim, where summer evenings are spent with friends, and where the stresses of daily life melt away. Partner with Brisbane Trusted Plungie Pool Experts The Markon Group is proud to be Brisbane's preferred Plungie Pool Partner and Installer. Our exclusive partnership with Plungie Pools means you're getting the best pool solution available, installed by Brisbane's most experienced and dedicated team. We offer: • Comprehensive site assessment and pool planning • Complete council approval management • Expert Plungie pool installation by licensed professionals • Integrated landscape design services • Basic landscaping packages for turnkey completion • Custom landscape design for those seeking something extraordinary • Ongoing support and maintenance guidance Whether you're building a new custom home or transforming an existing Brisbane property, we're ready to create the outdoor living space you've been dreaming of. Contact The Markon Group today to discuss your pool project. Let us show you why Plungie Pools has become our trusted, preferred pool partner, and how we can transform your Brisbane backyard into something truly spectacular. Your dream pool is closer than you think—and with The Markon Group and Plungie Pools, it can be a reality in days, not months. Let's create something beautiful together.
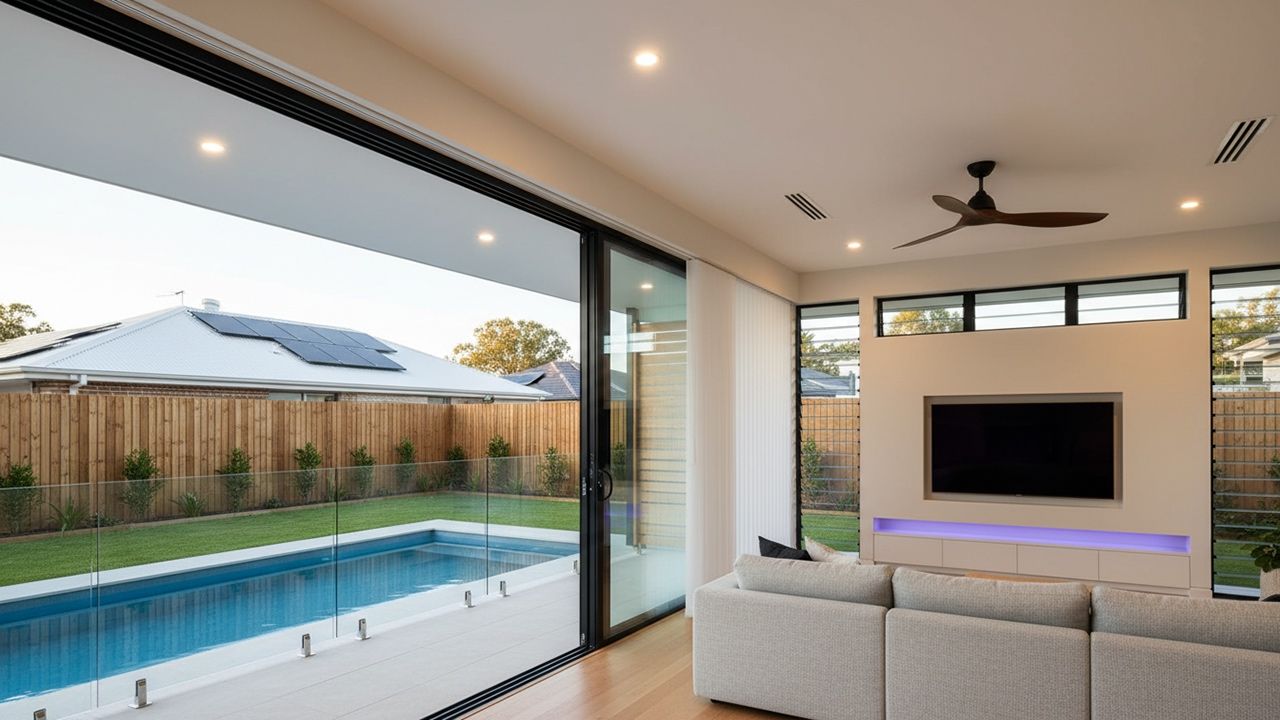
Building a new home in Queensland isn't just about beautiful design and quality finishes anymore it's about meeting strict energy performance standards that will affect your comfort, your bills, and your home's value for decades to come. Since May 2024, every new home in Queensland must achieve a minimum 7-star NatHERS rating under the National Construction Code (NCC) 2022. But that's only half the story. Your home also needs to pass a Whole of Home assessment that examines everything from your downlights and power outlets to your air conditioning system, hot water heater, and solar panels. And here's where things get really exciting: the game has completely changed with the introduction of the federal government's Cheaper Home Batteries Program starting July 1, 2025, combined with innovative free power schemes from energy retailers. These developments have transformed home batteries from a luxury to a genuinely smart investment that can dramatically improve your Whole of Home compliance while slashing your running costs. At Homes by Markon and The Markon Group, we're at the forefront of these changes, designing homes that don't just meet the 7-star standard—they exceed it, with integrated solar and battery systems that take advantage of these groundbreaking new programs. This comprehensive guide breaks down exactly what the 7-star rating means, how the Whole of Home assessment works, and—most importantly—how the new battery rebates and free power schemes have created an unprecedented opportunity for Queensland homeowners. Understanding the 7-Star NatHERS Rating: What It Actually Measures NatHERS (Nationwide House Energy Rating Scheme) has been around since 1993, but the jump from 6 stars to 7 stars represents the biggest change to residential energy efficiency in 30 years . Here's what the rating actually measures: The Building Thermal Shell The star rating (out of 10) assesses how well your home's building envelope —the roof, walls, windows, floors, and doors—keeps heat out in summer and warmth in during winter. According to research from RMIT University , moving from 6 to 7 stars cuts thermal energy use by 20-27% . That translates to real savings: the Queensland government estimates an average of $185 per year in reduced heating and cooling costs. The assessment uses sophisticated software (like FirstRate5, BERS Pro, or HERO) that models: Your home's orientation on the block Window sizes, placement, and glazing performance (U-values and Solar Heat Gain Coefficient) Insulation levels in ceilings, walls, and floors Roof colour and material (this is huge in Queensland) Shading from eaves, awnings, and external screens Air leakage through gaps and penetrations Your specific climate zone within Queensland For apartments, the whole building must collectively achieve an average of 7 stars, with no individual unit below 6 stars . Why 7 Stars Matters in Queensland Queensland's climate zones range from tropical Cairns to the cooler elevated regions around Toowoomba. But across the state, the focus is heavily on managing heat and humidity rather than retaining winter warmth. A 7-star home in Brisbane or the Gold Coast will: Stay significantly cooler during summer without running the air conditioner constantly Reduce peak electricity demand (which is when power costs the most) Feel more comfortable with fewer "hot spots" near windows Require less mechanical cooling, which means lower bills and reduced greenhouse emissions The Queensland government committed to the 7-star standard specifically because the average Queensland home was already achieving around 6.5 stars—meaning the step up is achievable without massive cost increases, especially with smart design. The Whole of Home Assessment: Where Appliances Meet the Building Shell Here's where things get more detailed. The 7-star thermal rating is only Part 1 of compliance. You also need to pass the Whole of Home (WoH) assessment , which was introduced for the first time in NCC 2022. The Whole of Home assessment looks at the annual energy consumption of your home's major fixed appliances and systems, including: Space heating and cooling equipment (air conditioners, ducted systems, heat pumps) Hot water systems (gas, electric, solar, heat pump) Artificial lighting (downlights, LED fittings, power density) Pool and spa pumps (if applicable) On-site renewable energy generation (solar PV systems and battery storage) The assessment generates a Whole of Home score out of 100 . To comply: Houses and townhouses (Class 1 buildings) need a minimum score of 60 Apartments (Class 2 buildings) need a minimum score of 50 A score of 100 means your home produces as much energy as it consumes (net-zero energy). Scores above 100 mean you're generating more than you use. According to the NatHERS Whole of Home overview , this holistic approach ensures homes don't just have good insulation but also use efficient appliances and, where possible, renewable energy to offset consumption. Artificial Lighting Requirements: The 4 W/m² Rule and Downlight Limits One of the most misunderstood aspects of the new code is the artificial lighting power density requirement. What the Code Actually Says For Class 1 buildings (houses and townhouses), the NCC 2022 specifies that artificial lighting must have a maximum power density of 4 W/m² serving all internal spaces. This doesn't mean you're limited in the number of downlights or light fittings—it means the total wattage of your lighting, divided by the floor area, cannot exceed 4 watts per square metre. Calculating Your Lighting Budget Let's say you're building a 200m² home: Maximum total lighting wattage = 200m² × 4 W/m² = 800 watts If you're using modern LED downlights at 10 watts each , you could install up to 80 downlights across the entire home and still comply. However, if you're using older-style halogen downlights at 50 watts each , you'd be limited to just 16 downlights for the whole house—which is nowhere near enough. Why LED is Non-Negotiable The shift to LED lighting isn't just about energy efficiency—it's about making the numbers work. According to the NCC , the 4 W/m² requirement effectively mandates LED technology for new homes. At Homes by Markon, we specify: LED downlights (typically 7-12 watts each depending on the room and ceiling height) Dimmable options where appropriate (dimming can further reduce the Whole of Home energy score) IC-rated (Insulation Contact) downlights wherever possible, which allow continuous ceiling insulation without gaps—this is critical for maintaining your thermal performance The Downlight Penetration Problem Here's something many builders miss: every downlight creates a penetration in your ceiling insulation . If you're using non-IC-rated downlights, you need to leave gaps around them to prevent fire risk, which creates thermal weak spots. The ABCB specifically recommends removing downlights that aren't IC4-rated and replacing them with other lighting options that allow continuous ceiling insulation. This can make a measurable difference to your star rating. What About Power Outlets? There's a common misconception that the NCC limits the number of power outlets (GPOs—general power outlets) you can install. This is not true . The NCC's lighting requirements specifically exclude "lamps plugged into general purpose socket outlets" because portable appliances are too difficult to regulate. You can install as many power outlets as you need—the Whole of Home assessment focuses on fixed appliances and lighting , not what you might plug in later. Heating and Cooling: How Your Air Conditioning System Affects Compliance Your choice of heating and cooling system has a massive impact on your Whole of Home score. Star Ratings for Air Conditioners Air conditioners in Australia are rated under the Greenhouse and Energy Minimum Standards (GEMS) . The rating system was updated in 2019 and now varies by climate zone. For Queensland (generally warm to hot climates), you'll see ratings for: Cooling performance (most important in QLD) Heating performance (less critical but still assessed) The ratings typically range from 1 to 6 stars (sometimes higher for premium units). The more stars, the more efficient the unit. Ducted vs Split Systems Ducted air conditioning systems are popular in Queensland for whole-home cooling, but they come with specific considerations: Three-phase power : Larger ducted systems (typically above 12-14kW) may require three-phase power. This doesn't affect your NatHERS rating directly, but it's a design consideration that needs to be planned early. Zoning : Modern ducted systems with zoning controls (allowing you to cool only occupied rooms) perform better in the Whole of Home assessment because they reduce unnecessary energy use. Star rating : A ducted system's GEMS rating is critical. The Whole of Home "reference building" assumes a 3-star ducted heat pump . If your system is rated lower, you'll need to compensate elsewhere (better insulation, solar panels, or a more efficient hot water system). Split systems (wall-mounted or ceiling cassette units) are often more efficient than ducted systems, especially if you're only cooling specific rooms. High-efficiency split systems can achieve 5-6 stars under GEMS, which significantly helps your Whole of Home score. Heat Pumps vs Refrigerated Cooling The NCC 2022 has a strong preference for heat pump technology (reverse-cycle air conditioners) over cooling-only units or gas heating. Heat pumps are far more energy-efficient because they move heat rather than generate it. At The Markon Group, we typically specify: High-efficiency reverse-cycle split systems for smaller homes or specific zones Ducted reverse-cycle systems with zoning for larger homes Minimum 3.5-star GEMS rating for ducted systems (higher where budget allows) Hot Water Systems: The Hidden Energy Hog After heating and cooling, hot water is typically the second-largest energy user in a Queensland home. How Hot Water Affects Your Whole of Home Score The Whole of Home "reference building" assumes a 5-star instantaneous gas water heater . If you choose a less efficient system, you'll struggle to hit the required score of 60. Here's how different systems compare: Gas Systems: Instantaneous gas (5-star) : Meets the reference standard Gas storage tank : Less efficient, harder to comply Solar-assisted gas : Better than standard gas, uses solar pre-heating Electric Systems: Standard electric storage : Very poor efficiency, will likely fail Whole of Home Heat pump hot water : Excellent efficiency (equivalent to 3-4 times more efficient than standard electric) Solar electric hot water : Excellent, especially with good solar access The Shift Away from Gas There's a clear policy direction in the NCC 2022 toward electrification . Gas appliances "chew up" a lot of your energy budget because: Gas has higher greenhouse emissions per unit of energy Gas infrastructure has supply charges even if you use minimal gas Electric systems can be offset by rooftop solar (gas cannot) At Homes by Markon, we're increasingly recommending: Heat pump hot water systems as the default choice Solar electric hot water where roof orientation and budget allow Avoiding gas altogether in new builds, which simplifies the Whole of Home compliance and future-proofs the home STCs and Hot Water Heat pump and solar hot water systems are eligible for Small-scale Technology Certificates (STCs) under Australia's Renewable Energy Target. The number of STCs is required as an input in the NatHERS Whole of Home assessment and can be found on the Clean Energy Regulator's website . The Battery Revolution: How the 2025 Federal Rebate Changes Everything Here's where the story gets genuinely exciting. If you're building a new home in Queensland right now, you're in the perfect position to take advantage of what might be the biggest opportunity in residential energy in Australian history. The Cheaper Home Batteries Program: Up to $18,600 Off Starting July 1, 2025 , the Australian Government's Cheaper Home Batteries Program provides a rebate of approximately $372 per kilowatt-hour (kWh) of usable battery capacity. Here's what that means in real terms: 10kWh battery : ~$3,700 rebate 13.5kWh battery (Tesla Powerwall 3): ~$5,000 rebate 20kWh battery : ~$7,400 rebate 30kWh battery : ~$11,160 rebate 50kWh battery (maximum eligible): ~ $18,600 rebate This is a $2.3 billion federal initiative designed to support over one million new battery installations by 2030. The rebate is applied as an upfront point-of-sale discount —you don't need to apply separately, your installer handles it automatically. Key Eligibility Requirements To qualify for the rebate: Battery must be between 5kWh and 100kWh nominal capacity Rebate applies to the first 50kWh of usable capacity Must be paired with new or existing rooftop solar Battery and inverter must be Clean Energy Council (CEC) approved Must be installed by a Solar Accreditation Australia (SAA) accredited installer (like The Markon Group's partners) Battery must be VPP-capable (but you don't have to join a Virtual Power Plant) Both on-grid and off-grid systems are eligible The Rebate is Declining—Act Now The rebate amount decreases each year until the program ends in 2030: Year202520262027202820292030Rebate per kWh $372$336$296$260$224$188 This means 2025 is the best year to install a battery —you'll get the maximum rebate. By 2030, the rebate will be less than half what it is now. Why This Changes Whole of Home Compliance Remember that Whole of Home score of 60 you need to achieve? A properly sized solar and battery system can make compliance dramatically easier and cheaper overall . Here's a real example from energy compliance modeling : Scenario 1: No Solar, Minimal Battery 150m² house in Brisbane 3.5-star ducted heat pump Instantaneous gas water heater 1.2kW solar PV system Result : Achieves Whole of Home compliance (score of 60) Scenario 2: Better Appliances, No Solar 150m² house in Brisbane 5.5-star non-ducted heat pump Heat pump water heater No solar required Result : Still achieves compliance Scenario 3: Solar + Battery (The Markon Approach) 150m² house in Brisbane 3.5-star ducted heat pump (standard efficiency) Heat pump water heater 6.6kW solar PV system 30kWh battery (with $11,160 rebate) Result : Exceeds compliance (score of 75+), near-zero electricity bills The third scenario is now genuinely affordable thanks to the federal rebate, and it delivers: Easier NatHERS compliance (you can use standard-efficiency appliances) Lower construction costs (don't need premium-rated air conditioning) Dramatically lower running costs (potentially 80-90% reduction in electricity bills) Blackout protection (critical in Queensland's storm season) Future-proofed for rising electricity prices Free Power Schemes: The Game-Changer for Battery Owners Now here's where it gets even better. Several energy retailers in Australia are now offering free electricity for 3 hours in the middle of the day , typically from 11am to 2pm . This isn't a gimmick—it's a response to the massive amount of solar power flooding the grid during peak sunshine hours, which often drives wholesale electricity prices to zero or even negative . How Free Power Works The Australian Government is introducing the Solar Sharer Offer , which will require electricity retailers to offer plans with at least 3 hours of free electricity daily starting July 2026 in Queensland, NSW, and South Australia. But you don't have to wait—several retailers already offer these plans: AGL : "Three for Free" plan (11am-2pm free) OVO Energy : "Free 3" plan (11am-2pm free) Red Energy : "Red EV Saver" (free hours for EV charging) GloBird Energy : "ZeroHero" plan Why This is Perfect for Battery Owners If you have a 30kWh battery and a free power plan, here's what happens: On a sunny day: Your solar panels charge the battery for free Excess solar exports to the grid (you get paid feed-in tariff) Battery powers your home from sunset to sunrise On a cloudy or rainy day: Your solar panels produce less power From 11am-2pm, the grid charges your battery for FREE You can import up to 10kW per hour (30kWh over 3 hours on single-phase) Battery still powers your home through the evening and night You pay nothing for electricity This is revolutionary. It means your battery system works even when the sun doesn't shine . You're no longer dependent on perfect weather—the grid becomes your backup solar system, charging your battery for free during the middle of the day. Real-World Example One battery owner on the SolarQuotes forum reported: "I have a 40kWh battery and 13.2kW solar, plus two EVs. The 3 hours free in the middle of the day was excellent during winter (low solar production) and on many poor solar days to ensure my home battery was at 100% by 2PM every day. We also often top up charge one of our EVs during that window too if it's at home. The practical result is that our battery gets us through the night till 11AM the next day every day so far, so we never use any peak or shoulder electricity and thus never get charged for electricity use." Zero electricity charges. That's the goal, and it's now genuinely achievable. Sizing Your Battery for Free Power With free power available 3 hours a day, the optimal battery size for a Queensland home is typically: Small home (100-150m²): 20-25kWh battery Medium home (150-200m²): 25-30kWh battery Large home (200-300m²): 30-40kWh battery A 30kWh battery is the sweet spot for most families because: It can fully charge during the 3-hour free window (10kW × 3 hours = 30kWh) It provides enough storage for overnight use plus morning consumption With the federal rebate (~$11,160), the net cost is around $8,000-$10,000 Combined with a 6.6kW solar system, you can achieve near-zero electricity bills year-round Solar PV Systems: The Foundation of Your Energy Independence While batteries get a lot of attention, your solar PV system is still the foundation of energy independence. Optimal Solar System Size for Queensland For a new home in Queensland, we typically recommend: Small home (100-150m²): 5-6.6kW solar system Medium home (150-200m²): 6.6-8kW solar system Large home (200-300m²): 8-10kW solar system Home with pool : Add 2-3kW to the above A 6.6kW system is the most popular size because: It's the maximum size for single-phase connection without special approval It generates approximately 25-30kWh per day in Brisbane/SEQ It's large enough to power the home, charge a battery, and export excess Combined with a 30kWh battery, it provides genuine energy independence Solar System Design Considerations A good solar system for a Queensland home should: Face north where possible (or split between north and west for afternoon generation) Be sized appropriately for the home's consumption and battery capacity Use quality panels and inverters (cheap systems underperform and fail sooner) Be integrated with the home's roof design —a white Colorbond roof with good solar access is ideal Account for future battery addition in the electrical design (even if not installing battery immediately) Solar + Battery Economics Here's the math that makes solar and batteries compelling: Upfront Costs (2025): 6.6kW solar system: ~$5,500 (after STC rebate) 30kWh battery: ~$20,000 Federal battery rebate: -$11,160 Net cost: ~$14,340 ( Depending on system, battery manufacturer and brand - See The Markon Group for custom designed systems) Annual Savings: Typical Queensland household electricity bill: ~$2,000-$2,500/year With solar + battery + free power plan: ~$200-$400/year (just supply charges) Annual saving: ~$2,000-$2,200 Payback Period: $14,340 ÷ $2,100 = 6.8 years After 7 years, you're essentially getting free electricity for the life of the system (25+ years for solar, 15 - 20 years for battery). And that's before considering: Rising electricity prices (historically 3-5% per year) Blackout protection (priceless during storms) Increased home value (solar homes sell for 3-5% more) Environmental benefits (reducing your carbon footprint by 4-6 tonnes CO₂ per year) Insulation and Glazing: The Foundation of Your 7-Star Rating While appliances, solar, and batteries are important for Whole of Home, you can't achieve a 7-star thermal rating without excellent insulation and glazing . Ceiling Insulation in Queensland Your roof and ceiling are the biggest thermal challenge in Queensland. On a summer day, a dark roof can reach 70-80°C , and without good insulation, that heat radiates straight into your living spaces. Minimum requirements for Brisbane/SEQ (Climate Zone 2): Ceiling insulation: R4.0 (for roofs with low solar absorptance) Higher R-values required for darker roofs What we actually recommend: R4.5 to R5.0 ceiling insulation as standard White Colorbond roof to reflect solar radiation (this is a Markon standard where applicable) Reflective foil under the roof combined with bulk insulation (batts) IC-rated downlights to maintain continuous insulation The combination of a white Colorbond roof and high R-value ceiling insulation can reduce your cooling load by 20-30% compared to a dark roof with minimum insulation. Wall Insulation Wall insulation is often overlooked in Queensland, but it matters—especially on west and east-facing walls that cop direct sun. Typical specifications: R2.0 to R2.7 wall insulation for Brisbane/SEQ Higher R-values for lightweight construction (timber frame with cladding) Reflective wraps or foil to reduce radiant heat transfer Glazing: Windows and Doors Windows are the weakest point in your thermal envelope. Glass conducts heat far more readily than insulated walls. Key glazing metrics: U-value : How easily heat flows through the glass (lower is better) SHGC (Solar Heat Gain Coefficient): How much solar heat the glass lets through (lower is better for hot climates) Single vs Double Glazing: In Queensland, double glazing isn't always mandatory, but it's increasingly common for: Large sliding or stacking doors (especially west-facing) Bedrooms exposed to morning or afternoon sun Noise reduction in busy areas (Gold Coast, Brisbane suburbs near main roads) Selective double glazing —upgrading only the most problematic windows—is often more cost-effective than double-glazing the entire home. Low-E (low-emissivity) glass is another option. It has a special coating that reflects heat while still allowing light through. It's cheaper than full double glazing and can be very effective on north, west, and east-facing windows. Pools and Spas: The Compliance Requirement Everyone Forgets If your home includes a swimming pool or spa , there are two separate compliance issues: Pool Pumps in the Whole of Home Assessment If you have a pool or spa, the pump energy consumption is included in your Whole of Home assessment. What's assessed: Pump size and efficiency Operating hours per day Whether you have a variable-speed pump (much more efficient) Solar heating for the pool (if installed) How to minimize the impact: Specify a variable-speed pump (can reduce energy use by 50-70%) Use a timer to run the pump during off-peak hours or when solar is generating Consider solar pool heating instead of gas or electric (solar thermal panels on the roof) Run the pump during free power hours (11am-2pm) if you're on a free power plan At The Markon Group, we always include pool pumps in the early Whole of Home modeling so there are no surprises at the end of the project. How The Markon Group Achieves 7-Star Compliance (And Exceeds It) At Homes by Markon and The Markon Group, we've developed a systematic approach to achieving 7-star NatHERS and Whole of Home compliance that balances performance, cost, and livability—while taking full advantage of the new battery rebates and free power schemes. Step 1: Early NatHERS Modeling We engage a NatHERS accredited assessor during the concept design phase—not at the end when it's too late to make changes. Early modeling allows us to: Test different roof colors, insulation levels, and window configurations Identify which upgrades give the best "bang for buck" Avoid expensive mistakes (like oversized west-facing windows with no shading) Show clients the cost vs performance trade-offs for different options Step 2: Climate-Responsive Design Every Markon home is designed for its specific Queensland climate zone : Orientation : Living areas face north or north-east where possible Shading : Generous eaves, external blinds, or louvres on west and east elevations Cross-ventilation : Operable windows positioned to catch prevailing breezes Ceiling fans : Included in all major rooms (they're cheap, effective, and improve the NatHERS rating) Step 3: Smart Specification Choices We use a tiered approach to specifications: Essential (every home): White Colorbond roof (where applicable) R4.5+ ceiling insulation R2.5+ wall insulation IC-rated LED downlights (4 W/m² compliance) High-efficiency reverse-cycle air conditioning (minimum 3.5-star GEMS) Heat pump or solar hot water Performance upgrades (where budget allows): Selective double glazing on large doors and west-facing windows Low-E glass on priority elevations 6.6kW solar PV system Variable-speed pool pump (if pool included) Premium (high-performance homes): Full double glazing with thermally broken frames R5.0+ ceiling insulation Higher-spec air conditioning (5+ star GEMS) 6.6kW solar + 30kWh battery (with $11,160 federal rebate) Advanced air-tightness detailing Step 4: Integrated Solar + Battery Strategy This is where The Markon Group really differentiates itself. We don't just add solar and batteries as an afterthought—we design the entire home around energy independence . Our standard recommendation for new builds in 2025: The Markon Energy Independence Package: 6.6kW solar PV system (north-facing where possible) 30kWh battery system (with $11,160 federal rebate) Free power electricity plan (3 hours free daily) Heat pump hot water (electric, solar-compatible) All-electric home (no gas connection) Smart home energy management (monitoring and optimization) What this delivers: Whole of Home score of 70-80 (well above the required 60) Near-zero electricity bills (potentially $200-$400/year total) Blackout protection (critical for Queensland storms) Future-proofed for rising electricity prices and potential gas phase-out Premium home value (energy-independent homes command higher prices) Step 5: Documentation and Certification We provide: NatHERS Certificate showing the star rating Whole of Home report with the score and energy breakdown Detailed specifications for the builder (insulation, glazing, appliances, lighting) Solar and battery system design with federal rebate documentation As-built verification to ensure what's installed matches what was modeled Common Mistakes That Cause Homes to Fail Compliance Even experienced builders can trip up on the new NCC 2022 requirements. Here are the most common mistakes we see: 1. Leaving NatHERS Assessment Until the End If you wait until the design is finalized, you've lost the opportunity to make cost-effective changes. Fixing a failed assessment at the end often means expensive retrofits. At The Markon Group we are onto this from the very start. 2. Ignoring Roof Color A dark roof in Brisbane can add 0.5 to 1.0 stars to the insulation and glazing requirements. A white Colorbond roof is one of the cheapest ways to improve performance and is standard on all our builds 3. Oversized West-Facing Windows Without Shading Large west-facing glass is a NatHERS killer. If you must have it, you need external shading (not internal blinds) and high-performance glazing. 4. Using Non-IC-Rated Downlights Gaps around downlights create thermal weak spots. Always specify IC4-rated LED downlights . 5. Choosing Cheap, Low-Efficiency Appliances A 2-star air conditioner or standard electric hot water system will blow your Whole of Home budget. You'll end up needing a bigger solar system to compensate, which costs more overall. 6. Not Accounting for Pool Pumps Forgetting to include the pool pump in the Whole of Home assessment is a common oversight that can cause a late-stage failure. 7. Undersizing the Battery System With the federal rebate making larger batteries affordable, don't make the mistake of installing a 10kWh battery when a 30kWh system would deliver dramatically better results for only a few thousand dollars more (after rebate). 8. Not Planning for Free Power If you're installing a battery, make sure your electrical design allows for maximum charging rate during the 3-hour free power window. This means proper circuit sizing and potentially three-phase connection for larger batteries. The Future: Where Energy Efficiency is Heading The 7-star standard is just the beginning. The NCC is reviewed every three years, and the trajectory is clear: 8-star minimum is likely within the next 5-10 years All-electric homes will become the norm as gas is phased out Battery storage will become standard in new builds (not optional) Smart home energy management systems will be integrated into compliance pathways Vehicle-to-Home (V2H) technology will allow EVs to power homes during outages Community batteries and Virtual Power Plants will become more common At The Markon Group, we're already designing homes that exceed the current minimums, because: Future-proofing protects resale value Lower running costs are a major selling point Comfort is what clients actually experience every day Energy independence is increasingly valuable as grid electricity becomes more expensive and less reliable The Bottom Line: Now is the Perfect Time to Build If you're planning to build a new home in Queensland in 2025, you're in an unprecedented position: The 7-star NatHERS requirement ensures your home will be comfortable and efficient. The Whole of Home assessment ensures you'll have efficient appliances and systems. The federal battery rebate (up to $18,600) makes battery storage genuinely affordable. Free power schemes mean your battery works even on cloudy days. The combination of all these factors means you can build a home that: Meets all compliance requirements easily Costs less to run than any home built before Provides blackout protection during storms Is future-proofed for rising electricity prices Commands a premium resale value This opportunity won't last forever. The battery rebate decreases each year, and by 2030 it will be less than half what it is now. Free power schemes could change or become less generous as more people take them up. Ready to Build a Home That Exceeds the Standard? Achieving 7-star NatHERS and Whole of Home compliance isn't about cutting corners or just scraping through—it's about designing a home that genuinely performs better in Queensland's climate while taking full advantage of the unprecedented incentives available right now. At Homes by Markon, we combine: Early-stage NatHERS modeling to optimize your design Climate-responsive architecture that works with Queensland's sun, breezes, and humidity Smart specification choices that balance performance and budget Integrated solar + battery systems with full federal rebate support Free power plan optimization to minimize running costs Quality construction that delivers what the models promise When you build a custom home with The Markon Group we'll guide you through every step of the compliance process—and deliver a home that doesn't just meet the 7-star standard, it exceeds it. The battery revolution is here. The free power schemes are launching. The federal rebates are at their peak. Get in touch with Homes by Markon today to discuss your project. Let's design a home that achieves genuine energy independence—with near-zero electricity bills, blackout protection, and a level of comfort and performance that was simply impossible just a few years ago.
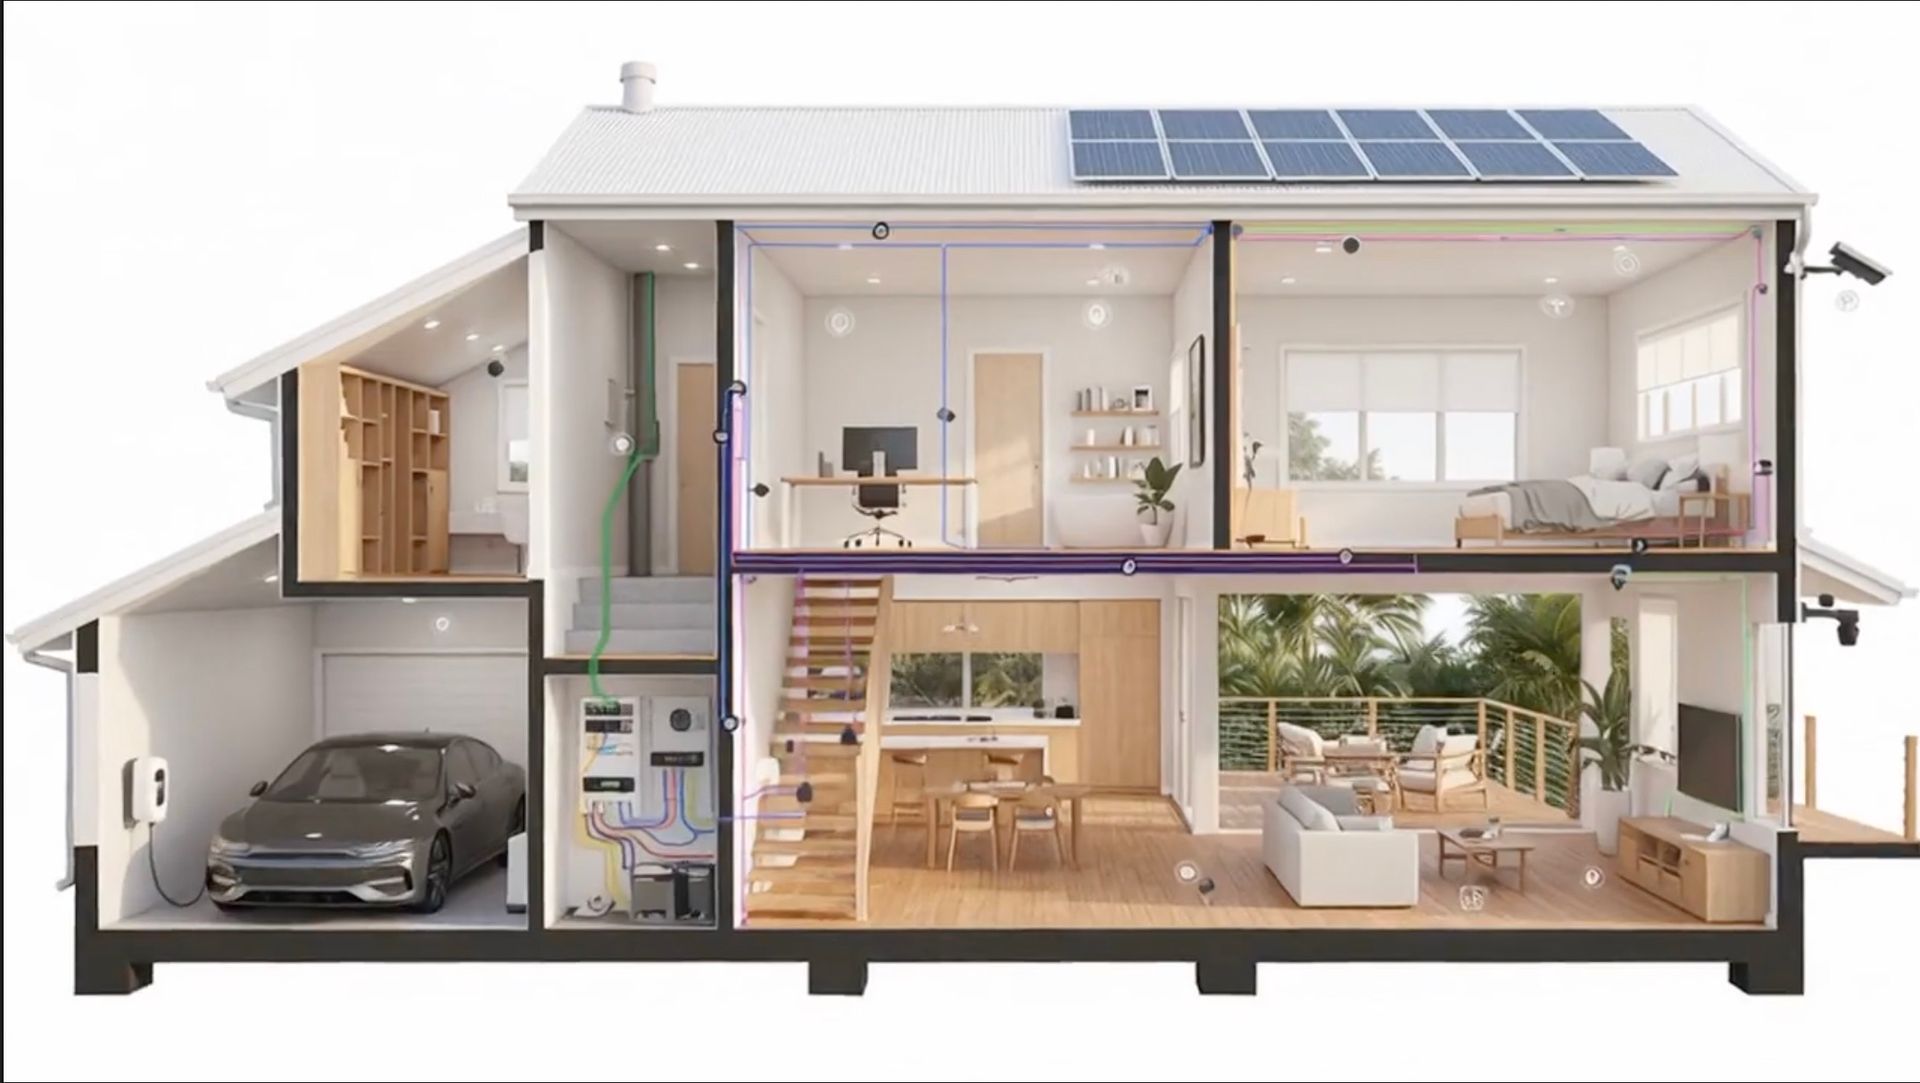
Introduction: The Hidden Foundation of Smart Living Picture this: You've just invested thousands of dollars in the latest smart home technology. Your voice-activated lights, security cameras, automated blinds, and climate control system promise convenience, efficiency, and peace of mind. But within weeks, you're dealing with dropped connections, dead zones in certain rooms, devices that won't respond, and a nagging worry about whether your network is secure. The problem isn't the devices themselves—it's the infrastructure supporting them. In I rapidly evolving housing market, particularly across Brisbane and the Gold Coast, smart home technology has transitioned from luxury novelty to expected standard. Yet many homeowners and builders still treat connectivity as an afterthought, installing smart devices on networks that were never designed to handle them. The result? A "smart" home that feels anything but intelligent. The truth is that creating a genuinely smart home requires planning from the ground up. It demands proper prewiring, robust network architecture, strategic placement of access points, and security protocols that protect your family's privacy. Whether you're building new with Homes by Markon or retrofitting an existing property, understanding these fundamentals will save you thousands in remediation costs and countless hours of frustration. This comprehensive guide explores the three pillars of smart home infrastructure: reliable Wi-Fi coverage, secure access control, and intelligent lighting systems. We'll examine why prewiring matters, how mesh networks solve coverage problems, what hubs and protocols work best, and how to maintain privacy and security in an increasingly connected world. Let's build your smart home the right way—from the foundation up. The Infrastructure Problem: Why Most Smart Homes Fail The Bandwidth Bottleneck The average Australian household now operates between 15 and 25 connected devices simultaneously. In Queensland's climate-controlled homes, that number often exceeds 30 when you factor in smart thermostats, multiple security cameras, automated irrigation systems, pool controllers, and entertainment systems. Each device competes for bandwidth on your home network. A single 4K security camera can consume 8-12 Mbps of upload bandwidth continuously. Multiply that by four cameras, add video doorbells, streaming services on multiple TVs, work-from-home video conferences, and gaming consoles, and you quickly understand why the standard router provided by your internet service provider simply cannot cope. The problem intensifies in Queensland's popular double-storey designs and sprawling single-level homes with outdoor entertainment areas. Wi-Fi signals degrade through walls, floors, and especially through the metal roofing and steel frames common in modern Australian construction. That beautiful Colorbond roof protecting your home from the elements? It's also blocking your Wi-Fi signal. The Retrofit Nightmare Attempting to add smart home infrastructure after construction presents significant challenges. Running ethernet cables through finished walls requires cutting access holes, fishing cables through insulation, and patching drywall—expensive, time-consuming, and often impossible without major renovation. Many homeowners resort to powerline adapters or Wi-Fi extenders, both of which introduce latency, reduce bandwidth, and create additional points of failure. These band-aid solutions might work for basic web browsing, but they're inadequate for the real-time communication requirements of security systems, video doorbells, and home automation. The cost difference between prewiring during construction and retrofitting afterward is staggering. What might cost $2,000-$4,000 as part of your initial build can easily exceed $15,000-$20,000 when attempted post-construction, assuming it's even feasible given your home's design. The Security Vulnerability Perhaps most concerning is the security dimension. Many smart devices ship with default passwords, outdated firmware, and minimal security protocols. When connected to your primary home network—the same network containing your computers, phones, and sensitive personal data—these devices become potential entry points for malicious actors. In 2024, Australian households experienced a 34% increase in smart home security breaches compared to the previous year. These weren't sophisticated attacks by criminal masterminds; they were automated bots scanning for devices with default credentials or known vulnerabilities. The solution isn't to avoid smart home technology—it's to implement it correctly from the beginning. Pillar One: Reliable Wi-Fi Coverage Through Proper Planning Understanding Mesh Networks vs. Traditional Routers Traditional Wi-Fi relies on a single router broadcasting signal throughout your home. As you move farther from the router or encounter obstacles like walls and appliances, signal strength degrades. Range extenders attempt to solve this by rebroadcasting the signal, but they create separate networks, introduce latency, and halve available bandwidth. Mesh Wi-Fi systems revolutionize home networking by deploying multiple access points (nodes) throughout your property that communicate with each other, creating a seamless network blanket. As you move through your home, your devices automatically connect to the nearest, strongest node without dropping connection or requiring manual network switching. For Queensland homes, mesh systems offer particular advantages: Climate resilience: Quality mesh systems handle the heat and humidity of Queensland summers better than consumer-grade routers tucked in hot roof spaces or poorly ventilated cabinets. Outdoor coverage: Extending reliable Wi-Fi to alfresco areas, pools, and outdoor entertainment spaces—essential for Queensland's indoor-outdoor lifestyle—becomes straightforward with strategically placed outdoor-rated mesh nodes. Scalability: As you add smart devices or extend your home, adding additional mesh nodes is simple and doesn't require reconfiguring your entire network. Performance: Modern mesh systems like Ubiquiti UniFi, Netgear Orbi, or Eero Pro support Wi-Fi 6 or 6E standards, providing the bandwidth and device capacity required for comprehensive smart home deployments. The Prewiring Advantage While wireless mesh systems eliminate many coverage problems, the backbone connecting your mesh nodes should still be wired ethernet wherever possible. Wireless backhaul (mesh nodes communicating wirelessly with each other) works but consumes bandwidth and introduces latency. Proper prewiring during construction provides: Ethernet to strategic locations: Ceiling-mounted access points in central locations, entertainment centers, home offices, and outdoor areas. Structured cabling to a central hub: All network cables terminate in a dedicated communications cabinet, typically located in the garage or a utility room, where your router, switches, and network equipment reside. Conduit for future expansion: Even if you don't pull cables to every location initially, installing conduit provides pathways for future upgrades without opening walls. Power over Ethernet (PoE) capability: PoE allows network cables to carry both data and power, eliminating the need for separate power supplies for access points, security cameras, and other devices. A typical smart home prewire package for a four-bedroom Queensland home might include: Ethernet to 3-4 ceiling-mounted access point locations Ethernet to main entertainment area and home office Ethernet to 4-6 security camera locations (front door, rear yard, driveway, side access) Ethernet to outdoor entertainment area Coaxial or fiber for NBN connection Structured cabinet with patch panel, switch, and cable management This infrastructure, installed during construction, costs a fraction of retrofit pricing and provides a foundation that will serve your home for decades. Network Design for Queensland Homes Effective Wi-Fi coverage requires understanding how Queensland's construction methods affect signal propagation: Steel frames and Colorbond roofing: Metal significantly attenuates Wi-Fi signals. Homes with steel frames require more access points than equivalent timber-framed homes. Never rely on a single router in a roof space to cover a steel-framed home. Open-plan living: Queensland's popular open-plan designs help Wi-Fi propagation, but large open spaces still require multiple access points to maintain strong signal throughout. Outdoor areas: Alfresco dining, pool areas, and outdoor kitchens need dedicated coverage. Standard indoor access points may provide marginal outdoor coverage, but purpose-built outdoor access points ensure reliable connectivity where Queenslanders spend significant time. Multi-storey considerations: Two-storey homes require at least one access point per level, positioned to minimize the number of floors signals must penetrate. A professional network design considers your home's floor plan, construction materials, and intended device locations to determine optimal access point placement. This planning happens before construction begins, ensuring cables are run to the right locations and your communications cabinet is appropriately sized and positioned. Pillar Two: Secure Access Control and Network Segmentation The Principle of Network Segmentation Not all devices on your network require the same level of access or present the same security risk. Your laptop containing financial records and family photos requires different security treatment than your smart light bulbs. Network segmentation divides your home network into separate virtual networks (VLANs), isolating device categories from each other: Primary network: Computers, phones, tablets—devices containing sensitive personal data and requiring full network access. IoT network: Smart home devices like lights, thermostats, sensors, and appliances—devices that need internet access but shouldn't communicate with your primary network. Guest network: Visitors' devices—isolated from both your primary and IoT networks. Security network: Cameras and security systems—isolated to prevent compromised IoT devices from accessing security footage. If a smart light bulb with default credentials gets compromised, segmentation ensures the attacker gains access only to other IoT devices, not your computers or security cameras. This architecture, standard in commercial environments, is increasingly essential for residential smart homes. Modern mesh systems and home routers increasingly support VLAN configuration, making segmentation accessible to homeowners without networking expertise. Alternatively, professional-grade equipment like Ubiquiti UniFi provides granular control over network segmentation, firewall rules, and access policies. Authentication and Access Control Beyond network segmentation, securing your smart home requires attention to authentication: Change default credentials: Every device ships with default usernames and passwords. Change them immediately. Use unique, complex passwords for each device or system. Enable two-factor authentication: Wherever supported, enable 2FA for smart home hubs, security systems, and cloud services. Regular firmware updates: Manufacturers release firmware updates to patch security vulnerabilities. Enable automatic updates where available, or schedule quarterly manual checks. Disable unnecessary features: Many devices include features you'll never use—remote access, cloud storage, voice assistants. Disable features you don't need to reduce attack surface. Local control where possible: Devices that operate locally without requiring cloud connectivity are inherently more secure and reliable. Prioritize systems that function even if your internet connection fails. Privacy Considerations Smart home devices collect significant data about your household patterns, behaviors, and routines. Security cameras obviously capture video, but even seemingly innocuous devices like smart thermostats, lighting systems, and appliances generate data about when you're home, your daily routines, and your preferences. Consider privacy implications when selecting devices and services: Data storage location: Does video footage store locally on your network, or does it upload to the manufacturer's cloud? Local storage provides greater privacy and eliminates subscription fees, but cloud storage offers off-site backup if your home is burglarized. Data sharing policies: Review manufacturers' privacy policies. Some companies sell anonymized usage data to third parties. Others use your data to train AI models or serve targeted advertising. Voice assistants: Smart speakers with always-listening voice assistants raise privacy concerns for many families. If you use them, understand what data they collect, how long it's retained, and how to delete recordings. Camera placement: Position security cameras to monitor entry points and perimeters without capturing neighbors' properties or public spaces where privacy expectations exist. Queensland's privacy laws provide some protections, but ultimately, you control what devices you install and how you configure them. Prioritize manufacturers with strong privacy commitments and transparent data practices. Pillar Three: Intelligent Lighting Systems Why Lighting Matters for Smart Homes Lighting represents the most accessible and impactful entry point into home automation. Unlike security systems or climate control, lighting affects every room, every day, and offers immediate, tangible benefits: Convenience: Control all lights from your phone, voice commands, or automation routines. Never walk through a dark house again. Energy efficiency: Automated schedules and occupancy sensors ensure lights operate only when needed. LED smart bulbs consume 75-80% less energy than incandescent bulbs. Security: Automated lighting schedules simulate occupancy when you're away, deterring opportunistic burglars. Ambiance: Tunable color temperature and dimming create appropriate lighting for any activity—bright, cool light for morning routines, warm, dimmed light for evening relaxation. Integration: Lighting integrates with other smart systems—lights automatically illuminate when security cameras detect motion, or dim when you start watching a movie. Smart Lighting Approaches Three primary approaches exist for smart lighting, each with distinct advantages: Smart bulbs: Replace standard bulbs with Wi-Fi or Zigbee-enabled smart bulbs. Simple to install in existing homes, but requires smart bulbs in every socket, can be expensive at scale, and stops working if someone flips the physical switch off. Smart switches: Replace standard light switches with smart switches that control existing bulbs. More cost-effective for rooms with multiple bulbs on one circuit, works with any bulb type, and maintains physical switch functionality. Requires neutral wires at switch locations (not always present in older homes). Smart lighting systems: Comprehensive systems like Philips Hue, LIFX, or Lutron Caséta combine smart bulbs, switches, sensors, and hubs into integrated ecosystems. Offers the most flexibility and features but requires greater upfront investment and planning. For new construction with Homes by Markon, the optimal approach combines smart switches for general lighting with smart bulbs for accent and feature lighting where color-changing or advanced features add value. Prewiring for Smart Lighting Modern smart switches require neutral wires at switch locations to power their wireless radios and processors. Australian electrical standards now require neutral wires in new switch installations, but older homes often lack them, limiting smart switch options. During construction, ensure your electrician: Installs neutral wires at all switch locations: Even if you don't install smart switches immediately, having neutral wires available provides flexibility for future upgrades. Plans for multi-way switching: Smart switches handle multi-way switching (controlling one light from multiple locations) differently than traditional switches. Discuss your lighting plan with your electrician to ensure compatibility. Provides adequate circuit capacity: Smart lighting systems, particularly those with many LED bulbs, can create harmonic distortion on electrical circuits. Proper circuit design prevents issues. Considers dimmer compatibility: Not all LED bulbs dim smoothly with all dimmers. If you plan to use dimming, select compatible bulbs and switches. Lighting Control Protocols Smart lighting devices communicate using various protocols: Wi-Fi: Connects directly to your home network. Simple setup, but each device consumes network bandwidth and IP addresses. Best for small deployments (under 10 devices). Zigbee: Low-power mesh protocol designed for smart home devices. Requires a hub but supports hundreds of devices without impacting Wi-Fi. Devices from different manufacturers can work together on the same Zigbee network. Z-Wave: Similar to Zigbee but uses different radio frequencies. Also requires a hub. Slightly better range than Zigbee but fewer device options in Australia. Bluetooth: Short-range protocol suitable for individual bulbs or small rooms. Limited automation capabilities. Proprietary protocols: Some systems like Lutron use proprietary protocols optimized for reliability and performance. For whole-home lighting control, Zigbee or Z-Wave systems connected to a central hub provide the best balance of reliability, scalability, and device compatibility. Popular hubs like Samsung SmartThings, Hubitat, or Home Assistant support multiple protocols, allowing you to mix devices as needed. Automation and Scenes The real power of smart lighting emerges through automation: Time-based schedules: Lights turn on at sunset, turn off at bedtime, or follow custom schedules for each room. Occupancy sensing: Motion sensors trigger lights when you enter rooms and turn them off after a period of no motion. Sunrise/sunset simulation: Gradually brighten lights in the morning to ease waking, or dim them in the evening to promote better sleep. Integration with other systems: Lights flash when the doorbell rings, turn red when smoke detectors activate, or automatically adjust based on TV or music system status. Scenes: Save lighting configurations for different activities—"Movie Night" dims living room lights and turns off kitchen lights, "Dinner Party" sets warm, dimmed lighting throughout entertaining areas, "Away Mode" randomly varies lighting to simulate occupancy. These automations transform lighting from something you manually control to an intelligent system that anticipates your needs and responds to context. Hubs, Protocols, and Ecosystem Choices The Hub Dilemma Many smart home devices require hubs—central controllers that communicate with devices and connect them to your network and internet. Hubs add cost and complexity but provide significant benefits: Protocol translation: Hubs allow Zigbee or Z-Wave devices to connect to your Wi-Fi network and internet. Local processing: Quality hubs process automation locally, ensuring your smart home functions even if your internet connection fails. Unified control: Hubs provide single apps to control devices from multiple manufacturers. Advanced automation: Hubs enable complex automation rules involving multiple devices and conditions. Popular hub options include: Samsung SmartThings: Broad device compatibility, cloud-based processing, user-friendly app. Requires internet connection for most functions. Hubitat Elevation: Local processing, strong privacy, supports complex automation. Steeper learning curve. Home Assistant: Open-source, incredibly powerful, supports virtually every device and protocol. Requires technical knowledge to set up and maintain. Apple HomeKit: Excellent privacy and security, seamless integration with Apple devices. Limited device compatibility compared to other platforms. Amazon Alexa/Google Home: Voice control and basic automation. Limited advanced features, cloud-dependent. Your choice depends on technical comfort, privacy priorities, and which ecosystem you're already invested in. Many homeowners start with user-friendly options like SmartThings or Alexa, then migrate to more powerful platforms like Home Assistant as their needs grow. Avoiding Ecosystem Lock-In The smart home industry lacks universal standards, leading to frustrating incompatibility between devices and platforms. A smart lock that works with Alexa might not work with HomeKit. A security camera compatible with Google Home might not integrate with your preferred hub. The Matter protocol, launched in 2022 and gaining adoption through 2024-2025, promises to solve this problem by providing a universal standard that works across ecosystems. Matter-certified devices work with Alexa, Google Home, Apple HomeKit, and Samsung SmartThings simultaneously. When selecting devices, prioritize: Matter certification: Ensures future compatibility and flexibility. Open protocols: Devices using Zigbee, Z-Wave, or MQTT can typically integrate with multiple platforms. Local API access: Devices with local APIs can be controlled by advanced platforms like Home Assistant even if manufacturer cloud services shut down. Established manufacturers: Companies with long track records are more likely to provide ongoing support and updates. Avoid devices that work only with proprietary apps and cloud services, especially from unknown manufacturers. When those companies inevitably go out of business or discontinue products, your devices become expensive paperweights. The Markon Approach: Smart Prewire Packages Homes by Markon recognizes that smart home infrastructure requires planning from the design phase. That's why we offer comprehensive smart prewire packages tailored to Queensland's climate, construction methods, and lifestyle. What's Included Our smart prewire packages provide the structured cabling and infrastructure your smart home needs: Network backbone: Ethernet cabling to strategic locations throughout your home, all terminating in a structured communications cabinet with professional patch panel and cable management. Wi-Fi infrastructure: Prewiring for ceiling-mounted access points in optimal locations based on your floor plan and construction materials, with Power over Ethernet capability. Security camera preparation: Ethernet and power to exterior locations for security cameras covering entry points, driveways, and outdoor areas. Entertainment and office: Ethernet to entertainment centers, home offices, and media rooms for reliable, high-bandwidth connectivity. Outdoor connectivity: Prewiring for outdoor access points and devices, ensuring your alfresco areas, pools, and outdoor entertainment spaces have reliable coverage. Smart lighting readiness: Neutral wires at all switch locations and circuit design optimized for LED lighting and smart switches. Future-proofing: Conduit runs to key locations, allowing future cable additions without opening walls. Customization for Your Needs Every family's smart home vision differs. Some prioritize security and surveillance, others focus on entertainment and whole-home audio, while others want comprehensive automation of lighting, climate, and appliances. During the design phase, we discuss your priorities and customize the prewire package accordingly. Want extensive outdoor camera coverage? We'll add additional camera locations. Planning a home theater? We'll ensure adequate cabling for surround sound and video distribution. Working from home? We'll prioritize office connectivity and potentially add a second internet connection for redundancy. This customization happens when it's most cost-effective—during the design and construction phases—rather than as expensive retrofits later. Professional Installation and Testing Our licensed electricians and data cabler specialists install all structured cabling to Australian standards, with proper cable management, labeling, and testing. Every cable is certified and documented, so you know exactly what's installed and where it goes. The communications cabinet includes space and power for your networking equipment, with proper ventilation to handle Queensland's heat. We can even pre-install and configure networking equipment if you prefer a turnkey solution. The Investment Smart prewire packages represent a modest addition to your overall build cost—typically 1-2% of total construction budget—but provide infrastructure that would cost 5-10 times more to retrofit. More importantly, they ensure your smart home actually works as intended from day one. Consider it insurance against obsolescence. Technology changes rapidly, but structured cabling and proper infrastructure remain relevant for decades. The ethernet cables we install today will support networking standards that don't even exist yet. Practical Implementation: Getting Started For Your New Build If you're building with Homes by Markon, the process is straightforward: Discuss your vision: During the design phase, tell us about your smart home priorities and plans. Review the prewire package: We'll recommend a package based on your home's size, layout, and your stated priorities, with customization options. Approve and integrate: The prewire package integrates into your construction schedule and budget. Installation: Our team installs all infrastructure during the appropriate construction phases. Documentation: You receive complete documentation of all installed cabling, including cabinet layout and cable labels. Equipment selection: After handover, you select and install networking equipment, smart devices, and systems, knowing the infrastructure is ready. DIY vs. Professional Installation Some aspects of smart home implementation suit DIY approaches, while others require professional expertise: DIY-friendly: Installing smart bulbs and plugs Setting up mesh Wi-Fi systems Configuring hubs and automation Installing smart switches (if you're comfortable with basic electrical work and local regulations permit) Professional recommended: Running ethernet cables through walls Installing ceiling-mounted access points Any work involving electrical panels or circuits Security camera installation at height Configuring VLANs and advanced network features (unless you have networking experience) Know your limits. Improperly installed cabling or electrical work creates safety hazards and may void insurance or violate building codes. When in doubt, hire professionals. Common Mistakes to Avoid Underestimating Device Count Most homeowners dramatically underestimate how many smart devices they'll eventually deploy. You might start with a few smart bulbs and a video doorbell, but within a year, you've added security cameras, smart switches, sensors, appliances, entertainment devices, and more. Plan network capacity for 2-3 times the devices you initially envision. It's easier to have excess capacity than to upgrade your network infrastructure later. Ignoring Bandwidth Requirements Not all internet plans suit smart homes. If you're running multiple 4K security cameras with cloud recording, streaming 4K content on multiple TVs, and working from home with video conferences, your internet connection needs substantial upload and download bandwidth. In Queensland, NBN plans vary significantly in upload speeds. The popular NBN 50 plan provides 50 Mbps download but only 20 Mbps upload—potentially insufficient for multiple security cameras and video conferencing. Consider NBN 100 or higher plans, or investigate alternative technologies like 5G home internet in areas with strong coverage. Mixing Too Many Ecosystems It's tempting to buy whatever smart device is on sale or looks interesting, but mixing too many ecosystems creates management headaches. You'll end up with six different apps, incompatible devices, and automation that doesn't work across systems. Choose one or two primary ecosystems and stick with them. If you start with Philips Hue for lighting, continue with Hue-compatible devices. If you choose SmartThings as your hub, prioritize SmartThings-compatible devices. Neglecting Security Many homeowners install smart devices with default settings and never think about security until something goes wrong. By then, it's too late. Make security configuration part of your installation routine: change default passwords, enable two-factor authentication, update firmware, and segment your network. Spend an extra 15 minutes securing each device when you install it, rather than trying to secure dozens of devices later. Forgetting About Maintenance Smart homes require ongoing maintenance: firmware updates, battery replacements in sensors, cleaning camera lenses, checking automation rules, and reviewing security settings. Schedule quarterly smart home maintenance sessions to update firmware, test devices, replace batteries, and ensure everything functions correctly. This proactive approach prevents small issues from becoming major problems. The Future of Smart Homes in Queensland Smart home technology continues evolving rapidly. Trends shaping Queensland homes over the next 5-10 years include: Energy management: Integration with solar panels, battery storage, and time-of-use electricity pricing to optimize energy consumption and costs. Smart homes will automatically shift energy-intensive activities to periods of peak solar production or off-peak pricing. Health monitoring: Sensors monitoring air quality, humidity, temperature, and even detecting falls or health emergencies, particularly valuable for aging-in-place scenarios. AI-driven automation: Current automation follows rules you program. Future systems will learn your patterns and preferences, automatically adjusting without explicit programming. Matter adoption: As Matter-certified devices proliferate, ecosystem lock-in will diminish, and device interoperability will improve dramatically. 5G and edge computing: Faster wireless connectivity and local processing will enable more sophisticated automation and reduce reliance on cloud services. Sustainability focus: Smart homes will increasingly focus on environmental impact—water conservation, energy efficiency, and integration with electric vehicles. The infrastructure you install today—structured cabling, robust networking, and proper planning—will support these future innovations. That's why building the foundation correctly matters so much. Conclusion: Building Intelligence from the Ground Up Smart home technology promises convenience, efficiency, security, and comfort. But those promises only materialize when built on proper infrastructure. Without reliable Wi-Fi coverage, secure network architecture, and thoughtful planning, smart devices become sources of frustration rather than enhancement. The difference between a smart home that delights and one that disappoints comes down to foundation. Prewiring during construction costs a fraction of retrofitting later. Proper network design prevents coverage problems before they occur. Security planning protects your family's privacy and data. Intelligent lighting systems transform how you experience your home every single day. For Queensland homeowners building with Homes by Markon, smart home infrastructure integrates seamlessly into your custom build. Our smart prewire packages provide the structured cabling, network backbone, and electrical preparation your smart home needs, installed by licensed professionals to Australian standards. Whether you're planning comprehensive automation or just want the flexibility to add smart devices over time, proper infrastructure ensures your home is ready. You'll avoid the retrofit nightmare, save thousands in future costs, and enjoy a smart home that actually feels smart. The technology will continue evolving. New devices, protocols, and capabilities will emerge. But the ethernet cables in your walls, the access points in your ceilings, and the structured cabinet in your garage will remain relevant for decades, supporting whatever innovations come next. That's the power of building intelligence from the ground up. Ready to Build Your Smart Home Foundation? Homes by Markon specializes in custom homes designed for modern living, including comprehensive smart home infrastructure. Our smart prewire packages provide the foundation your connected home needs, installed during construction when it's most cost-effective. Whether you're building in Brisbane, the Gold Coast, or anywhere across Southeast Queensland, we'll work with you to design and implement the infrastructure that makes your smart home vision a reality. Contact Homes by Markon today to discuss your custom home project and discover how our smart prewire packages can future-proof your home for decades of technological evolution. Let's build something intelligent together. Contact The Markon Group today: 📍 Location: 20–24 Commerce Drive, Browns Plains, Brisbane 📞 Phone: +61 7 3153 2000 🌐 Website: www.markongroup.com.au ✉️ Email: info@homesbymarkon.com.au Building futures for Queensland families.
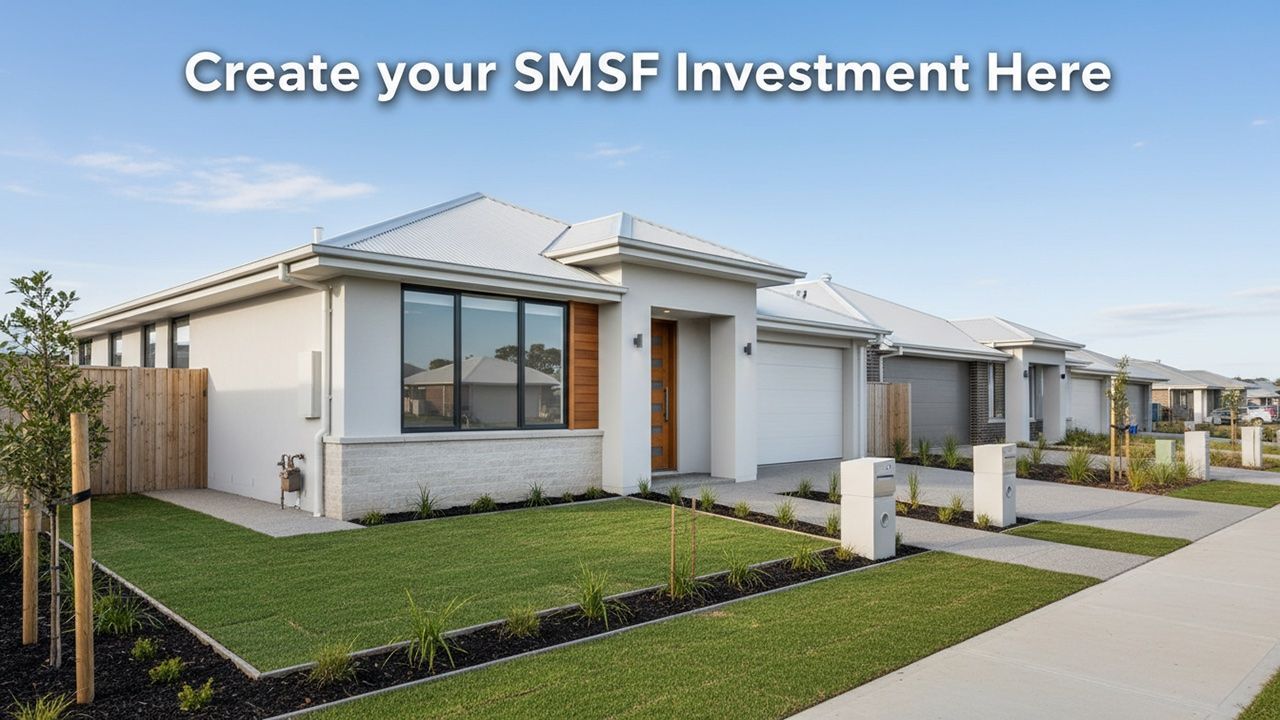
Prepared for: Prospective SMSF Trustees Prepared by: The Markon Group / Homes by Markon Date: 2025-11-23 IMPORTANT DISCLAIMER This report has been prepared by The Markon Group Pty Ltd and its building division, Homes by Markon. The information contained herein is for general educational purposes only and is not intended to be, nor should it be construed as, financial, legal, or taxation advice. Investing in property through a Self-Managed Super Fund (SMSF) is a complex undertaking with significant financial and legal obligations. The regulations governing SMSFs, particularly concerning borrowing and property development, are strict and subject to change. Non-compliance can result in severe penalties. The Markon Group and Homes by Markon are not licensed financial advisors and do not provide financial product advice. Before making any decision related to establishing an SMSF or investing through one, you must seek independent, professional advice from a suitably qualified and licensed financial advisor who specialises in SMSFs. You should also consult with legal and accounting professionals to ensure any strategy is appropriate for your personal circumstances, financial situation, and retirement objectives. This report should not be relied upon as a substitute for professional advice. The Markon Group accepts no liability for any loss or damage arising from any reliance on the information in this document. Introduction: Building Your Retirement Future in SE Queensland Welcome to your guide on a powerful but complex investment strategy: using a Self-Managed Super Fund (SMSF) to build property in the thriving South East Queensland (SEQ) corridor, specifically Brisbane and the Gold Coast. For many Australians, the idea of taking direct control of their superannuation to invest in tangible assets like property is highly appealing. It offers the potential for significant wealth creation, tax efficiencies, and a direct hand in shaping your retirement nest egg. The SEQ region, with its robust population growth, major infrastructure projects, and dynamic economy, presents a compelling landscape for long-term property investment. However, navigating the journey of an SMSF property build requires a deep understanding of the rules, a clear strategy, and a team of expert partners. This report is designed to serve as an educational starting point for SMSF trustees in the consideration phase. We will demystify the core concepts, outline what is possible (and what is not), highlight the compliance risks, and provide an overview of the SEQ market. Our goal is to empower you with foundational knowledge so you can have more informed conversations with your financial advisory team. As expert builders, Homes by Markon understands the construction requirements that align with SMSF regulations. Once your professional advisors have helped you establish the correct financial and legal structure, we stand ready to be your trusted partner in bringing your SMSF property to life. 1. SMSF and Property Investment: The Basics A Self-Managed Super Fund (SMSF) is a private superannuation fund that you manage yourself. Unlike large industry or retail funds, where investment decisions are made for you, an SMSF gives you, the trustee, direct control over your retirement savings and investment strategy. An SMSF can have between one and six members, who are typically also the trustees. Why Use an SMSF for Property? Investing in property through an SMSF is a popular strategy for several key reasons: Control: You choose the specific property, the location, and the strategy, aligning the investment directly with your retirement goals. Tax Benefits: The tax environment within super is highly concessional. Rental income is typically taxed at just 15% during the accumulation phase. If the property is sold after being held for more than 12 months, the capital gains tax is effectively 10%. In the retirement (pension) phase, both rental income and capital gains can be tax-free. Diversification: Direct property can diversify your retirement portfolio beyond traditional shares and bonds. Leverage: You can use the funds in your SMSF as a deposit and borrow to purchase a property of higher value than you could afford with your existing super balance alone. The "Sole Purpose Test": The Golden Rule of SMSF Every decision you make as an SMSF trustee must comply with one overarching principle: the sole purpose test . This Australian Taxation Office (ATO) rule dictates that your fund must be maintained for the sole purpose of providing retirement benefits to its members. This means you cannot gain a personal, present-day benefit from the fund's assets. For residential property, this rule is absolute: a fund member or any of their relatives cannot live in, rent, or use the property for any reason. Breaching the sole purpose test can lead to severe penalties. 2. The Mechanics of Borrowing: Limited Recourse Borrowing Arrangements (LRBA) Most SMSFs don't have enough cash to buy a property outright. To borrow money, an SMSF must use a special type of loan called a Limited Recourse Borrowing Arrangement (LRBA) . Understanding this structure is critical. In simple terms, an LRBA is a loan agreement where the lender's rights are limited only to the specific asset purchased with the loan. If the SMSF were to default on the loan, the lender could claim the property, but they would have no recourse (no claim) to any of the other assets within your SMSF, such as cash or shares. This structure is designed to protect your remaining retirement savings. The Role of the "Bare Trust" To facilitate an LRBA, a second legal structure called a bare trust (or holding trust) must be established. The SMSF provides the deposit. The lender provides the rest of the funds via the LRBA. The bare trust acquires the legal title to the property and holds it "on behalf" of the SMSF. The SMSF holds the "beneficial ownership," meaning it is entitled to all rental income and capital growth. Once the loan is fully repaid, the legal title can be transferred from the bare trust to the SMSF itself. The "Single Acquirable Asset" Rule A crucial component of the LRBA rules is that the borrowed funds must be used to purchase a "single acquirable asset." This generally means a property on a single title. You cannot use one LRBA to buy two separate properties on two different titles. This rule is the primary reason why certain building pathways are not possible, as we will explore later. 3. Navigating the Rules: Related Parties and Restrictions The ATO has strict rules about transactions between an SMSF and its "related parties." A related party is broadly defined and includes all fund members, their relatives (parents, siblings, children, etc.), and business partners, as well as any companies or trusts these individuals control. General Prohibition and Key Exceptions As a general rule, an SMSF is prohibited from acquiring assets from a related party. However, there are two major exceptions relevant to property: Listed Securities: An SMSF can acquire publicly traded shares from a related party at market value. Business Real Property: An SMSF can acquire a commercial property (like an office, warehouse, or retail shop) from a related party, provided it is valued independently and purchased at market value. The property must be used "wholly and exclusively" in a business. Strict Rules for Residential vs. Commercial Property Residential Property: The rules are inflexible. An SMSF-owned residential property cannot be lived in, rented by, or used in any capacity by a fund member or their relatives. Commercial Property: The rules are more flexible. An SMSF can purchase a commercial property and lease it to a business owned by a fund member. This is a popular strategy for business owners, allowing them to use their business rent to help pay off an asset inside their own super fund. The critical condition is that this must be done on a commercial, "arm's length" basis . This requires a formal lease agreement with rent set at the fair market rate. 4. What's Possible with an SMSF Property Build? With the right advice and structure, an SMSF can invest in a newly built property. Established Properties: The most straightforward path is for an SMSF to purchase an existing residential or commercial property, using an LRBA if borrowing is required. Off-the-Plan / Turnkey House & Land Packages: An SMSF can purchase a property "off-the-plan" or via a single house-and-land package contract. This structure is compliant because the SMSF is acquiring a single asset —the completed home on its land—under a single contract. If borrowing, the LRBA is used to fund the purchase of this single, complete asset upon settlement. Commercial Property Options: An SMSF can purchase an existing commercial property or enter into a single contract to have one built. This allows business owners to secure their own premises within their super fund, paying commercial rent to the SMSF, which helps grow their retirement savings. Repairs vs. Improvements: It's vital to understand the difference. Repairs: Funds borrowed via an LRBA can be used for repairs and maintenance that restore the asset to its original condition (e.g., fixing a leaking roof, repainting). Improvements: Borrowed funds cannot be used for improvements that fundamentally change or enhance the property's character (e.g., adding a room, building a granny flat). Any improvements must be paid for with other available cash within the SMSF, not with the loan money. 5. What's NOT Possible: The Vacant Land and Construction Trap A common misconception is that an SMSF can use an LRBA to buy a block of vacant land and then take out a second loan (or use the same LRBA) to fund the construction of a house. This is strictly prohibited under current SMSF law. The reason goes back to the "single acquirable asset" rule. When you use an LRBA, you must be acquiring a single, whole asset. Vacant land is considered one asset. Building a house on that land is considered a fundamental improvement or the creation of a new, separate asset, not the repair of the original one. Because LRBA funds cannot be used for improvements, you cannot use them to finance the construction. Attempting to do this would be a major compliance breach. The only compliant way to build using an SMSF and a loan is to enter into a single contract for a complete house and land package, where the fund acquires the finished property as a single asset. 6. The Importance of Compliance: Risks and Penalties The ATO takes SMSF compliance very seriously. The penalties for breaking the rules are severe and are typically levied against the trustees personally, meaning you cannot use the fund's money to pay the fines. Potential consequences of non-compliance include: Administrative Penalties: The ATO can issue fines for specific breaches. For example, breaches of the borrowing or in-house asset rules can attract penalties of 60 penalty units, which currently amounts to $19,800 per trustee . Rectification Directions: The ATO can order you to unwind the non-compliant investment. Trustee Disqualification: For serious or repeated breaches, the ATO can disqualify you from ever being a trustee of an SMSF again. Notice of Non-Compliance: This is the most severe penalty. The ATO can declare your fund "non-complying." If this happens, the fund loses its concessional tax status, and a tax rate of 45% can be applied to the fund's entire asset balance. This is not a "do-it-yourself" area of investment. The financial risks of getting it wrong are catastrophic, which is why a team of qualified, independent experts is non-negotiable. 7. A Focus on South East Queensland (Brisbane & Gold Coast) The decision to invest in property is as much about "where" as it is about "how." For SMSF investors with a long-term horizon, the South East Queensland market fundamentals for 2025 and beyond are exceptionally strong. Key Market Drivers: Population Growth: SEQ, particularly Brisbane and the Gold Coast, continues to experience record levels of interstate migration. This sustained influx of new residents creates relentless demand for housing. Housing Undersupply: A persistent shortage of available homes, compounded by rising construction costs and delays, means that demand consistently outstrips supply. This imbalance is a primary driver of both property price growth and rental increases. Infrastructure Boom: The region is undergoing a once-in-a-generation transformation. Billions are being invested in projects like the Cross River Rail, Brisbane Metro, Queen's Wharf precinct, and upgrades to the M1. The lead-up to the 2032 Brisbane Olympics is acting as a further catalyst for investment and urban renewal, enhancing connectivity and liveability. Strong Rental Market: The high demand and low supply have created an incredibly tight rental market. In late 2025, Brisbane's vacancy rate was around a critically low 0.9%, with the Gold Coast also experiencing rates around 1-1.5%. For an SMSF, this translates to strong, consistent rental yields (projected at 4-5%+) and low vacancy risk, which is crucial for servicing loan repayments and meeting cash flow requirements. Economic Diversification: The Gold Coast and Brisbane economies have matured well beyond tourism and resources. Growth in the health, education, technology, and professional services sectors provides a stable employment base, supporting long-term market resilience. Forecasts for 2025-2026 predict continued price growth for both houses and units across Brisbane and the Gold Coast, with some analysts projecting double-digit growth. This combination of capital growth potential and strong rental returns makes SEQ a compelling location for a long-term SMSF property investment strategy. 8. Build Structures and Partnering with Homes by Markon So, how do you translate this knowledge into a tangible asset? The key is a compliant build structure. The Compliant Pathway: A Single Contract Turnkey Build As established, an SMSF using an LRBA cannot buy land and then engage a builder in a separate contract. The compliant pathway is to enter into a single contract that results in the delivery of a single asset —the finished house on its block of land. This is often referred to as a "turnkey" or "off-the-plan" house and land package. Your SMSF, through its bare trust, signs one contract that covers the entire process from start to finish, settling on the property only once it is complete and ready for a tenant. This structure satisfies the ATO's "single acquirable asset" rule. How Homes by Markon Can Help This is where our expertise comes in. The role of your financial advisor is to structure your SMSF and LRBA correctly. Our role, as your building partner, is to deliver the physical asset in a way that aligns with that structure. Homes by Markon is not a financial advisor. We are expert builders who understand the SMSF landscape from a construction perspective. Once you and your advisory team have determined that a new-build property is the right strategy for your fund, we can: Work with you to identify a suitable house and land package that fits your SMSF's investment strategy and budget. Provide a single, fixed-price contract for the entire turnkey build, ensuring compliance with the "single acquirable asset" rule. Manage the entire construction process, from design and approvals to handover. Deliver a high-quality, tenant-ready residential or commercial property, built to the highest standards. We bridge the gap between your financial strategy and the physical reality, ensuring the asset you are acquiring is delivered seamlessly and in accordance with the strict requirements of your SMSF structure. 9. What's NOT Possible: The Vacant Land and Construction Trap A common misconception is that an SMSF can use an LRBA to buy a block of vacant land and then take out a second loan (or use the same LRBA) to fund the construction of a house. This is strictly prohibited under current SMSF law. The reason goes back to the "single acquirable asset" rule. When you use an LRBA, you must be acquiring a single, whole asset. Vacant land is considered one asset. Building a house on that land is considered a fundamental improvement or the creation of a new, separate asset, not the repair of the original one. Because LRBA funds cannot be used for improvements, you cannot use them to finance the construction. Attempting to do this would be a major compliance breach. The only compliant way to build using an SMSF and a loan is to enter into a single contract for a complete house and land package, where the fund acquires the finished property as a single asset. 10. The Importance of Compliance: Risks and Penalties The ATO takes SMSF compliance very seriously. The penalties for breaking the rules are severe and are typically levied against the trustees personally, meaning you cannot use the fund's money to pay the fines. Potential consequences of non-compliance include: Administrative Penalties: The ATO can issue fines for specific breaches. For example, breaches of the borrowing or in-house asset rules can attract penalties of 60 penalty units, which currently amounts to $19,800 per trustee . Rectification Directions: The ATO can order you to unwind the non-compliant investment. Trustee Disqualification: For serious or repeated breaches, the ATO can disqualify you from ever being a trustee of an SMSF again. Notice of Non-Compliance: This is the most severe penalty. The ATO can declare your fund "non-complying." If this happens, the fund loses its concessional tax status, and a tax rate of 45% can be applied to the fund's entire asset balance. This is not a "do-it-yourself" area of investment. The financial risks of getting it wrong are catastrophic, which is why a team of qualified, independent experts is non-negotiable. 11. A Focus on South East Queensland (Brisbane & Gold Coast) The decision to invest in property is as much about "where" as it is about "how." For SMSF investors with a long-term horizon, the South East Queensland market fundamentals for 2025 and beyond are exceptionally strong. Key Market Drivers: Population Growth: SEQ, particularly Brisbane and the Gold Coast, continues to experience record levels of interstate migration. This sustained influx of new residents creates relentless demand for housing. Housing Undersupply: A persistent shortage of available homes, compounded by rising construction costs and delays, means that demand consistently outstrips supply. This imbalance is a primary driver of both property price growth and rental increases. Infrastructure Boom: The region is undergoing a once-in-a-generation transformation. Billions are being invested in projects like the Cross River Rail, Brisbane Metro, Queen's Wharf precinct, and upgrades to the M1. The lead-up to the 2032 Brisbane Olympics is acting as a further catalyst for investment and urban renewal, enhancing connectivity and liveability. Strong Rental Market: The high demand and low supply have created an incredibly tight rental market. In late 2025, Brisbane's vacancy rate was around a critically low 0.9%, with the Gold Coast also experiencing rates around 1-1.5%. For an SMSF, this translates to strong, consistent rental yields (projected at 4-5%+) and low vacancy risk, which is crucial for servicing loan repayments and meeting cash flow requirements. Economic Diversification: The Gold Coast and Brisbane economies have matured well beyond tourism and resources. Growth in the health, education, technology, and professional services sectors provides a stable employment base, supporting long-term market resilience. Forecasts for 2025-2026 predict continued price growth for both houses and units across Brisbane and the Gold Coast, with some analysts projecting double-digit growth. This combination of capital growth potential and strong rental returns makes SEQ a compelling location for a long-term SMSF property investment strategy. 12. Build Structures and Partnering with Homes by Markon So, how do you translate this knowledge into a tangible asset? The key is a compliant build structure. The Compliant Pathway: A Single Contract Turnkey Build As established, an SMSF using an LRBA cannot buy land and then engage a builder in a separate contract. The compliant pathway is to enter into a single contract that results in the delivery of a single asset —the finished house on its block of land. This is often referred to as a "turnkey" or "off-the-plan" house and land package. Your SMSF, through its bare trust, signs one contract that covers the entire process from start to finish, settling on the property only once it is complete and ready for a tenant. This structure satisfies the ATO's "single acquirable asset" rule. How Homes by Markon Can Help This is where our expertise comes in. The role of your financial advisor is to structure your SMSF and LRBA correctly. Our role, as your building partner, is to deliver the physical asset in a way that aligns with that structure. Homes by Markon is not a financial advisor. We are expert builders who understand the SMSF landscape from a construction perspective. Once you and your advisory team have determined that a new-build property is the right strategy for your fund, we can: Work with you to identify a suitable house and land package that fits your SMSF's investment strategy and budget. Provide a single, fixed-price contract for the entire turnkey build, ensuring compliance with the "single acquirable asset" rule. Manage the entire construction process, from design and approvals to handover. Deliver a high-quality, tenant-ready residential or commercial property, built to the highest standards. We bridge the gap between your financial strategy and the physical reality, ensuring the asset you are acquiring is delivered seamlessly and in accordance with the strict requirements of your SMSF structure. Conclusion and Your Next Steps Using your SMSF to build an investment property in South East Queensland can be a highly effective strategy for building long-term wealth for your retirement. The region's powerful economic and demographic fundamentals provide a strong foundation for growth, while the SMSF structure offers significant tax advantages and control. However, this is a high-stakes environment. The rules are complex, the penalties for error are severe, and the process requires meticulous planning and execution. Success depends on having the right team of experts guiding you at every stage. Final Disclaimer: This report is a guide for educational purposes only and does not constitute financial advice. Your journey should begin with a conversation, not with a builder, but with a financial professional. Your Call to Action Seek Professional Financial Advice. Your first and most critical step is to engage a licensed, independent financial advisor who specialises in SMSFs. They will assess your personal situation and determine if an SMSF property strategy is right for you. They are the only ones qualified to give you advice. Discuss Your Build with Homes by Markon. Once your advisory team has given you the green light and the correct SMSF and borrowing structures are in place, contact us. We can discuss our SMSF-aligned turnkey building solutions and how we can help you create a high-quality asset for your fund. Partner with an Expert Builder. Choose a building partner who not only delivers exceptional quality but also understands the unique compliance requirements of an SMSF build. Partner with The Markon Group and Homes by Markon to ensure your property is delivered professionally, efficiently, and in alignment with your financial strategy. Contact The Markon Group today: 📍 Location: 20–24 Commerce Drive, Browns Plains, Brisbane 📞 Phone: +61 7 3153 2000 🌐 Website: www.markongroup.com.au ✉️ Email: info@homesbymarkon.com.au Building futures for Queensland families.
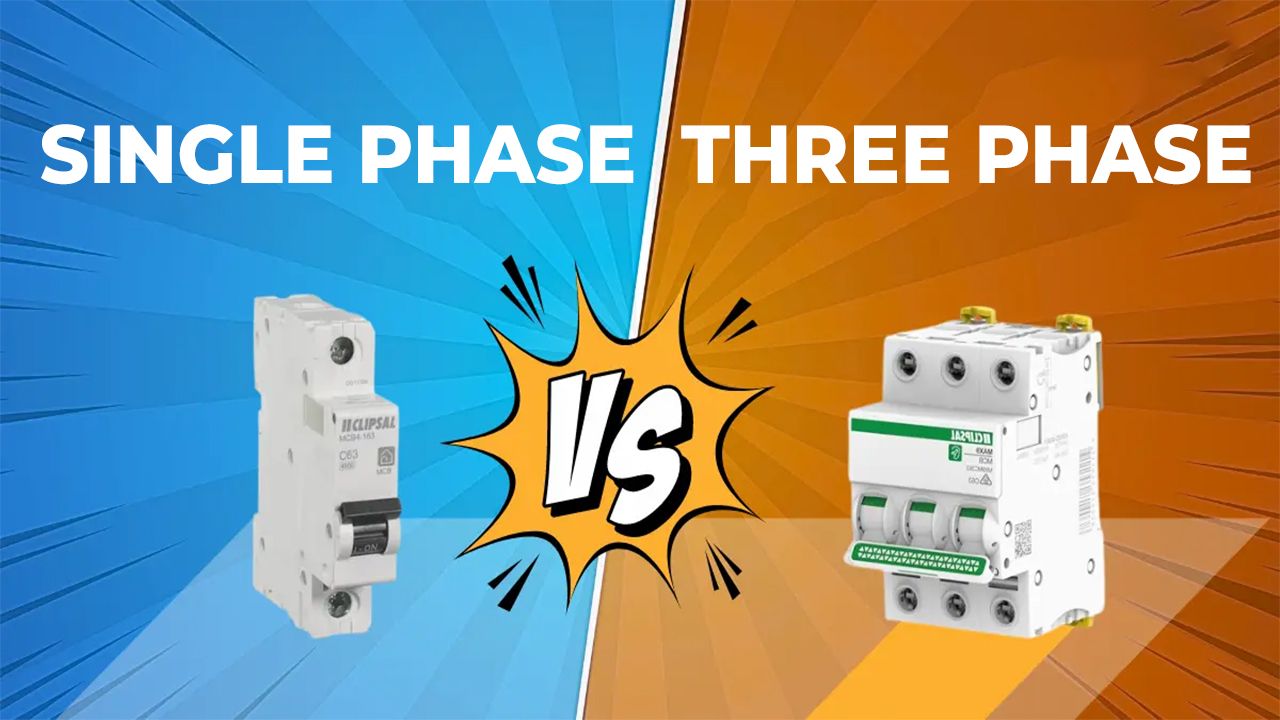
Single Phase vs 3 Phase Power: Making the Right Choice for Your New Custom Home When you’re planning a new custom home, most of the exciting decisions are easy to see. You’re thinking about your kitchen layout, that perfect open-plan living space, where the kids’ rooms will go, and of course, the look of the home from the street – including a fresh, modern white Colorbond roof that keeps everything cool and bright. Behind all of that, there’s a quieter decision that doesn’t get as much attention, but has a big impact on how your home actually lives and feels day to day: Will your new home run on single phase power or 3 phase power? For years, most existing homes have simply used single phase by default. But with the way we now live in Brisbane and across South East Queensland – bigger air-conditioning systems, more electrical appliances, solar, batteries and electric vehicles – 3 phase power is becoming more common, and often the smarter long-term choice. This guide is here to walk you through the difference in plain English, explain what’s changed in recent years, and help you understand why more new custom homes are moving to 3 phase power. We’ll also show you how Homes by Markon considers this early in the design of your new custom home so your power supply suits the way you live now – and the way you’ll live in the future. What Is Single Phase Power vs 3 Phase Power? Let’s start with the basics, without the technical jargon. Single phase power – the traditional standard Single phase power is what most people think of as a “normal” home power supply. It’s been the standard in many suburban homes across Brisbane and SEQ for decades. A simple way to picture it is this: Imagine a single lane road bringing electricity into your home. All your appliances – lights, air-conditioning, oven, fridge, washing machine – share that same lane. As long as the total traffic on that lane doesn’t get too heavy, everything runs smoothly. For smaller homes with modest electrical demand, single phase power can work perfectly well. It’s familiar, it’s simple, and it has been the default choice for a long time. 3 phase power – three lanes instead of one 3 phase power, on the other hand, is like having a three-lane highway feeding your home. You still get the same 230–240 volts at your power points. But behind the scenes, there are three separate phases of power coming into the property. This gives your home more overall capacity and a smoother way to share heavier electrical loads. Traditionally, 3 phase power has been used for commercial buildings, workshops and very large loads. These days, more and more new custom homes – especially larger homes and homes with ducted air-conditioning, solar, batteries and EV provisions – are moving to 3 phase because it simply handles modern electrical demands better. The key point: You don’t need to become an electrician to make the right choice. You just need a basic understanding of what each option offers, and a builder who designs your home with the right power supply from the start. Why This Decision Matters More Now Than It Used To If you look at older Brisbane homes, their electrical loads are often quite light compared to what we expect in a new build today. Over the past decade, the way we use power at home has changed significantly. Bigger and more constant electrical loads Modern homes regularly run: Ducted, whole-house air-conditioning Large fridges and freezers Induction cooktops and sometimes double ovens Multiple TVs, computers, devices and home office setups Laundry appliances, dryers and often extra fridges in the garage On a hot summer’s afternoon in Brisbane, it’s not unusual for a new home to have: The ducted air-conditioning going The oven and cooktop running for dinner The dishwasher on The washing machine spinning Multiple screens and devices in use all at once. That is a very different picture to the smaller, less equipped homes of decades past. Solar power becoming standard In South East Queensland, solar is no longer a luxury. For many people building a new home, it’s either: installed from day one, or planned for in the near future. With Brisbane’s strong sunshine, solar is an obvious way to reduce ongoing power bills. But solar also changes the way your home interacts with the grid: Instead of just using power, your home is now also generating and exporting power. Larger solar systems and more capable inverters are becoming common. This extra generation and export is handled more comfortably when the home’s power supply is well designed – and often that means 3 phase. Batteries gaining popularity More households are now looking at battery storage to: Use more of their own solar power in the evenings Reduce reliance on the grid Increase resilience during outages. Batteries can move a lot of energy in and out of your home over short periods. Having a well thought-out power supply – particularly 3 phase for homes with larger systems – helps ensure this is handled reliably and efficiently. Electric vehicles and EV chargers Even if you don’t own an electric vehicle yet, there’s a good chance you’ll consider one over the next 5–10 years. EV charging is a high electrical load. Some chargers are designed to run on single phase, but many perform best with 3 phase, especially when you want faster charging without overloading the rest of the house. Homes by Markon can design your new custom home with future EV charger provisions as an extra , so when you’re ready to add a charger, your home’s electrical system is already prepared. Higher expectations for comfort and efficiency Today, people expect new homes to be: Comfortable year-round Energy efficient Cheaper to run over time. Design decisions like a white Colorbond roof make a big difference here. A white roof reflects much more heat than a dark one, reducing the amount of heat that gets into your home. That means: Your air-conditioning doesn’t have to work as hard Your cooling costs can be lower Your solar and battery systems can be used more efficiently. Once you layer in ducted air-conditioning, solar, batteries and future EV charging, the question of single phase vs 3 phase power becomes one of the most important “behind-the-scenes” design decisions in a new custom home. Why Power Companies Often Prefer 3 Phase for New Homes As our streets fill with more air-conditioning, more solar, and more EVs, the electricity grid itself is under more pressure and complexity. From a power company’s point of view, 3 phase power: Helps spread demand more evenly Helps spread solar export more evenly Reduces stress on any one part of the network. Better load balancing Think back to the road analogy. With single phase, a lot of houses might be crowding into one lane. With 3 phase, the network can effectively spread that traffic across three lanes. This balancing becomes especially important where: Many homes have large ducted air-conditioning systems Solar systems are feeding power back into the grid at the same time EV chargers are drawing high loads in the evening. Handling high-demand homes more safely New custom homes with: Whole-house air-conditioning Strong solar input Multiple large appliances can place substantial demand on the network. 3 phase power helps share this demand and reduce the risk of overloading a single phase. In some newer estates or certain situations, power companies may: strongly recommend, or require 3 phase connections for particular types of new homes or higher loads. Homes by Markon works with electrical designers, electricians and supply authorities to ensure each new custom home is designed with the right power supply, in the right way, from day one. The Benefits of 3 Phase Power for Your New Custom Home So how does this all play out in real life for someone building a new home in Brisbane or South East Queensland? Here are the key ways 3 phase power can benefit your new build. 1. More capacity for real-world modern living 3 phase power gives your home more “room” to handle multiple heavy loads at once. This is especially valuable if your new home will have: Ducted air-conditioning throughout A large kitchen with multiple appliances A bigger laundry setup The potential for EV charging, a workshop, or other power-hungry additions later. Instead of constantly worrying about overloading circuits, 3 phase helps ensure your home can comfortably run everything you need during busy times – like those hot summer evenings when the whole family is at home. 2. Better performance for whole-house air-conditioning For many families, comfort is a major factor in building a new custom home. Ducted air-conditioning across the whole home is very popular in Brisbane and SEQ. Many larger, more capable ducted systems are designed to run on 3 phase. The benefits include: Smoother starting and running of large compressors Reduced chance of voltage drop or strain when the system kicks in More reliable performance during extreme heat periods when demand is highest. Combine this with a white Colorbond roof , good insulation and thoughtful home orientation, and you end up with: A home that stays more comfortable An air-conditioning system that doesn’t have to work as hard Potentially lower running costs over the life of the home. 3. A better match for solar and battery systems Solar and batteries are where 3 phase really becomes attractive for many new builds. Larger and more capable solar systems 3 phase power often allows: The use of 3 phase solar inverters Better distribution of solar generation across all three phases of your home’s supply. This can help: Smooth out how solar power is used within the home Reduce the risk of voltage issues on a single phase Improve the reliability of solar export back to the grid. In some cases, the size of the solar system or inverter capacity you’re allowed to install may be influenced by whether your home is on single phase or 3 phase. Being on 3 phase can give you more flexibility and options. Batteries that work efficiently with the home As batteries become more common, a well-designed 3 phase power setup: Makes it easier for the battery to charge and discharge effectively Helps spread that activity across the home Reduces the load on any one phase. Homes by Markon designs your home to be solar and battery ready , working closely with trusted partner installers who specialise in the systems themselves. Together, we ensure your switchboard, wiring and roof design are set up to make the most of your chosen solution – and to support future upgrades. 4. Future-proofing your investment A new custom home isn’t a short-term decision. You’re building for the next decade or two – possibly longer. 3 phase power gives you: More flexibility to add or upgrade electrical features in the future Less need for expensive electrical upgrades later on. Examples of future changes that 3 phase supports well include: Adding or upgrading EV chargers (as extras) Increasing your solar system size (subject to local rules) Installing or upgrading a battery system Adding a workshop with more demanding power tools Adding spa or heat pump equipment. Rather than designing a home that’s just adequate for today, 3 phase helps prepare your home for the lifestyle and technologies of tomorrow. Pros and Cons: Single Phase vs 3 Phase To make things clearer, it’s helpful to look at the pros and cons of each option side by side. Single Phase – Pros Often slightly cheaper to connect or keep as the standard option. Perfectly adequate for smaller homes with modest electrical requirements. Simple and familiar arrangement; many existing homes are already on single phase. Single phase can work well if: You’re building a relatively compact home You don’t plan on whole-house ducted air-conditioning Your solar system will be modest You have no plans for EV charging or other high loads. Single Phase – Cons Limited capacity compared to 3 phase. As you add more high-demand appliances, the risk of overloading increases. May restrict your options for larger ducted air-conditioning systems. Can limit the size or performance of solar and battery systems, depending on local inverter and export rules. Offers less flexibility for future additions like EV chargers, spa equipment or larger expansions of your electrical setup. 3 Phase – Pros Much greater electrical capacity for your home overall. Handles whole-house ducted air-conditioning and multiple large loads more comfortably. Often a better match for larger solar systems and battery setups. Helps integrate your home more smoothly with a grid that’s handling increasing amounts of solar and high-demand appliances. Excellent future-proofing , allowing you to adapt as your lifestyle and technology needs change. For many new custom homes in Brisbane and SEQ – especially medium to large homes with strong comfort and solar goals – 3 phase is increasingly the most sensible choice. 3 Phase – Cons Usually a higher upfront connection cost than basic single phase. The metering and switchboard design is a little more complex (though this is all handled by your builder and electrician). Requires thoughtful load balancing across the three phases – which is part of the design work Homes by Markon coordinates. Overall, while 3 phase can cost a bit more initially, it often provides significant benefits in comfort, flexibility and long-term value. How Homes by Markon Designs Your New Home With Power in Mind Choosing between single phase and 3 phase isn’t something you should be left to decide on your own after the house is designed. It needs to be considered early, when your layout, roof design and mechanical services are being planned. Homes by Markon takes a holistic approach to this. Understanding how you’ll live in the home During the design stage, we look at how you intend to use your new home: How large will the home be? Are you planning ducted air-conditioning throughout? How important are low ongoing power bills to you? Are you planning solar from day one, or do you want the home to be solar-ready? Do you see a battery system in your future? Is there a possibility of owning an EV, or multiple EVs, down the track? Are there any special loads – like workshop tools, gym equipment or spa systems – you want to allow for? These answers help guide whether single phase will be sufficient, or whether 3 phase is clearly the wiser option. Designing for comfort, efficiency and future upgrades We then design your home around those goals, bringing together: A white Colorbond roof for better heat reflection and lower cooling loads Well-planned insulation and orientation Ducted air-conditioning sized correctly for your home Electrical infrastructure that matches your current and future needs. For solar and batteries, we: Design the roof layout and switchboard to be solar and battery ready Work with trusted partner installers who specialise in these systems Coordinate the details so your power supply, inverter, and any future battery can work together effectively. Whether you choose single phase or 3 phase, the aim is always the same: a home that is comfortable, efficient and ready for what’s coming next. Real-World Style Examples To make the difference more tangible, it helps to imagine a couple of scenarios. Example 1 – Single phase feeling the strain A couple builds a new home on single phase. At first, they have: A few split system air-conditioners A standard electric cooktop and oven A single fridge, TV and basic appliances. Over time, as their family grows, they: Install a larger air-conditioning system Add a second fridge in the garage Upgrade to an induction cooktop Add a decent-sized solar system Eventually buy an EV and want a charger. Suddenly, the electrical demand is much higher. Circuit breakers trip more often, and the limits of the single phase supply become more obvious. At that point, upgrading to 3 phase can be more complex and disruptive than simply designing the home for 3 phase from the beginning. Example 2 – 3 phase from day one Another family builds a new custom home in Brisbane with Homes by Markon. From the start, their home is designed with: 3 phase power connection A white Colorbond roof and good insulation Whole-house ducted 3 phase air-conditioning A generous solar system installed by a partner company Provision in the switchboard and wiring for a future EV charger as an extra. The home handles Brisbane’s hot summers comfortably. The solar system operates efficiently, exporting power smoothly. When the family decides to add a battery or EV charger in a few years, the underlying power supply is already capable of supporting it. The difference isn’t just technical – it’s about how easy and comfortable life in the home feels, both now and in the years ahead. How to Decide Which Option Suits Your New Custom Home So, where does that leave you when you’re planning your own build? You don’t need to know everything about voltages, phases and inverters. You simply need to be honest about: The size and style of home you’re building The comfort you expect (especially with air-conditioning) How important solar and energy efficiency are to you What you might want to add in the future. When you should seriously consider 3 phase 3 phase is very much worth considering if your new home will: Be medium to large in size Have ducted or whole-house air-conditioning Include a larger solar system now or soon Possibly have a battery system in future Include or plan for EV charging Or if you simply want to keep your options open with minimal limitations. When single phase might still be suitable Single phase may be enough if: The home is relatively small Cooling needs are modest You’re not planning significant solar, battery or EV charging Your current and future electrical demand is clearly within what single phase can comfortably handle. The important thing is to have this discussion early with your builder and your electrical team, rather than leaving it as a default or an afterthought. Start Your Custom Home Conversation With Homes by Markon Single phase and 3 phase power both have their place. But with the way we now live in Brisbane and across South East Queensland – bigger air-conditioning, more solar, more devices, and the rise of EVs – 3 phase power is increasingly the smarter, more future-focused choice for many new custom homes. The best time to make this decision is at the design stage, when we’re planning your layout, your roof, your air-conditioning and your solar. You don’t need to have all the technical answers – that’s what we’re here for. What matters is that your home is comfortable, efficient to run, and ready for whatever you want to add in the years ahead. If you’re starting to plan a new custom build and want to get the power, comfort and efficiency right from day one, we’d love to talk. Start your custom home conversation with Homes by Markon.
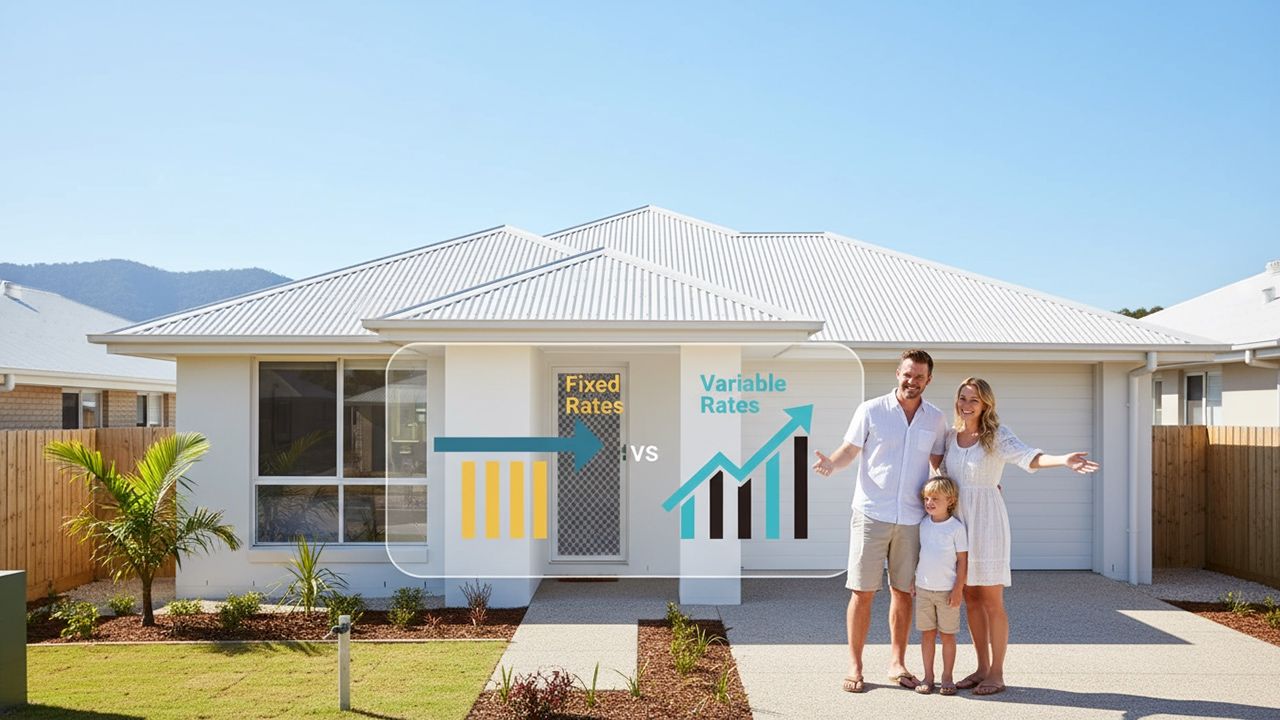
Important notice: The Markon Group does not provide financial advice. Any information in this article is general in nature only , shared “in passing” for educational purposes. It should be considered a first step only in your understanding. Before making any decision, seek professional advice from a suitably qualified person, such as a mortgage broker or an Australian-recognised financial institution. Picking a home loan today isn’t just about chasing the lowest rate. It’s about choosing a structure that matches your risk comfort , your cash flow , and your goals – especially if you’re planning a new build or a major renovation in QLD. For many homeowners, the choice comes down to three main options: Fixed rate home loan Variable rate home loan Split loan (a mix of fixed and variable) Let’s walk through what each really means in practice, how offset/redraw features and construction loan quirks come into play, and where each structure might fit in your journey. 1. Fixed Rate Home Loans: Certainty in an Uncertain Market A fixed rate home loan locks in your interest rate for a set period (often 1–5 years). Your repayments stay the same during that period, regardless of what the market does. When a fixed rate might appeal You want certainty over your repayments. You’re stretching slightly for your home and want to manage budget risk . You think interest rates may rise and want to protect yourself. Common pros and cons of fixed rates Pros (Fixed Rate) Repayment certainty: You know exactly what is coming out of your account every month. Protection from rate rises: If the RBA increases rates and lenders follow, your fixed rate doesn’t change during the fixed period. Can help with household budgeting , especially for families or single-income households. Cons (Fixed Rate) Less flexibility: Often limited extra repayments. Break costs may apply if you refinance, sell, or switch during the fixed term. Offset accounts may be restricted or unavailable: Some lenders don’t offer an offset account on a fully fixed loan, or it might only be partial. If rates fall , you’re stuck at the higher fixed rate unless you pay break costs. 2. Variable Rate Home Loans: Flexibility and Features A variable rate home loan moves with the market. Your interest rate (and repayments) can go up or down over time. When a variable rate might appeal You want flexibility – to pay extra, refinance, or restructure without heavy penalties. You like the idea of using tools like an offset account or redraw facility . You’re comfortable that repayments may change and can handle some risk . Key pros and cons of variable rates Pros (Variable Rate) Flexibility: Usually easier to make unlimited additional repayments. Often easier and cheaper to refinance or restructure. Offset account compatibility: Many variable loans offer a full offset account , which can be powerful for managing interest. If rates fall , your repayments may reduce (depending on your lender). Cons (Variable Rate) Repayment uncertainty: Rates can rise, and your repayments can increase. Emotional/psychological stress when markets are volatile. Budgeting can be trickier if you’re on a tight cash flow. 3. Split Loans: A “Best of Both” Approach A split loan lets you divide your home loan into two parts: One fixed portion One variable portion For example, if you borrow $600,000, you might fix $400,000 and leave $200,000 variable. Why some homeowners in QLD like splits You lock in some certainty (fixed side) and keep some flexibility (variable side). You can pair a variable split with an offset account to reduce interest while still having part of your loan safely fixed. It can suit people who say, “I don’t want to gamble everything, but I don’t want to be completely locked in either.” Pros and cons of split loans Pros (Split Loan) Balance of risk: You’re not fully exposed to rate rises, but not fully locked in either. You can still use offset/redraw on the variable side (subject to lender terms). Can be tailored to your situation – e.g. 70% fixed / 30% variable, or vice versa. Cons (Split Loan) Slightly more complex to manage – two portions, two sets of rules. The fixed portion still has break costs and limits on extra repayments. If you want to move lender later, both portions need to be considered – which can affect timing and costs. 4. Offset Accounts vs Redraw: Everyday Tools That Matter The structure of your loan is one thing, but the features can make a huge difference to how you use your money. Offset account (often popular in Brisbane & Gold Coast) An offset account is a transaction account linked to your home loan. The money in that account is “offset” daily against your loan balance when interest is calculated. For example: Loan: $600,000 Offset balance: $50,000 You’re effectively charged interest on $550,000 (simplified example). Common points about offset accounts (general in nature): Great for people who like to keep savings accessible while still reducing interest. Often found on variable loans , though some lenders may offer them on certain fixed/split products. Particularly attractive in markets like the Gold Coast , where people may receive lump sums (e.g. bonuses, irregular income, rental income) and want to park funds strategically. Redraw facility A redraw facility lets you access any extra repayments you’ve made on your loan, above the minimum required. For example: Minimum repayment: $3,000/month You pay: $3,500/month for a year The extra $500 x 12 = $6,000 may be available for redraw (subject to lender terms). Offset vs redraw – practical differences (general concepts only): Offset: Separate account (often with a card). Money is typically 100% accessible , operating like a normal transaction account (subject to product conditions). Redraw: Funds are usually accessed via the loan account. Some lenders have limits, delays, or minimum redraw amounts. Why this matters for structure If you value flexibility and cash-on-hand , a variable loan with an offset account can be attractive. If you’re mainly focused on paying the loan down faster and less on daily access, a redraw facility might be enough. For a split loan , you may often find the offset is attached to the variable portion , not the fixed. 5. Construction Loan Nuances: Building in QLD If you’re planning to build a new home or undertake a major renovation in QLD, your finance structure might look a little different during the build. Common construction loan features (general information only): Progress payments: The lender generally releases funds in stages – slab, frame, lock up, fit out, completion – rather than all at once. Interest-only during construction: Many construction loans charge interest-only on the amount drawn during the build. Your repayments may be lower during this phase, then switch to principal + interest after completion. Variable vs fixed during construction: Some people stay variable during construction for maximum flexibility. Once the build is complete, they may fix, stay variable, or split depending on their situation at the time. How fixed, variable, and split play into a construction scenario All Variable during construction, then choose later You use a variable construction loan with an offset. You park your savings or contingency funds in the offset account while progress payments roll out. Once the home is complete and the final loan amount is known, you might: Fix some of the balance Keep it all variable Or set up a split loan . Split from the start (where allowed) You might have one split set up for construction (variable) and another intended as fixed later. This can be more complex and highly lender-dependent, so it’s something to discuss with a broker or lender. Fixed too early risk If you fix before you know the final amount or timing, you may risk: Fixing an amount that doesn’t match your end position; or Being caught with a fixed structure that doesn’t suit you if construction timing changes. This is a key area where professional advice can be important. Again, all of the above is general information only . Construction lending can be highly specific, and what’s right for one project in Brisbane or the Gold Coast may not suit another.

When you’re building a home in South East Queensland, the thing you can’t see—the ground beneath your block—quietly influences everything you can see later: your slab design, your site preparation, the drainage plan, and the “site costs” line on your quote. At Homes by Markon (part of The Markon Group), we now use Biax Slab Foundation systems on every new home. The reason is simple: Biax offers consistent quality and excellent engineering flexibility, and your soil test determines the exact configuration we specify. Whether your report comes back Class M, H, or P under AS 2870, we tailor the Biax design so your structure suits your soil, not the other way around. In this guide, you’ll learn what a soil test in QLD actually checks, what Class M/H/P means in practice, how Biax responds to each classification, and which site conditions push costs up (and how to keep them under control). We’ll also unpack piering, drainage, cut‑and‑fill earthworks, and how to read your engineering so you know where every dollar is going. If you’ve been Googling “slab types Brisbane” or comparing “site costs building Gold Coast,” this is the practical, engineering‑led view you’ve been looking for. Visual idea: A simple diagram showing Biax rib grids overlayed on Class M, H, and P soil profiles, with notes on rib depth, edge beams, articulation joints, and optional pier locations. Why Biax—And What Makes It Work So Well in Queensland The Biax Slab Foundation is a slab‑on‑ground system that uses lightweight void formers to create a biaxial rib grid within your concrete slab. By concentrating concrete and steel where they add the most stiffness (ribs and edge beams), Biax delivers a robust, predictable platform without unnecessary bulk. That efficiency matters in Queensland, where seasonal moisture swings can cause reactive clays to expand and contract. What you gain by standardising on Biax: One proven system, many configurations: We vary rib depth, spacing, reinforcement, and edge beams to match your soil class, footing loads, and layout. Predictable performance: The ribbed grid distributes loads and resists differential movement—key on H‑class clays. Cleaner installation: Lightweight formers and straightforward reinforcement patterns improve site workflows and quality control. Engineering transparency: Your soil test determines the exact Biax specification, so we can price against a real design rather than guesswork. Bottom line: Choosing Biax for every home removes the “which slab system?” debate and focuses attention where it belongs—on your soil and site conditions. Soil Test 101: The Data That Drives Your Slab A geotechnical investigation (often simply called a soil test) is the first technical step. In Queensland, it typically includes: Boreholes at key locations to identify layers (topsoil, fill, clays, sands), groundwater cues, and bearing capacity. Assessment of soil reactivity (how much the soil will move as it gains or loses moisture). A recommended AS 2870 site classification (e.g., M, H1/H2, or P) and notes on any special considerations (trees, slope, uncontrolled fill, or overland flow risks). Why it matters: Reactivity informs how stiff your Biax slab needs to be. Bearing capacity influences edge beam sizing and, in some cases, piering. Fill and variable layers help decide whether we improve the platform, replace material, or bypass weak zones with piers. Moisture pathways guide drainage design, finished floor levels (FFL), and slab edge details. From this report, our engineer specifies your Biax configuration: rib grid dimensions, reinforcement schedules, edge beam sizes, articulation/control joints, any drop edge beams, and whether piering is required at certain points. AS 2870 Classes M, H, and P—What They Mean for Your Biax Design You’ll commonly see three classes across Brisbane, Logan, Ipswich, Moreton Bay, and the Gold Coast. Here’s how each translates into design decisions for a Biax slab. Class M (Moderately Reactive) What it means: Soils will move a moderate amount with seasonal moisture changes—typical for many suburban sites. Biax response: A standard rib grid with engineered depths and an appropriate reinforcement schedule, compliant edge beams, and sensible jointing. Good surface and subsurface drainage is still essential to keep moisture conditions steady. Budget outlook: Often the “baseline” when access is decent and earthworks are minimal. Class H (Highly Reactive: H1/H2) What it means: Soils can move significantly—often high‑plasticity clays, tree influences, or uneven moisture regimes. Biax response: Deeper ribs and upgraded edge beams, heavier reinforcement, and careful jointing around large openings. Selective piering may be specified at edges or point loads. Budget outlook: Expect an uplift relative to Class M, primarily from slab upgrades and any piering. Good drainage and FFL planning are critical to long‑term performance. Class P (Special Consideration Site) What it means: Something about the site warrants extra care—uncontrolled fill, deep soft soils, steep slopes, abnormal moisture conditions, or risk factors such as nearby significant trees or overland flow. Biax response: Case‑specific engineering that may include drop edge beams integrated into the slab, local or continuous piering to founding strata, fill replacement or improvement, and a robust drainage strategy. Budget outlook: Variable. We provide clear allowances and triggers so you understand the range and what would change the scope. Note on other classes: Class A/S (often sandy profiles) can yield very efficient Biax designs, but councils may still require direct stormwater connection. Class E (extremely reactive) exists in pockets; Biax can be engineered to suit, but with careful detailing and selective piering. Piering with Biax: When It’s Needed and How We Plan For It Even a stiff slab can benefit from anchoring into more stable material in certain conditions. Piering is not automatic—it’s specified by the structural engineer based on your soil test and the intended slab layout. Common triggers: Uncontrolled or variable fill, especially beneath slab edges or load paths H‑class sites near large trees or where cut‑and‑fill transitions run under slab edges P‑class conditions with variable founding depths across the footprint Concentrated loads under columns or stacked structural elements Types we use: Screw piers (helical piles): Quicker install, minimal spoil, capacity verified by torque. Bored concrete piers: Drilled to depth and founded in a specified stratum, then reinforced and poured—good where founding layers are well characterised. Budget clarity: We document an assumed number, diameter, and depth for piering, plus a clear per‑metre rate if deeper founding is required. Founding criteria (torque values for screws, refusal or target depths for bored piers) are stated on the engineering, so there’s no ambiguity during install. Drainage, Levels, and Stormwater: The Quiet Hero of Slab Performance Moisture changes drive soil movement in reactive clays. Controlling water around your slab reduces the risk of differential movement and cracking. Our drainage playbook: Finished floor levels (FFL): We set the FFL to promote natural falls away from the slab perimeter. Even a small increase can make a big difference on a flat block. Surface controls: Spoon drains, grated channels at garage thresholds, and surface pits to capture runoff before it reaches slab edges. Subsurface drainage: Where drop edge beams or retaining conditions exist, we add ag drains and free‑draining backfill to relieve water pressure. Lawful discharge: Councils across Brisbane and the Gold Coast have specific rules for stormwater. We design a compliant path to the lawful point of discharge early, so the site drains properly from day one. Overland flow: If mapping shows flow paths, we coordinate levels, landscaping, and drainage so storm events don’t pond against the home. Good drainage is not an optional extra—it’s an integral part of how your Biax slab maintains performance throughout the seasons. Earthworks, Cut‑and‑Fill, and Retaining: Building the Right Platform Your slab is only as good as the platform beneath it. Getting the earthworks right is one of the biggest levers you have to control risk and cost. What we evaluate: Platform strategy: Achieving a stable bench while minimising excessive export/import of material. Cut/fill transitions: Avoiding abrupt transitions directly under critical slab edges; where unavoidable, we use drop edge beams or piering to bridge. Drop edge beams vs external retaining: Integrating retaining into the slab edge can simplify the footprint and drainage. In other cases, external retaining is more cost‑effective—site‑specific engineering decides. Controlled fill: When fill is required, we use engineered material compacted in layers with density testing. Uncontrolled fill is either replaced, improved, or bypassed with piers per the engineer’s advice. Access and logistics: Tight infill sites may change the sequence of earthworks, piering, and pours; planning this early avoids delays and cost creep. Budgeting Your Site Costs: An Engineering‑Led Breakdown “Site costs” is the umbrella for everything ground‑related that protects your home’s structure. They’re separate from finishes and fixtures, and they vary from block to block based on soil, slope, and stormwater constraints. Standardising on Biax helps by keeping the foundation system constant while we tune the engineering to your soil test. Typical inclusions: Soil test QLD (geotech) and structural engineering for the Biax slab Earthworks: cut‑and‑fill, platform preparation, and spoil management Controlled fill import and compaction testing (as needed) Biax slab specification: rib/edge beam sizes, reinforcement schedule, jointing details Piering: quantities, diameters, assumed depths, and founding criteria (if specified) Drainage: surface controls, perimeter subsurface drainage, pits and pipes, stormwater to lawful discharge Temporary erosion and sediment control Termite and moisture management layers per code How to keep it predictable: Test and survey early: Get the soil test and levels plan before final pricing. Engineer first: Price against a real Biax design, not allowances pulled from thin air. Define piering rules: Agree a realistic assumed depth and transparent rates for additional depth. Lock down drainage: Confirm FFL and the stormwater strategy to avoid late changes. If you’re comparing “site costs building Gold Coast” quotes, look for itemised lists that mirror the above. The more specific the engineering, the fewer surprises you’ll face during construction. Reading Your Soil Report and Engineering—Without the Headache Here’s how to skim the documents and grasp the essentials: Site classification (AS 2870): Your headline—Class M, H (H1/H2), or P—with a short description of why. Soil profile: Layer by layer, noting any fill, stiff clays, sands, and approximate depths. Reactivity and moisture notes: Expected movement and any risks from seasonal wetting/drying or groundwater. Bearing capacity: Often expressed in kPa; influences edge beams and pier sizing. Recommendations and flags: Trees, overland flow, uncontrolled fill, slope considerations. Biax slab schedule: Rib depth/spacing, edge beam sizes, reinforcement (top/bottom bars, mesh), articulation/control joint locations. Piering (if any): Quantity, diameter, target depth or torque, and founding criteria. Drainage: Surface and subsurface measures, plus the lawful point of discharge strategy. If you’d like, we can sit down and translate the jargon line by line, connecting each engineering note to a practical outcome (and a cost line) so it all makes sense. Brisbane vs Gold Coast: Local Nuances That Affect Design and Cost Brisbane infill (tree‑affected clays) Expect H‑class tendencies near mature trees. Biax designs typically deepen ribs and edge beams and may include selective piering, especially at edges and large openings. Overland flow overlays are common; drainage planning is non‑negotiable. Gold Coast lowlands (sand profiles, pockets of higher water table) Soils can fall into A or S classes, but many sites still require direct stormwater connection to a lawful point. Biax performs efficiently on sands; the key is preventing ponding near slab edges with considered levels and drainage. Hinterland and slopes Cut‑and‑fill platforms are the norm. Biax slabs may integrate drop edge beams for retained edges, and piering often bypasses fill to natural ground at critical lines. Access and staging are important cost drivers on steeper blocks. These local realities are why “slab types Brisbane” searches return a wide spectrum of advice. By committing to Biax and letting the soil test dictate the configuration, we simplify the choice and focus on getting the engineering right for your particular block. Planning Timeline: From “Block Found” to “Slab Down” Initial Block Review We look at planning overlays (flood, overland flow, bushfire), slope, access, services, and any nearby trees. Site Intelligence Commission the soil test and a levels/feature survey. If prior geotech exists (e.g., for a recent subdivision), we confirm whether a current site‑specific test is still required. Concept Layout We shape your floor plan with an eye on load paths, articulation joints, and simple, continuous slab geometry where possible. Biax Engineering The structural engineer sizes your Biax rib grid, edge beams, reinforcement, joints, and any piering or drop edge beams needed for your site class. Site Costs and Documentation You receive an itemised site cost breakdown tied to the engineering, including clear pier depth assumptions and the stormwater plan. Approvals and Pre‑Construction Final documentation for certification; we confirm levels, drainage, and any pre‑start earthworks sequencing. Construction Earthworks and platform preparation, piering (if required), form and steel for Biax, inspections, then the concrete pour. At each step, decisions are linked back to your soil test and engineering so you always understand the “why,” not just the “what.” Common Myths—Busted “A stiffer slab means I’ll never get cracks.” Any concrete can crack; the goal is to manage where and how. With Biax, we use joints, reinforcement, and detailing to control crack width and location while the slab rides out seasonal soil movement. “If I’m on sand, I don’t need to worry about drainage.” Sandy sites can still hold water depending on compaction and water table. Councils may require direct stormwater connection. Good drainage is always part of the plan. “Piering guarantees zero movement.” Piering anchors parts of the slab to stable material but does not eliminate all movement. It’s used strategically to reduce differential movement where the soil profile is weak or variable. “Site costs are just a builder’s way to pad the price.” Site costs are how we translate geotechnical reality into a safe structure. When they’re itemised and tied to engineering, they’re neither vague nor optional—they’re your home’s risk management plan. Real‑World Scenarios in SEQ—And the Biax Response Inner‑Brisbane H1 site near mature trees Challenge: High‑plasticity clays with seasonal moisture variation and root influence. Biax solution: Deeper ribs, upgraded edge beams, careful jointing at large openings, and selective screw piers along vulnerable edges. Outcome: A stiff slab tuned to expected movement patterns, with clear pier depth allowances to keep the budget under control. Gold Coast low‑lying block with sandy profile Challenge: A/S class sands with localised shallow water table; strict lawful discharge requirements. Biax solution: Efficient rib grid with attention to edge detailing; elevations and drainage arranged to prevent ponding; direct connection to lawful discharge. Outcome: A cost‑effective slab with durable water management. Hinterland slope, P‑class due to fill and gradient Challenge: Mixed layers, uncontrolled fill pockets, and a platform that needs retaining. Biax solution: Drop edge beams integrated along retained edges, bored piers to natural ground through fill sections, terraced landscape levels with robust drainage. Outcome: Reduced external retaining, predictable performance, and a stable building platform. A Quick Homeowner Checklist Before you finalise a plan: Get a soil test in QLD and a levels survey. Ask for a preliminary Biax engineering concept for your site class. Confirm assumed pier depths and rates per extra metre if piering is required. Review the stormwater plan and FFL to ensure water runs away from the slab. Check that site costs are itemised and directly linked to the engineering. During design: Keep slab geometry simple where practical; it reduces stress concentrations and costs. Coordinate heavy loads (e.g., feature masonry) with rib directions and jointing. If your site has trees, discuss their placement and impact on soil moisture. Before construction: Walk through the platform levels and drainage with your builder. Confirm access logistics for earthworks, pier rigs, and concrete deliveries. Make sure inspection points (steel, formwork, pier founding) are scheduled and documented. FAQs Do you only build with Biax now? Yes. Homes by Markon has standardised on Biax Slab Foundation systems. The soil test sets the configuration—rib depth, spacing, reinforcement, edge beams, and any piering. How much can site costs vary? They depend on soil class, earthworks, piering, and drainage complexity. The fastest way to narrow the range is to engineer the Biax slab against your soil test and levels plan before final pricing. Is piering always required on H‑class sites? Not always. Many H‑class sites are handled with deeper ribs, edge beams, and reinforcement upgrades. Piering is used where the soil profile, loads, or cut/fill transitions justify it. What if my report says P‑class? P‑class means “take care,” not “can’t build.” We tailor the Biax design, consider drop edge beams, and use selective piering or platform improvement as directed by the engineer. I keep seeing “slab types Brisbane”—does that still apply if you only use Biax? Yes. “Slab types” is shorthand for performance requirements across various soils. We meet those requirements by adjusting the Biax configuration rather than switching systems. Can drainage really make that much difference? Absolutely. Consistent moisture around the slab is one of the best protections against excessive movement and cosmetic cracking. Getting FFL and stormwater right is essential. About Us: Engineering First, Always The Markon Group is a custom home builder. We also design and import custom‑built modular prefabricated buildings, applying the same engineering discipline across off‑site and on‑site projects. Homes by Markon focuses on site‑built custom homes throughout Brisbane, the Gold Coast, and surrounding regions. Standardising on Biax foundations allows us to deliver consistent quality, transparent pricing, and performance you can rely on—because your slab is tuned to your soil test, not a generic template. Ready to Move Forward? Get a Site Assessment with Homes by Markon If you own a block—or you’re comparing lots—you deserve clarity before you commit. We’ll arrange your soil test, complete a levels survey, and engineer the right Biax slab design for your site class. You’ll receive: A soil test in QLD and an engineering‑led Biax configuration aligned to your classification (M, H, or P) An itemised breakdown of site costs tied directly to the engineering, with clear piering assumptions A simple visual showing how your Biax rib grid, edge beams, joints, and any piers respond to your soil and layout A documented drainage and stormwater strategy to protect your slab long‑term Avoid the guesswork and budget shocks. Get a site assessment with Homes by Markon and build with confidence—on foundations designed precisely for the ground beneath your home. Contact The Markon Group today: 📍 Location: 20–24 Commerce Drive, Browns Plains, Brisbane 📞 Phone: +61 7 3153 2000 🌐 Website: www.markongroup.com.au ✉️ Email: info@homesbymarkon.com.au Building futures for Queensland families.
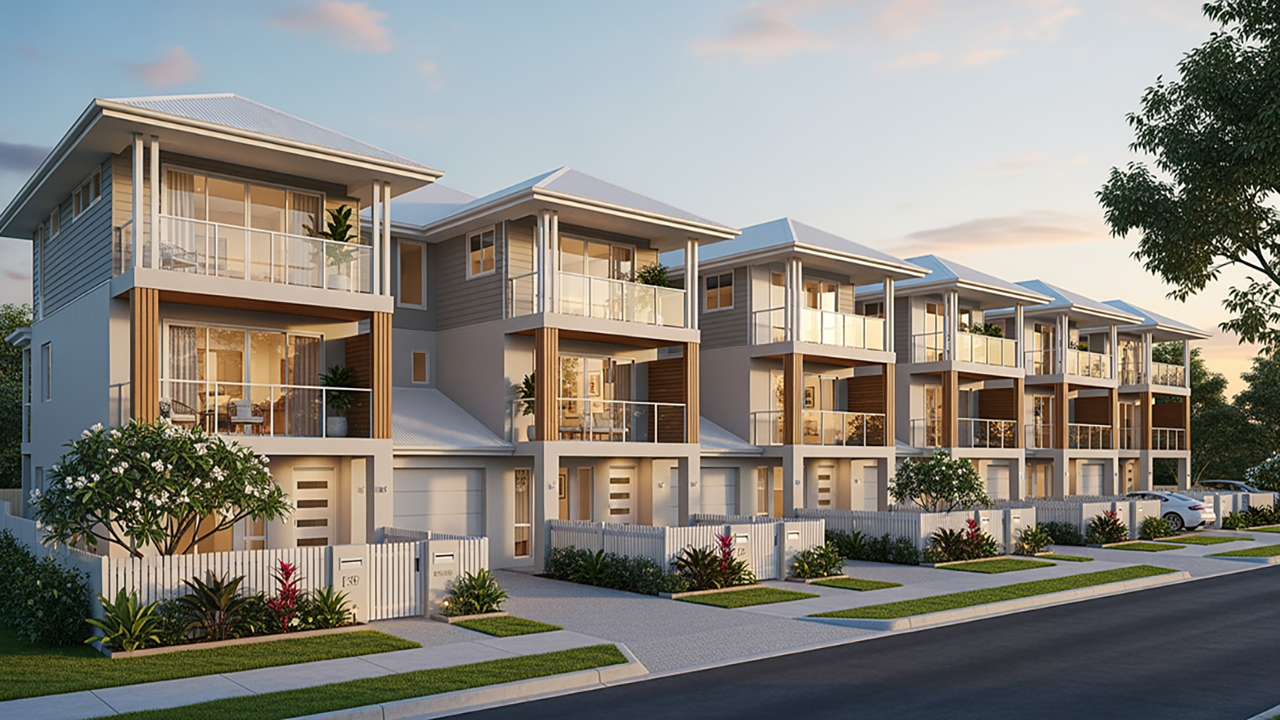
The dream of owning a home in Brisbane feels like it’s slipping away for many. You see it in the weekend auction results, you hear it in conversations with friends, and you feel it in your own budget. The relentless climb of property prices and the tightening squeeze of the rental market have become defining features of our city. For first-home buyers, growing families, and even savvy investors, the question is no longer just where to buy, but how. But what if the solution wasn’t about building further and further out, creating more urban sprawl? What if it was about building smarter, right here in the suburbs we already love? A groundbreaking proposal from the influential Grattan Institute is sparking a nationwide conversation, and it has the potential to completely reshape Brisbane’s housing landscape. The idea is simple, yet revolutionary: allow the construction of three-storey homes across our city’s residential heartland. This isn't just another policy paper. It's a potential lifeline for thousands of Brisbanites, offering a tangible path towards more affordable housing in Brisbane . It’s an opportunity to create diverse, vibrant communities and provide the "missing middle" housing that our city desperately needs. For those looking to build, it represents a new frontier of possibility. Let's explore what this housing revolution could mean for you and for the future of Brisbane. The Squeeze is Real: Brisbane's Housing Crisis by the Numbers Before we look at the solution, it’s crucial to understand the scale of the problem. Brisbane is no longer the sleepy, affordable capital it once was. A perfect storm of high interstate migration, strong economic growth, and preparations for the 2032 Olympics has supercharged our property market, leaving many behind. The statistics paint a stark picture of the affordability challenge in 2025: Soaring Property Prices: The median house price in Brisbane has surged past the million-dollar mark, with various reports placing it between $977,000 and $1.08 million . Even the median price for a unit is now hovering between $670,000 and $775,000 . This rapid appreciation has pushed the dream of a standalone house with a backyard out of reach for an entire generation of buyers. Extreme Rental Stress: The rental market is arguably in an even more critical state. An astonishing 78% of Brisbane renters are experiencing financial stress , meaning they spend more than 30% of their income just to keep a roof over their heads. With vacancy rates at a critically low 0.9-1.0% , landlords hold all the cards, and finding a suitable, affordable rental has become a competitive sport. Mortgage Pressure: It’s not just renters feeling the pinch. Nearly 38% of mortgage holders in Brisbane are also in financial stress , grappling with higher interest rates and the sheer size of their home loans relative to their incomes. This isn't a temporary blip; it's a structural crisis. For decades, our city has expanded outwards, but we've failed to adequately increase density in our established, well-connected suburbs. The result is a chronic undersupply of homes where people actually want to live—close to jobs, schools, public transport, and community hubs. This is the problem the Grattan Institute’s plan aims to solve head-on. A Radical Solution: Unlocking Brisbane's Suburbs with Upzoning The Grattan Institute’s report, "A Housing Policy Revolution," proposes a bold and decisive move to tackle the housing crisis at its source: restrictive zoning laws. For too long, these invisible rules have dictated what can be built and where, effectively putting a cap on housing supply in our most desirable areas. The plan’s core recommendation is to overhaul these planning systems by: Permitting three-storey homes (like townhouses and small apartment blocks) on virtually all residential land in capital cities like Brisbane. Allowing six-storey apartment buildings within 800 metres of major transport hubs and town centres. This is what planners call upzoning . It’s about allowing for slightly more density—not skyscrapers in every suburban street, but thoughtfully designed medium-density housing that can coexist with existing homes. For Brisbane, this is particularly significant. The report highlights that three-quarters or more of residential land in Brisbane is currently zoned for buildings of two storeys or fewer . This has created a "missing middle" in our housing stock. We have sprawling single-family homes on one end and high-rise apartments in the CBD and inner-ring suburbs on the other, but very little in between. This lack of diversity pushes prices up and forces people into housing that doesn’t suit their needs or budget. The potential impact is staggering. The Grattan Institute estimates that these changes could boost housing construction by 67,000 homes per year across Australia, leading to a 12% cut in rents and slashing over $100,000 off the average home price over a decade. It’s a plan designed to make our cities "wealthier, healthier, and more vibrant" by allowing more people to live closer to where they work and play. Of course, such a radical idea has its critics. Concerns about infrastructure capacity—whether our existing water, sewerage, and transport systems can handle more people—are valid. However, as Real Estate Institute of NSW chief Tim McKibbin noted, "when you’re in a crisis you have to look at all available opportunities... There’s going to have to be some brave and unpopular decisions made if we are to solve the housing crisis." Is Government Listening? Policy Shifts in Queensland and Brisbane The good news is that this call for "brave decisions" is not falling on deaf ears. Both the Queensland Government and Brisbane City Council are already taking significant steps to address the housing supply shortage, and their initiatives align closely with the philosophy behind the Grattan Institute's proposal. The state government's "Homes for Queenslanders" plan is a comprehensive strategy aimed at delivering more homes, faster. A key component is the ShapingSEQ 2023 regional plan, which sets ambitious housing supply targets for South East Queensland and promotes density in well-located areas. The government is backing this with a $3.1 billion investment, including a $2 billion Housing Investment Fund to fast-track social and affordable housing projects. We are already seeing the results, with thousands of new homes under construction in Brisbane suburbs like Woolloongabba, Burpengary East, and Joyner . At the local level, Brisbane City Council's Housing Supply Action Plan is directly tackling barriers to development. A key initiative is the Housing Supply Incentive Policy, which offers significant reductions (50-75%) in infrastructure charges for eligible new developments. This is specifically designed to encourage the construction of more diverse housing types, such as smaller apartments and townhouses, which are crucial for improving affordability. These government actions signal a clear shift in thinking. The old model of endless suburban sprawl is being replaced by a focus on smart, sustainable growth. This creates the perfect environment for the Brisbane 3-storey homes concept to flourish, moving it from a radical idea to a practical, government-supported solution. The "Missing Middle" Advantage: Why 3-Storey Homes are a Win-Win So, what does this "missing middle" housing actually look like, and why is it such a powerful tool for affordability? Three-storey townhouses and terrace homes offer a unique blend of benefits that cater perfectly to the needs of first-home buyers, families, and investors. A Game-Changer for Affordability The primary advantage of townhouse construction is its inherent cost-effectiveness. By sharing walls and building on a smaller land footprint, developers can significantly reduce construction costs compared to a traditional detached house. These savings are passed directly on to the buyer, creating a more accessible price point. Furthermore, ownership costs are often lower. The shared-wall design makes them more energy-efficient, leading to smaller utility bills, and shared maintenance responsibilities can reduce the financial burden of upkeep. Smart, Flexible Living for Modern Families A three-storey design offers incredible lifestyle flexibility. The vertical layout allows for a clear separation of living spaces, which is ideal for modern families. Imagine a ground floor with a garage and home office, a second floor for open-plan living and dining, and a third floor dedicated to quiet bedrooms. This layout provides privacy and functionality that a single-level home on a small lot simply can't match. It’s the perfect solution for those who need space but want the convenience and community of an established suburb. A Golden Opportunity for Investors For property investors, three-storey townhouses represent a strategic sweet spot. They are more affordable to acquire than a house but often generate higher rental yields than an apartment. Their broad appeal to a diverse range of tenants—from young professionals to small families and downsizers—ensures consistent demand and low vacancy rates. As Brisbane continues to grow, well-designed townhouses in desirable suburbs are poised for strong capital growth, making them a resilient and profitable addition to any investment portfolio. Brisbane's construction trends are already leaning into this model, with a focus on high-quality, sustainable designs. New townhouse developments increasingly feature luxury finishes, subtropical architectural elements to suit our climate, and community amenities like pools and green spaces, offering a premium lifestyle at an attainable price. Building Our Way Out: How More Townhouses Can Reshape Brisbane Ultimately, the housing crisis is a problem of supply and demand. The solution lies in building more of the right type of homes in the right places. Allowing more Brisbane 3-storey homes to be built across the city directly addresses this challenge. By unlocking the vast potential of our middle-ring suburbs, we can: Dramatically Increase Housing Supply: Releasing the handbrake of restrictive zoning would unleash a wave of "missing middle" development, quickly increasing the number of available homes and easing the intense competition among buyers and renters. Put Downward Pressure on Prices: Basic economics dictates that when supply increases to meet demand, prices stabilize and can even fall. This is the most effective long-term strategy for improving affordable housing in Brisbane . Create More Liveable Communities: Gentle density allows more people to live in established suburbs with existing infrastructure, schools, and amenities. This reduces our reliance on cars, shortens commute times, and fosters vibrant, walkable neighbourhoods where local businesses can thrive. Offer Greater Housing Choice: A more diverse housing stock means more options for everyone, at every stage of life. Whether you're a first-home buyer, a growing family, or an empty nester looking to downsize, a market with a healthy "missing middle" provides choices that fit your lifestyle and budget. This isn't about turning our leafy suburbs into concrete jungles. It's about thoughtful, incremental change that adds to the character and vitality of our communities while making them accessible to more people. It’s about building a more equitable, sustainable, and prosperous future for Brisbane. Seize the Opportunity: Build Your Future with Markon Group The landscape of Brisbane housing is on the cusp of a revolution. The conversation started by the Grattan Institute is gaining momentum, and government policy is already moving to support smarter, denser development. This shift presents a once-in-a-generation opportunity for those ready to embrace the future of urban living. Whether you're a first-home buyer seeking an affordable entry into the market, a family wanting a modern and spacious home in an established suburb, or an investor looking to capitalize on this city-shaping trend, the time to act is now. Don't just watch the change happen—be a part of the solution. The experts at Markon Group specialize in designing and building custom Brisbane 3-storey homes that maximize value, style, and functionality. We understand the nuances of modern townhouse construction and are passionate about creating innovative living spaces that meet the needs of Brisbane families. Contact us today to discuss how we can help you navigate these new opportunities and build the home of your future. Let's build a better Brisbane, together. Contact The Markon Group today: 📍 Location: 20–24 Commerce Drive, Browns Plains, Brisbane 📞 Phone: +61 7 3153 2000 🌐 Website: www.markongroup.com.au ✉️ Email: info@homesbymarkon.com.au Building futures for Queensland families.
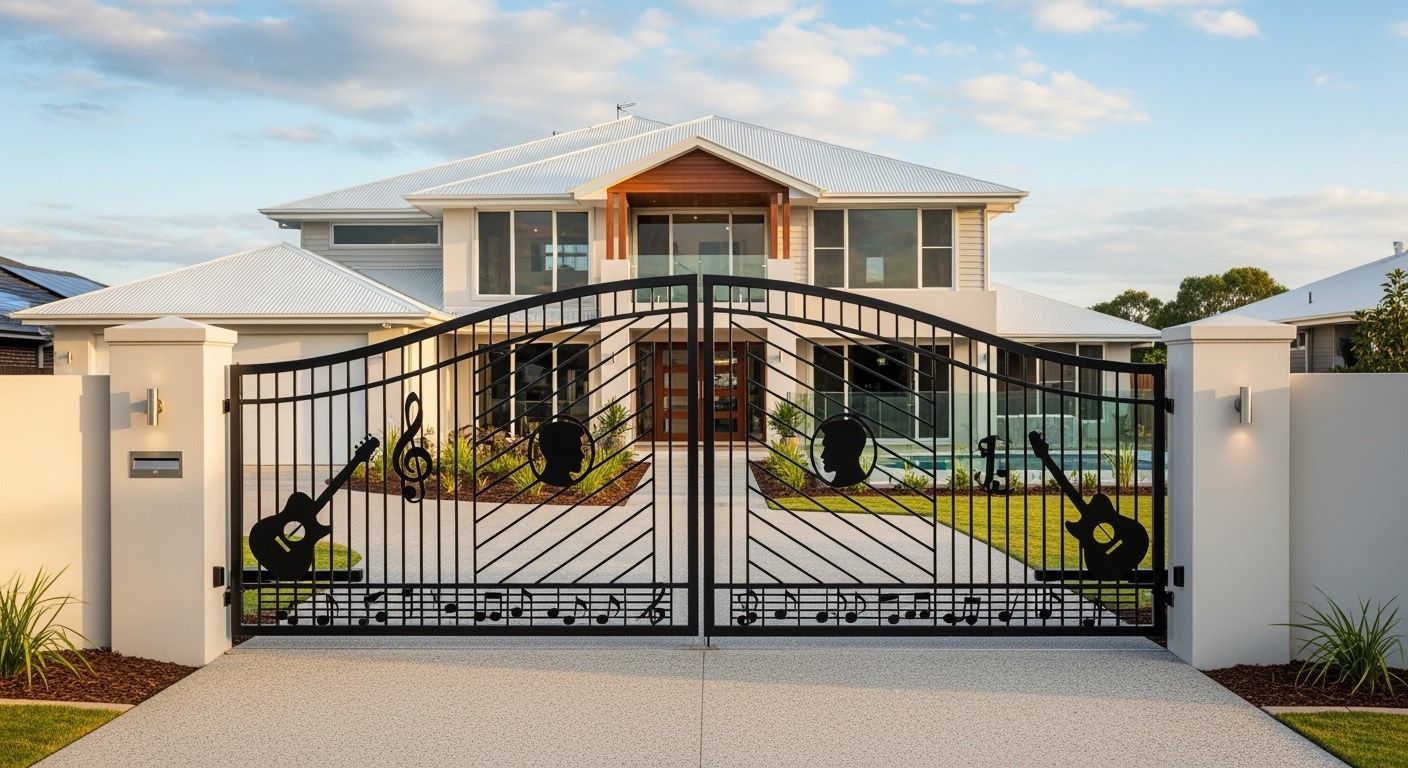
Why Your Front Fence and Gate Matter
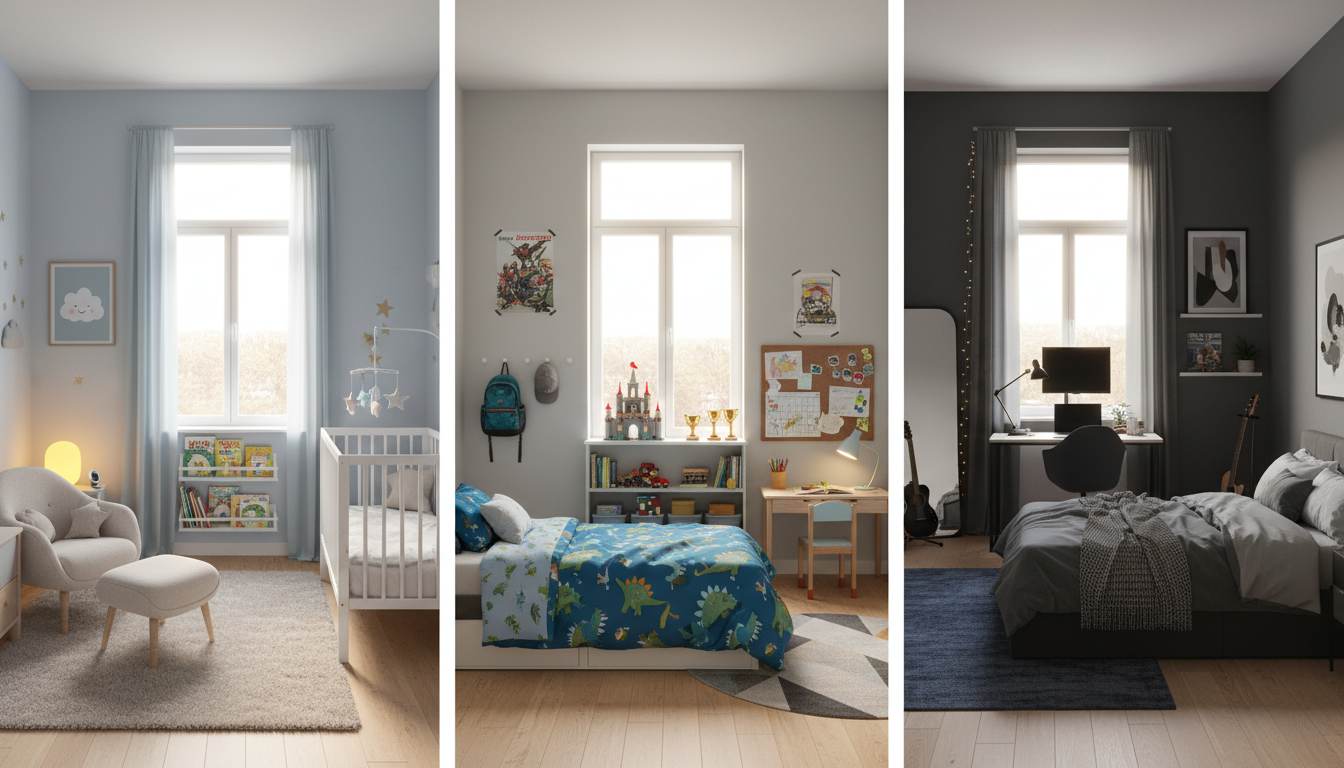
Spaces that adapt from toddler years to teen life Designing a home for a growing family is equal parts joy, logistics, and foresight. What works beautifully when your eldest is in nappies can quickly feel cramped, chaotic, or just plain impractical when you’re juggling homework, sport bags, sleepovers, and P-plate timetables. The secret isn’t more square metres—it’s smarter ones. In Queensland, where the lifestyle is outdoors-forward and the climate encourages cross-breezes and indoor–outdoor living, a family home design should feel easy, breathable, and future-friendly. That’s where adaptable floor plans shine. With the right zoning, storage, multi-use rooms, and acoustic control, you can create a home that evolves seamlessly from toddler-safe to teen-ready. Homes by Markon and The Markon Group specialise in flexible, family-first design—from bespoke residences to custom modular prefabricated buildings—so your home can be purpose-built now and still perfect later. Below, we’ll walk through the core principles and room-by-room strategies to help you plan a child friendly home that grows with your kids. Why Adaptability Matters (More Than You Think) Life stages shift quickly Cot to bunk bed. Duplo to devices. Playdates to study groups. The layout, storage, and sound control that worked for a toddler can unravel when you hit the school years (and again when the P-plater era arrives). Queensland lifestyle = indoor–outdoor flow Alfresco zones, shaded play spaces, and breezy living rooms aren’t just nice-to-have—they’re essential in QLD. Designing for climate means thinking about daylight, heat loads, cross-ventilation, and durable finishes from day one. Better value, lower stress A well-zoned, acoustically considered plan with generous storage prevents costly retrofits. Multi-use rooms and modular joinery let you reconfigure rather than rebuild. The Four Pillars of a Family-First Floor Plan 1) Zoning: Calm Where You Need It, Energy Where You Want It Zoning separates quiet, sleep-friendly spaces from lively, social ones. Think of your home in three layers: Sleep Zone: Bedrooms, nursery, and retreat spaces (ideally grouped together away from the main living hub). Living Zone: Kitchen, dining, family room, alfresco. Utility Zone: Mudroom, laundry, storage walls, garage access, and tech hubs. Key moves: Cluster children’s bedrooms in a “kid wing” with a nearby bathroom and a small retreat or activity nook. Keep the main suite slightly removed—either at the opposite end or on a separate level—to balance privacy and easy access. Position loud functions (kitchen appliances, home gym, media room) away from sleeping areas. Use hallways and pocket doors to create transitional “sound buffers.” In two-storey homes, place primary living downstairs and a kid retreat upstairs adjacent to bedrooms. In single-storey Queenslander-inspired plans, use breezeways, wraparound verandahs, or a central courtyard to create natural separation. 2) Storage: The Backbone of Sanity Family clutter isn’t a flaw—it’s a season of life. Intelligent storage makes it disappear. Entry/Mudroom: Built-in bench, shoe drawers, bag hooks at child height, lockable drop zones for keys/devices, and a washable runner. Living Room: Low-profile joinery with deep drawers, a concealed charging hub, and adjustable shelving that shifts from toy bins to books and board games. Kitchen: A generous butler’s pantry for bulk buying, snack baskets, and small appliances; vertical tray dividers; deep drawers for pots and lunchboxes. Laundry: Tall cabinets for brooms and sports gear, slide-out hampers, overhead drying rails, and an outdoor connection to the clothesline. Bedrooms: Wardrobes with adjustable hanging rails, integrated desk nooks for later years, under-bed drawers or lift-up frames. Garage: Wall-mounted storage panels, ceiling racks for seasonal items, a dedicated sports bay, and a separate garden-tools corner for safety. Design tip: Choose durable, wipeable finishes and protect high-traffic zones with kick plates, corner guards, and hardwearing flooring. 3) Multi-Use Rooms: One Space, Many Lives Rooms that flex with your family are budget-friendly and future-proof. Nursery-to-Study: Plan a neutral, restful room with blackout blinds now; later, swap the cot for a desk and add acoustic pinboards. Playroom-to-Retreat: Start with soft flooring, low storage, and open floor space. Over time, introduce a sofa, desk alcove, and better task lighting for homework or gaming. Guest Room-to-Teen Suite: Include a wardrobe, a compact desk niche, and access to a nearby bathroom. Media Room-to-Multipurpose: Acoustic wall panels, blackout curtains, and a sliding door let it serve as movie den, music room, or quiet study space. Alfresco-to-Outdoor Classroom: Covered deck with ceiling fans, a robust outdoor table, and storage bench seating for art supplies or sports gear—great for craft, homework, or weekend barbecues. Smart joinery is your best ally: wall beds (Murphy beds), pull-out desks, and modular shelving transform spaces within an afternoon. 4) Acoustic Control: Peace Is Practical A quiet home is a calmer home. You don’t need to go full recording studio—just apply a few evidence-based principles. Floor coverings: Use area rugs over hard floors in living and activity zones to absorb sound. Walls and doors: Consider sound-rated plasterboard in shared walls; solid-core doors reduce noise bleed dramatically. Layout: Offset bedroom doors (avoid direct face-to-face with living rooms) and add hallways or nib walls to disrupt sound paths. Soft furnishings: Curtains, upholstered furniture, acoustic pinboards in study zones, and fabric wall panels in media rooms all help. Appliances: Choose low-decibel models and isolate noisy equipment (e.g., position the laundry away from sleep zones). Room-by-Room Adaptability Overlays Below are practical overlays you can apply now, with a path to evolve each space over time. Think of these as modular “layers” you can add or refresh as your children grow. Entry and Mudroom Now: Wall hooks at child height Pull-out shoe drawers and labelled cubbies Durable flooring with a tray for wet shoes A lockable drawer for keys and medication Later: Taller hanging for school blazers and uniforms A charging drawer for devices and a family calendar screen Narrow parcel cupboard with external drop slot for courier deliveries Kitchen and Dining Now: Island bench with waterfall corners for safety Pantry “kids shelf” for snacks and lunch prep Easy-clean surfaces and rounded hardware Later: Breakfast bar with power for laptops Integrated workstation near the pantry for homework supervision Ambient, task, and accent lighting layered for both family dinners and teen gatherings Living Room Now: Low built-ins with deep drawers for toys Corner protected play area with soft rug Recessed TV and cable management out of reach Later: Modular sofa with washable covers Zoned lighting scenes for study vs. movie nights Acoustic rugs and wall decor to reduce echo Kid Retreat / Activity Nook Now: Open shelving boxes with picture labels Oil-based paint or washable low-VOC finishes Floor cushions and a flip-out play mat Later: Built-in desk run with under-shelf LED strips Pinboard walls for timetables and art Sliding door to provide separation during study or sleepovers Bedrooms Now: Cots and toddler beds with soft, rounded furnishings Blockout blinds and dimmable warm lighting Wardrobes with adjustable rails and toy drawers Later: Loft bed with a desk nook underneath for compact rooms Cable-managed study desk and ergonomic chair Reading light, task light, and nightlight on separate circuits Bathrooms Now: Step-stool-friendly vanities and anti-scald mixers Non-slip tiles and easy-clean grout Shelf niches for bath toys Later: Twin basins for morning rush Tall mirror cabinet with internal charging for electric toothbrushes Back-to-wall baths for easier cleaning Laundry Now: Three-bin sorter (lights/darks/sports) Pull-out ironing board and overhead drying rail Direct access to outdoor clothesline to capture breezes Later: Extra washer/dryer stack for sports-heavy households Ventilated drying cabinet for wet seasons Durable benchtop for school bag sorting and badge sewing Home Office / Study Zone Now: Shared study nook near kitchen for supervision Cable ducting and lockable drawers Adjustable stools for different ages Later: Acoustic panels and a sliding door for privacy Task lighting with high CRI for accurate colour rendering Multiple power points and USB-C for device-heavy years Media / Multipurpose Room Now: Soft flooring and blackout curtains for nap-friendly movie sessions Wall reinforcement for future TV or projector mount Toy storage disguised as bench seating Later: Solid-core door for sound isolation Sound-absorbing wall panels and ceiling baffles Seating that transitions from floor cushions to tiered lounges Outdoor Areas and Pool Now: Shaded alfresco with ceiling fans and a durable dining table Synthetic or hardy turf play patches and scooter loops Storage bench for balls and outdoor toys Later: BBQ station with bar fridge and lockable knife drawer Outdoor screen for movie nights Herb gardens for science projects and cooking If you’re including a pool, ensure it has glass fencing or a government certified fence that meets Queensland safety standards. A frameless glass fence offers clear sightlines from the kitchen and alfresco, supports supervision, and visually enlarges your yard. Roofing note: For thermal performance and longevity in Queensland’s sun, a white Colorbond roof reflects heat and helps keep the home cooler. Pair with appropriate insulation and ventilation for best results. Layout Patterns That Work for Queensland Families Pavilion Style with Courtyard Separate living, sleep, and utility pavilions around a protected courtyard. Sliding doors enable flow, while each pavilion can be closed off for quiet time or aircon efficiency. L-Shape with Northern Alfresco Wrap living spaces along the northern edge for winter sun; deep eaves and a covered alfresco temper summer heat. Bedrooms form the shorter leg of the L for separation. Upstairs Kid Wing Kids’ bedrooms and a retreat upstairs; primary suite on ground near a nursery that later becomes a study. Keeps noise contained and gives everyone a little independence. Linear Breezeway A central breezeway aligns windows and doors to harness cross-ventilation. Play areas and living spaces spill onto the alfresco for year-round usability. Homes by Markon can tailor any of these patterns, or design a bespoke hybrid that fits your block, outlook, and family rhythm. Safety and Durability: Ready for Real Life Rounded corners on benchtops and joinery, especially at toddler height Matte, low-glare finishes to hide smudges and reduce visual noise Slip-resistant tiles in wet areas and near exterior thresholds Hardwearing flooring: hybrid planks, engineered timber, or porcelain tiles with large-format rugs Child locks where needed now, concealed later Window furnishings with cordless mechanisms Zoned air conditioning with lockable controls Climate-Savvy Comfort: Light, Shade, Breeze Orientation: Position living areas to maximise winter sun while shading them in summer using eaves, screens, and planting. Cross-Ventilation: Align openings to promote breeze paths; consider louvres with insect screens. Glazing: Use performance glazing and external shading on east/west windows. Insulation: Pair roof, wall, and slab insulation with that high-performing white Colorbond roof. Fans + AC: Ceiling fans reduce reliance on cooling; treat AC as the backup for peak heat. Tech That Helps (Without Taking Over) Family command centre: A small screen or pinned board for schedules, chores, and reminders near the kitchen. Smart lighting scenes: “Homework,” “Movie,” and “Night” modes simplify daily routines. Mesh Wi-Fi: Even coverage across bedrooms, alfresco, and retreat spaces. Device charging drawers: Keeps benches tidy and devices central for supervision. Future wiring: Pre-wire for data, speakers, and security to avoid retrofits. Budget-Savvy Flexibility: Where to Spend, Where to Save Spend on: Layout, zoning, and acoustic envelope (solid-core doors, thoughtful wall construction) Built-in storage, especially in the mudroom, pantry, laundry, and living room Durable surfaces and hardware (hinges, runners, and handles that last) Orientation and passive design; the white Colorbond roof and insulation package Save on: Freestanding furniture you can upgrade later Modular shelving and wall systems that evolve with needs Simple, timeless base finishes with personality added via changeable decor Two Sample Family-Focused Floor Plan Concepts The Convertible Courtyard Home (Single Storey) Sleep wing: Three kids’ bedrooms grouped with a shared bathroom; a nearby “quiet pod” that transitions from nursery to study. Main suite: Opposite side for privacy; short walk to living zone. Living core: Kitchen with butler’s pantry, dining, and family space opening to a shaded alfresco. Utility spine: Mudroom linking garage to pantry and laundry; storage wall along the hall. Media/multipurpose: Close to living but with a sliding, sound-rated door. Pool: Positioned for visibility from kitchen and alfresco with a glass fence for safety and sightlines. Roof: White Colorbond with generous eaves. The Upstairs Kid Retreat (Two Storey) Ground: Open-plan living with sightlines to the backyard and pool; guest/transition room that becomes a study; laundry and mudroom by the garage. Upper: Three kids’ rooms around a central retreat for homework and hangouts; bathroom with separate WC; linen and games storage. Primary suite: Ground level sanctuary with outlook to a private garden. Acoustic focus: Solid-core doors to retreat and media; rugs and panels throughout. Outdoor living: Ceiling fans, BBQ station, lockable storage. Pool: Glass-fenced, visible from kitchen and living for passive supervision. Roof: White Colorbond, insulated, with solar provision. Common Mistakes to Avoid Bedroom doors opening directly to noisy living spaces Underestimating storage (especially for sports gear and school clutter) Skipping acoustic measures—thin doors and bare-walled media rooms invite chaos Overly custom toddler solutions that don’t translate to teen years Ignoring supervision lines from the kitchen to play areas and the pool Forgetting breezes—blocked cross-ventilation undermines comfort in QLD How The Markon Group Helps You Get It Right As a custom home builder, The Markon Group focuses on layouts that adapt without compromise—zoning that makes sense, storage you’ll actually use, and multi-use rooms that truly transform. Homes by Markon extends that expertise into turnkey family homes across Queensland, and The Markon Group also designs and imports custom built modular prefabricated buildings if you’re seeking a faster, flexible path to move-in. Collaborative design workshops to map your family’s routine, hobbies, and future needs Room-by-room adaptability overlays built into your plans from the start Acoustic and storage strategies tailored to your budget Climate-responsive design with passive cooling, cross-breeze pathways, and a white Colorbond roof as standard for heat reflection Pool planning that integrates glass or government certified fencing for safety and supervision Ready to Plan a Home That Grows With Your Kids? If you’re exploring a child friendly home with an adaptable floor plan—especially for Queensland’s lifestyle—Homes by Markon can help you shape spaces that feel effortless now and still work brilliantly in five, ten, or fifteen years. Explore your zoning options and future-friendly layouts Decide which rooms should be multi-use and how they’ll transform over time Get practical storage plans for mudrooms, pantries, and living areas Balance acoustics, comfort, and style so every room feels right for its moment Customise a flexible family plan with Homes by Markon. Contact The Markon Group today: 📍 Location: 20–24 Commerce Drive, Browns Plains, Brisbane 📞 Phone: +61 7 3153 2000 🌐 Website: www.markongroup.com.au ✉️ Email: info@homesbymarkon.com.au Building futures for Queensland families.
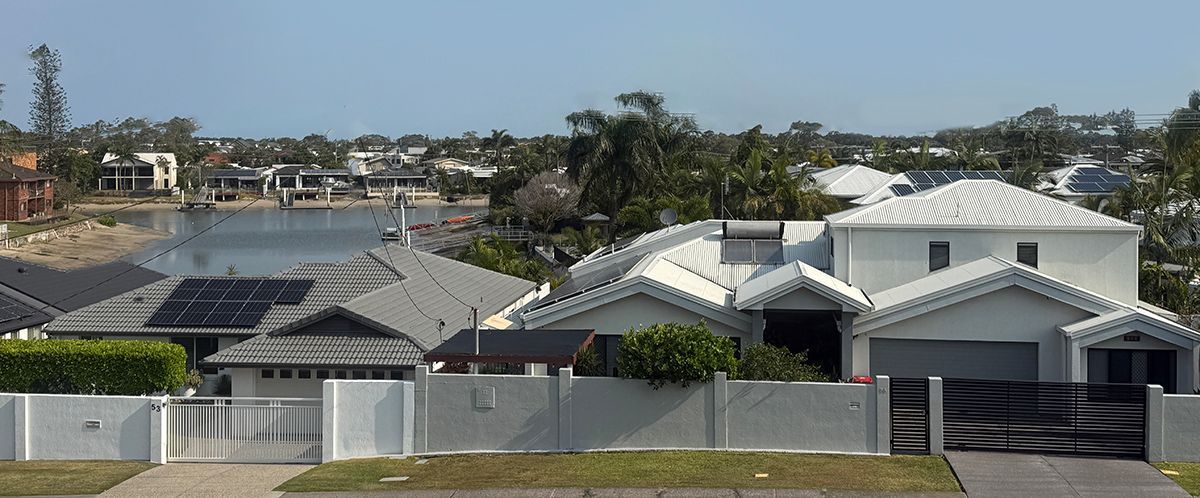
The material shift behind modern Queensland streetscapes If you’ve just arrived in Queensland from Melbourne or Sydney, your eyes probably told you something before your brain did: the roofs are different. In southern suburbs, terracotta and concrete tiles have long defined the skyline. In Brisbane, the Gold Coast, and much of QLD, the look is brighter and lighter—sleek, white Colorbond roofs stretching from street to street. That change isn’t a fad. It’s a practical response to Queensland’s climate, building practices, and energy-conscious lifestyle. This guide unpacks why white Colorbond is the expected norm in QLD, what it means for heat, weight, maintenance, acoustics and storm resistance, and—crucially—why a white Colorbond roof is the easiest, most secure platform for solar. We’ll cover the “re‑education” many southern homeowners go through, give you a plain‑English comparison of “Colorbond vs tile roof QLD,” highlight “modern roofing trends Brisbane,” and share roof replacement tips if you’re planning a “roof replacement Gold Coast.” Throughout, we’ll reference how The Markon Group and Homes by Markon can help, whether you’re building custom, modular/prefabricated, or upgrading an existing home. Why tiles made sense down south—and why QLD moved on Southern cities embraced tiles because they suit heritage styles, steep pitches, and cooler climates where thermal mass matters differently. Tiles look traditional and can last. But move north and the priorities change: More intense sun and longer hot seasons Coastal exposure and high‑wind events A preference for low‑pitch, wide‑eave roof forms Stronger emphasis on energy efficiency and solar integration In that context, a white Colorbond roof isn’t just a style choice; it’s a systems choice that influences comfort, resilience, and the ease of going solar. The big shift: why white Colorbond is standard in Queensland Heat management: a cooler, brighter roof White reflects heat. A white Colorbond roof reflects a large share of solar radiation, reducing heat transfer into your roof space. Pair that with reflective sarking and ceiling insulation and you get a noticeably cooler home and lower air‑conditioning loads in summer. Less heat soak equals lower running costs. In practice, many Brisbane and Gold Coast homes with white Colorbond report improved comfort and reduced energy bills compared with darker tiles or metal. Weight and structure: light is liberating Tiles are heavy. Concrete or terracotta tiles can be 50–90 kg/m². White Colorbond roof sheeting is a fraction of that. Lighter roofs reduce structural loads, which is a big advantage for older timber homes and for modular prefabricated buildings designed and imported by The Markon Group. Easier renovations and transport. Lightweight roofing simplifies roof replacement, allows for design flexibility, and can reduce engineering reinforcement costs. Maintenance and durability: fewer headaches Tiles crack, shift, and grow moss, especially with age or hail. Colorbond resists cracking and, with correct detailing, handles coastal weather well. White finishes with modern coatings are designed for Australian conditions and predictable maintenance cycles. Acoustics: quieter than you think “Metal roofs are noisy” is mostly a myth with modern construction. With the right underlay, sarking, and insulation, rain noise is well controlled. In many cases, a well‑built white Colorbond roof performs acoustically on par with tiles. Storm and wind resilience Continuous sheeting + engineered fixings = excellent wind performance. Correctly installed white Colorbond systems can be designed to meet cyclonic/wind requirements common along the QLD coast, where individual tiles can sometimes be more vulnerable to uplift if not specially secured. Streetscape and modern design White Colorbond delivers a clean, cohesive look that aligns with contemporary QLD architecture and helps mitigate heat build‑up at a micro‑climate level. It also pairs perfectly with solar—more on that shortly. Visual guide: roof cross‑section (tiles vs white Colorbond) Tiled roof cross‑section External tiles (terracotta or concrete) Timber battens fixed to rafters/trusses Optional sarking (varies by era) Roof cavity with bulk insulation (varies by home) Ceiling lining White Colorbond roof cross‑section External Colorbond sheeting (white profile) Continuous reflective sarking/underlay Purlins fixed to trusses/rafters Roof cavity with bulk insulation Ceiling lining Key differences: Colorbond provides continuous weatherproofing; tiles rely on overlapping units over battens. Reflective sarking is particularly effective under metal sheeting. Lightweight sheeting alters structural and installation dynamics, which becomes very important for solar mounting and long‑term weather tightness. The solar advantage: why white Colorbond is the easiest, most secure platform for PV Homeowners across Brisbane and the Gold Coast are covering roofs with solar. White Colorbond makes that easier, faster, and more robust than tile—while also adding a surprising bonus: the solar array itself helps cool and quiet the roof beneath. 1) Easier, cleaner mounting with fewer penetrations Clamp‑on systems. Many Colorbond profiles—like standing seam or concealed‑fix profiles (often colloquially referred to with terms like “Klip‑Lok”)—can accept non‑penetrating clamp systems that grip the sheet ribs. This means: Fewer or no penetrations through the sheet Faster installation Lower leak risk Standardized rails and hardware. Metal roof solar racking systems are mature and widely used in QLD. Installers quickly locate purlins, clamp rails, and set panel arrays with minimal disruption. Tile challenges avoided. Tiles often need individual tile grinding/notching, hook brackets, or replacement tiles with flashings, creating multiple penetrations and potential weak points. On older tiled roofs, breakage during install is common—slowing installers and adding cost. Bottom line: On a white Colorbond roof, solar is typically a simpler, neater job with fewer leak paths and less mess. 2) Stronger and more secure under QLD winds Engineered fixings and continuous sheeting. Properly specified clamps and fasteners provide excellent uplift resistance when installed to engineering and manufacturer guidance. Wind region compliance. Installers can design and certify arrays to relevant wind standards (e.g., AS/NZS 1170.2 wind actions) for Brisbane and coastal zones on the Gold Coast. The continuity of the metal surface and access to purlins/trusses make robust load paths more straightforward. Less point damage risk. Tiles can crack under foot or during bracket install; Colorbond’s uniform surface reduces these risks when installers use safe access and spread loads appropriately. Result: A well‑mounted solar array on a white Colorbond roof performs confidently in Queensland’s storm seasons. 3) Better long‑term weatherproofing Fewer penetrations = fewer potential leaks. High‑quality gaskets and seals at any necessary penetrations (for example, conduit or cable entry points) sustain weather tightness when done to standard. Cleaner detailing around ridges, hips, and valleys than the equivalent tile bracket routes. For roof replacement Gold Coast projects, this is a compelling reason to switch to white Colorbond before adding solar. 4) Cooler panels, cooler homes: the double benefit of white + the PV air gap White roofs run cooler. A white Colorbond surface reduces roof temperature compared with dark roofing. Lower roof surface temperatures help keep the air under panels cooler. Solar panels prefer cool conditions. Most panels lose a small percentage of output for every degree the cells heat up (the temperature coefficient). By keeping panel surrounds cooler, you help them operate closer to their rated efficiency. The ventilated air gap under panels acts like a radiant barrier. Panels shade the roof and create a small plenum where air can flow. This space: Reduces heat transfer into the roof sheeting Adds an extra “layer” of thermal resistance Can marginally dampen rain noise, because rails and panels interrupt direct impact and diffuse sound In plain terms: a white Colorbond roof plus solar panels is a one‑two punch for summer comfort—your roof runs cooler, your panels run happier, and your living spaces feel the difference. Note on reflectivity and PV performance: On monofacial panels, the main gain is from cooler operating temperatures (and the shade effect on the roof). On bifacial panels, a bright, reflective white roof can also increase rear‑side irradiance slightly, adding a modest energy bump in certain configurations. 5) Safety, access, and serviceability Neater cable management. Rails and clamps often integrate tidy cable pathways and secure attachment points for isolators and microinverters. Defined walk zones. It’s easier to establish safe access routes on a metal roof during installation and future maintenance. Clean earthing/bonding. Metal roofing systems are well understood by solar installers for bonding and earthing, subject to local standards and electrical codes. 6) Coastal durability: details that matter Correct fasteners and brackets. In coastal parts of the Gold Coast and Brisbane bayside, use corrosion‑resistant hardware (e.g., stainless steel 304/316, or hardware approved for your roof’s corrosion category). Avoid galvanic corrosion. Your installer should ensure compatibility between the Colorbond coating and any mounting system, using approved clamps, isolating pads, and correct washers. Regular washing. Rain generally cleans the roof, but in salt‑spray zones, periodic fresh water rinses (particularly sheltered areas) extend finish life—good for both the roof and the array. Homes by Markon can coordinate roofing and solar installers to meet QLD standards (such as AS/NZS 5033 for PV array installation) and best practice for coastal conditions. Practical Q&A: solar on white Colorbond in QLD Will clamps void the roof warranty? When approved clamp systems are used as per the roofing manufacturer’s recommendations, warranties are typically maintained. Always confirm product compatibility before installation. Is low‑pitch okay? Yes—many white Colorbond roofs in QLD are low‑pitch and work well with solar. Racking can adjust panel tilt where needed, though most residential installs follow the roof pitch. Is glare an issue with a white roof? White Colorbond is engineered with finishes to manage reflectivity while delivering high solar heat reflection. In practice, everyday glare issues are uncommon in suburban contexts, and solar panels themselves reduce reflectivity over much of the roof area. What about birds? Bird mesh or edge guards are often fitted around arrays to minimize nesting and debris under panels. It protects cables and helps airflow. Microinverters or string inverters? Both work. Microinverters/DC optimizers can improve performance on complex roofs with partial shade and simplify expansion. String inverters remain very common for straightforward arrays. Homes by Markon can help you weigh cost, performance, and maintenance factors. Modern roofing trends Brisbane: integrating solar from day one “Modern roofing trends Brisbane” increasingly means planning the roof as an energy platform: Solar‑ready truss and purlin layouts for ideal racking spans Preplanned conduit routes, isolator locations, and inverter positions Roof profiles selected for clamp‑on solar compatibility White Colorbond specified to improve thermal comfort and panel life Optional battery cabinets and EV charger circuitry positioned for future upgrades For custom homes and modular prefabricated buildings, The Markon Group designs with these in mind from the outset—so your roof arrives ready for solar, with minimal on‑site modification. Step‑by‑step: a smooth roof replacement + solar upgrade on the Gold Coast Consultation and assessment Homes by Markon evaluates your current tiled roof, structure, and solar goals. If you have a pool, we’ll also keep in mind sightlines and safety—Queensland requires compliant pool fencing; we recommend clear glass fences or government‑certified alternatives to keep your outlook open and your site compliant. 2. Engineering and specification Confirm roof structure for lightweight white Colorbond sheeting. Select a roof profile compatible with clamp‑on racking. Specify reflective sarking, ceiling insulation values, and ventilation. Choose corrosion‑appropriate fasteners for your location. Size and position the solar array with wind region considerations. 3. Removal and preparation Carefully remove tiles and battens, repair any timber as needed. Install sarking and purlins/trusses to spec for the new sheeting. 4. Install the white Colorbond roof Fit sheets, flashings, and gutters for a clean, weather‑tight finish. Confirm walk zones and access points for the solar team. 5. Mount the solar array Attach racking using approved clamps—minimal or no penetrations. Mount panels, run cables, install isolators and inverter(s). Commission the system in line with QLD electrical standards. 6. Final checks and handover Verify roof and array fasteners, seals, and earthing. Provide documentation: warranties, manuals, and maintenance tips. Outcome: A bright, energy‑efficient roofscape that’s cooler inside, quiet in the rain, storm‑ready, and solar‑productive—exactly what Queensland living calls for. Lifecycle cost and value: Colorbond vs tile roof QLD with solar Installation efficiency: Metal roofing paired with clamp‑on solar mounts reduces install time and labour complexity—costs you feel upfront. Energy savings: White Colorbond + solar lowers cooling loads and puts more solar yield to work by moderating panel temperatures and shading the roof. Maintenance: Fewer tile repairs, fewer leak paths, straightforward solar service access. Resale appeal: In Brisbane and the Gold Coast, buyers expect white Colorbond and appreciate integrated, well‑mounted solar. Ask your builder for a whole‑of‑life comparison that includes energy savings, maintenance schedules, and warranty coverage specific to your suburb and wind/corrosion zone. Design tips if you love tile aesthetics You can keep the character you love while using materials that suit QLD: Consider roof profiles that soften the look with subtle shadow lines. Balance bright white roofs with warm cladding, timber detailing, and landscaping. Use glazing, eaves, and verandahs to create the classic Queenslander feel—now with modern performance. Homes by Markon can blend your southern style preferences with white Colorbond practicality. Cross‑section visual: solar over white Colorbond (described) Picture a side‑view slice through your roof: Top layer: solar panels on aluminium rails Mounting: clamp brackets gripping the raised ribs of a white Colorbond sheet (no penetrations at each clamp) Air gap: a ventilated space between panel and roof, allowing airflow that cools both the panel and roof surface Under the sheet: reflective sarking, then purlins/trusses Ceiling cavity: bulk insulation above your ceiling lining What this diagram makes clear: the white roof reflects heat, the panels shade the sheet, the air gap ventilates, and the underlay/insulation complete the thermal and acoustic package. Quick myth‑busting “Metal roofs get hotter than tiles.” Not when they’re white. White Colorbond reflects significantly more heat than dark tiles or darker metal roofs. With reflective sarking and insulation, indoor comfort is excellent. “Solar is hard to install on metal roofs.” It’s usually easier. Clamp‑on racking is fast, secure, and clean—one reason installers love white Colorbond. “Rain will be deafening under panels.” The combination of panels + rails + underlay helps diffuse sound. In a well‑built system, rain noise is minor. Where The Markon Group and Homes by Markon fit in The Markon Group is a custom home builder that also designs and imports custom built modular prefabricated buildings. White Colorbond roofing is integrated into these designs to suit Queensland’s climate and to make solar adoption seamless—whether factory‑fitted or installed on site. Homes by Markon delivers new builds and roof upgrade projects ready for solar from day one. We coordinate roofing, insulation, ventilation, and solar so you get a complete, high‑performance roof system. If your project includes a pool, we’ll guide you on compliant fencing—glass fences or other government‑certified solutions—so the whole outdoor setting looks and works like a modern QLD home should. Your next step: explore your options with a friendly expert Whether you’re weighing “Colorbond vs tile roof QLD,” browsing “modern roofing trends Brisbane,” or planning a “roof replacement Gold Coast” that includes solar, you don’t have to figure it out alone. A quick design chat can clarify roof profiles, white finishes, insulation, ventilation, solar array placement, wind compliance, and coastal hardware choices tailored to your address. Friendly next step: Connect with Homes by Markon to review your roof and solar plan. We’ll show you how a white Colorbond roof—paired with the right solar hardware—keeps your home cooler, quieter, and more resilient, while making installation faster and more secure. Contact The Markon Group today: 📍 Location: 20–24 Commerce Drive, Browns Plains, Brisbane 📞 Phone: +61 7 3153 2000 🌐 Website: www.markongroup.com.au ✉️ Email: info@homesbymarkon.com.au Building futures for Queensland families.
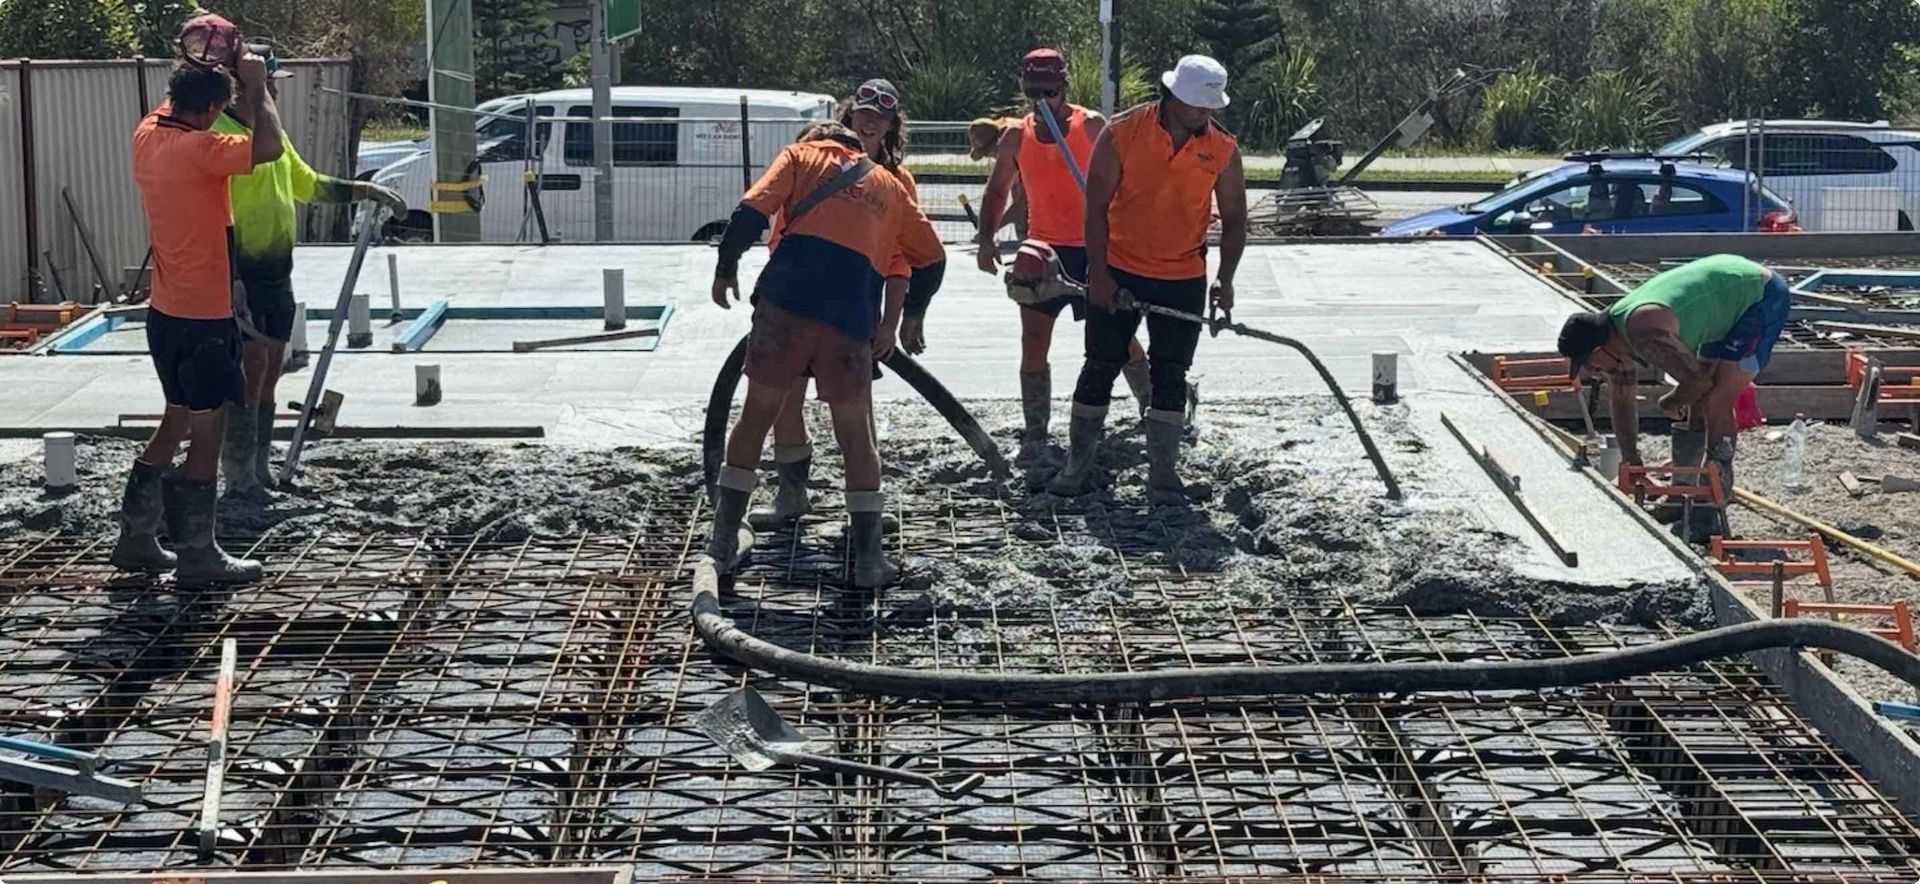
For Brisbane and South-East Queensland homebuyers seeking a stronger slab, a tidier site, and a more sustainable build—without unnecessary complexity or hype. If you’re planning a new home in Brisbane or across South-East Queensland, here’s welcome news: there’s a foundation system that’s smarter to install, tidier on site, and designed for strength and long-term performance—while also reducing waste. It’s called the Biax foundation system, and it’s a modern waffle-pod alternative that replaces polystyrene foam with recycled-plastic pods. At The Markon Group, we build family homes for Queensland conditions. We’ve used traditional polystyrene waffle slabs for years because, for their time, they were a reliable, cost-effective solution. But materials evolve, our industry evolves, and so do we. Biax retains the good bits of waffle slabs (reinforced ribs in a grid that delivers strength) but solves many day-to-day headaches and environmental drawbacks that come with cutting, carting, storing, and cleaning up foam. This article explains—in plain English—what Biax is, why we’re switching, and how it benefits you as a homebuyer in Brisbane/SEQ. You’ll see how it can help deliver a stiffer, cleaner, often more efficient slab stage and support a home that feels solid underfoot from day one. As part of our broader commitment to smarter, future-ready building, we continue to design each slab to suit its site, work with qualified engineers and certifiers, and keep our builds practical from the ground up. At a glance: Why Biax with The Markon Group Stronger-feeling, more rigid slab design that can help reduce cosmetic cracking over time A cleaner, tidier slab stage—no foam cutting, fewer off-cuts, and minimal wind-blown debris Recycled-plastic pods—less landfill, more sustainability Lightweight, click-together components that help speed install in many cases More compact storage on busy Brisbane/SEQ sites; easier logistics and fewer deliveries A proven waffle pod alternative designed for Australian conditions Each house slab engineered for your block and soil—no one-size-fits-all shortcuts Built by a family-run team that values craftsmanship, honest advice, and long-term performance What is Biax? A simple explanation If you’ve heard the term “waffle slab,” you’re already familiar with the basic idea. Think of your foundation as a concrete floor with a hidden grid of ribs—like a waffle—providing strength and stiffness. Traditional systems use polystyrene foam blocks to form the voids between these ribs. Biax uses recycled-plastic pods to create those voids instead. The pods sit on prepared ground in a neat grid. Reinforcing steel is placed as specified by the engineer. Concrete is poured over and around the pods to form a ribbed slab. When it cures, you have a strong, reinforced foundation for your home. Why does this matter? Because that hidden grid is what gives the slab its strength and feel underfoot. Biax’s system is designed for a tighter, more consistent grid setup—helping the slab feel more rigid and reducing the cosmetic cracks that can show up later in life. The pods are engineered to nest compactly for easy transport and storage, and they “click” together for consistent spacing on site. There’s no foam cutting, which means a tidier site and fewer mess headaches. In short, Biax is a modern take on a proven idea. It’s a waffle pod alternative that keeps the structural concept homeowners and engineers know—while improving day-to-day practicality and sustainability. Why we’re switching now We’ll say it upfront: traditional polystyrene waffle-pod slabs have served Brisbane and SEQ very well. They helped speed up residential building and offered a reliable way to form and pour house slabs at scale. But foam has downsides that any homeowner or site neighbour has likely seen: Bulk and storage challenges: Foam is bulky. On a tight suburban block, big stacks of polystyrene crowd the site and can get in the way. Cutting waste and mess: Foam often needs trimming or cutting, creating off-cuts and tiny beads that cling to everything. Wind-blown debris: Polystyrene fragments can blow around in Brisbane’s afternoon breezes or gusty summer storms, littering the street or nearby yards. Recycling challenges: Foam isn’t straightforward to repurpose at the volumes generated on typical residential sites. Biax retains the good bits of a waffle slab—reinforced ribs in a grid for strength—while addressing those practical pain points. The recycled-plastic pods nest for compact delivery, click together to hold consistent spacing, and eliminate foam cutting. As builders, we see that as a win for site cleanliness, crew safety, neighbourhood tidiness, and sustainability. As a homeowner, you get a sturdily engineered slab with less waste and a cleaner build environment. For The Markon Group, this is one more step in our broader approach to smarter building: pairing sound engineering with practical, tidy, future-ready methods we can stand behind for Brisbane/SEQ families. Benefits for homebuyers 1) Stronger, more rigid foundation Think of your slab like a chessboard of hidden beams. The closer and more consistent those beams are, the stiffer the floor feels. Biax is designed around a tighter, repeatable grid layout that helps reduce flex. In everyday life, that can mean: A more solid, quieter feel underfoot Fewer hairline or cosmetic cracks over time Better long-term performance across the home’s footprint A quick term explained: rib spacing refers to the distance between those hidden concrete “beams.” Closer spacing generally makes the slab stiffer—just as adding extra joists to a deck makes the deck feel more solid. Because each home is engineered for its site, your slab’s exact rib pattern and reinforcement will be tailored to soil type, loads, and design features (like step-downs for patios and garages). The big takeaway is simple: many Biax slabs feel sturdier from the start and stand up well as the house settles into its environment. 2) Cost-effective in the real world On paper, pods are just one part of the foundation budget. On site, the system can influence time, logistics, and wasted materials. With Biax: Pods are lightweight and nest efficiently, often reducing deliveries. The click-together system and predictable grid can help speed setup. There’s no foam cutting, so less time spent tidying—and fewer off-cuts to handle. The design approach can reduce concrete volume in many cases (depending on site prep and engineering) and streamline the pour. All up, the total-of-project picture can be very competitive. We’re careful not to overpromise—final costs always depend on your soil conditions, engineering, and design—but in many projects we see the efficiencies of Biax help offset material differences and create a smoother slab stage. 3) Cleaner, faster sites Ask any neighbour who’s seen foam beads drifting down the street after a windy day: site tidiness matters. With Biax: There’s no cutting foam, so minimal mess and fewer off-cuts Pods are robust and designed to lock together, reducing movement during setup The layout stays consistent, which helps reinforcing and services placement Fewer lightweight bits blowing around during summer storms For you, that means a tidier experience on your block and a more predictable slab timeline. 4) Sustainability you can see Biax pods are made from recycled plastic and are themselves recyclable. By swapping polystyrene for a recycled, durable void-former, we reduce foam waste, avoid wind-blown debris, and support a cleaner site from day one. It’s a practical, immediate way to build more sustainably in Brisbane/SEQ without adding complexity for you or the crew. 5) Safety and logistics, simplified Lightweight, nestable components mean easier handling and fewer deliveries—handy on tight urban sites or lots with limited access. The pods’ grippy, stackable design helps keep everything in its place, even when the weather isn’t cooperating. In Brisbane’s wet season, those small details can make a big difference to safety, productivity, and schedule predictability. Built for Brisbane and South-East Queensland SEQ soils are varied. Some blocks have reactive clays that swell and shrink with moisture; coastal sites can be sandy; hillside blocks can present their own drainage and movement considerations. Add in summer storms, stormwater surges, and windy afternoons—and foundations in our region need to be carefully designed and built. Here’s how we handle this, simply and transparently: Site-specific engineering: Every house slab Brisbane or SEQ project we deliver is engineered for your soil, loads, and design. Biax is a foundation system QLD homeowners can adopt with confidence because the engineering comes first. Qualified professionals: We work with experienced structural engineers and certifiers who understand local conditions. Practical drainage and site prep: Good slab outcomes start with good site preparation. We focus on compaction, levels, drainage paths, and clean, consistent placement of pods and reinforcement. Build integrations: If your design includes step-downs for patios, a garage, a pool surround, or a future alfresco, we coordinate those details upfront so the slab stage sets you up for a smooth build later. If you’re planning a pool, we ensure glass or government-certified fencing that meets all Queensland safety requirements. This is not engineer-speak; it’s just the right way to build in SEQ. Get the fundamentals right and the rest of the home benefits. How Biax fits into the rest of your home Foundations are part of a bigger story. When we choose a stronger, smarter slab system, it complements the other decisions that make a home comfortable, efficient, and long-lasting: Energy-smart envelopes: Pair your foundation with a white Colorbond roof and thoughtful orientation and shading to help keep interiors cooler in summer. Flooring choices: A more rigid slab provides a solid base beneath tiles, timber, polished concrete, or hybrid flooring—helping finishes look good for longer. Outdoor living: Step-downs, thresholds, and drainage are addressed in design so patios and alfrescos feel integrated from day one. Pools and landscaping: If you’re adding a pool now or later, we plan for compatible levels, pathways, and compliant glass fencing as part of the landscape design. If you’re curious how Biax integrates with your specific design, our team is happy to talk through it during your design consult. You can also explore our Custom Home Design, Energy-Smart Homes, and Slab & Site Preparation resources on our website for deeper context. FAQs Is Biax more expensive? It depends on the total-of-project picture. While line-item prices can vary, the system often reduces wasted materials, deliveries, and on-site fiddling. In many cases, those efficiencies help offset costs and can make the slab stage smoother overall. We’ll price your specific slab after engineering, so you’ll see clear numbers for your site and design. Is it as strong as the old slabs? Yes—your slab is engineered for your home’s loads and soil, just as with traditional systems. The everyday difference you may notice is stiffness: a tighter, more consistent grid can feel more solid underfoot and may help reduce cosmetic cracking over time. Will I notice anything different in daily life? Most homeowners say the house feels quiet and solid underfoot. Over time, you may see fewer hairline cracks in non-structural finishes compared to some conventional slabs—especially in high-sun, high-expansion areas like polished concrete. Results vary by home, but a stiffer slab generally supports a neater finish. Is it environmentally better? Biax pods are made from recycled plastic and are recyclable. The system eliminates foam cutting and reduces wind-blown polystyrene debris, helping keep sites and neighbourhoods cleaner. It’s a practical sustainability step you can see right from slab stage. Does this change my build timeline? Often, yes—in a helpful way. The pod system is designed to click together and hold consistent spacing with minimal trimming, which can make slab prep more predictable. Fewer deliveries and less tidying can also help. Weather still plays a role in SEQ, but Biax supports schedule confidence. Can my design still do X (step-downs, patios, garages, alfrescos)? Yes. Your slab is a bespoke engineered solution. Step-downs, thicker edge beams, garage levels, patios, and alfresco transitions are all standard parts of slab design. We coordinate these details upfront so the build proceeds smoothly. Why choose The Markon Group for a Biax foundation in Brisbane/SEQ Family-run and local: We’re a South-East Queensland builder that treats every home as if it were our own. Experience with both systems: We understand traditional waffle slabs and Biax, so our recommendation is grounded in real-world outcomes. Site-specific engineering: No cookie-cutter slabs—your design and soil come first. Clean, careful builds: Tidy sites, thoughtful logistics, and respectful neighbours. Straight talk, zero hype: We’ll show you the pros, the trade-offs, and the numbers for your block—so you can decide with confidence. Ready to build on a stronger, smarter foundation? Book a design consult with The Markon Group to see how a Biax slab can support your future home. We build across Brisbane and South-East Queensland, and we’d love to help your family plan a home that’s sturdy, efficient, and beautifully practical—starting from the ground up. Ask us about: Your site’s soil and the best foundation approach How Biax integrates with your floor plan, alfresco, and garage Energy-smart design ideas and our white Colorbond roof specification Pools, levels, and compliant glass fencing as part of your landscape plan Homes by Markon—our homebuilding team within The Markon Group—can guide you from concept to keys with clear steps and open communication. Sources & Links Biax — Home: Biax Foundations | 100% Recycled Void Former | Concrete ... Biax — FAQs: Biax — FAQs Biax — News: Rocking the foundations of the building industry: Rocking the foundations of the building industry Biax — News: Biax named one of Australia’s most innovative products: Biax named one of Australia's most innovative products Note: Additional technical information, case studies, and product details are available via the Biax website’s Benefits, Components, and Success Stories sections. Contact The Markon Group today: 📍 Location: 20–24 Commerce Drive, Browns Plains, Brisbane 📞 Phone: +61 7 3153 2000 🌐 Website: www.markongroup.com.au ✉️ Email: info@homesbymarkon.com.au Building futures for Queensland families.
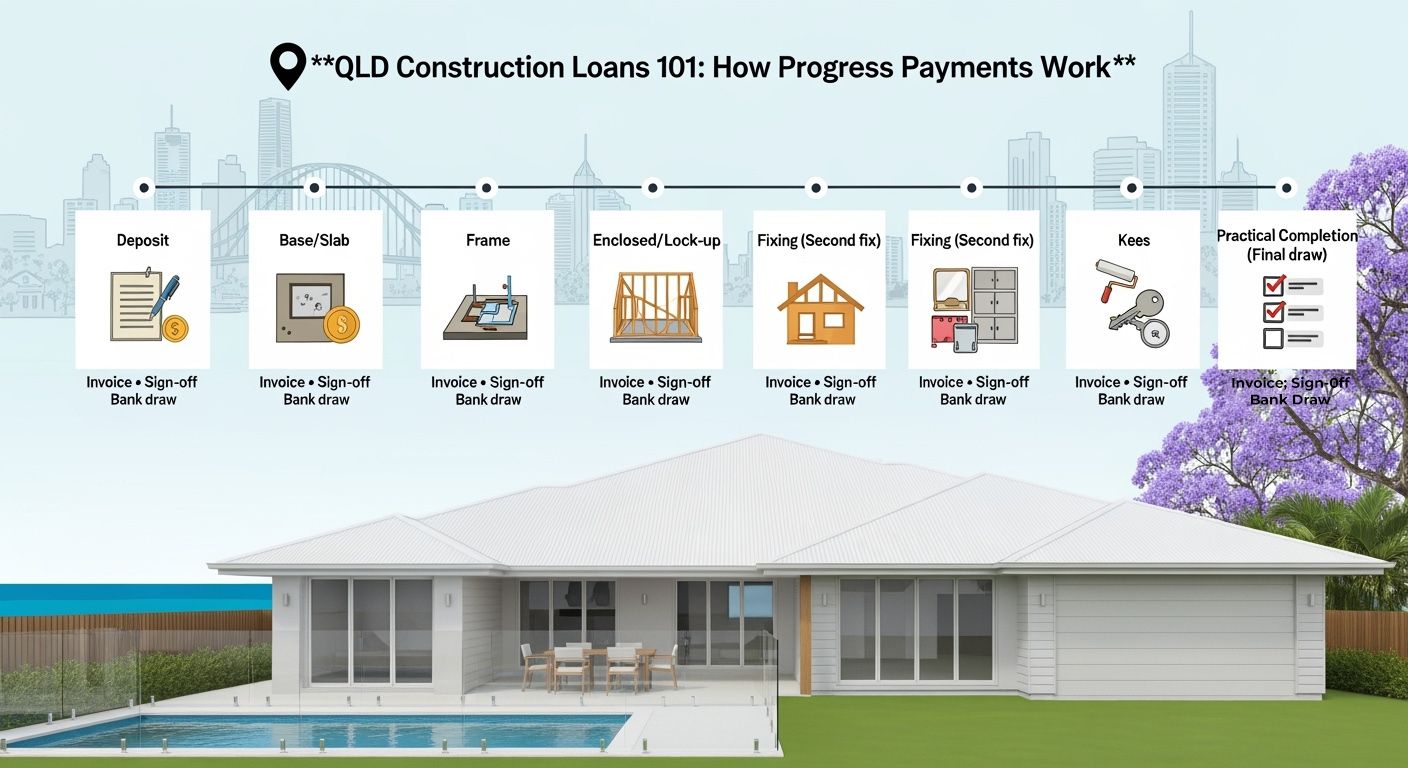
Decode construction lending so your build stays on track. If you’re building in Brisbane, the Gold Coast, or anywhere across Queensland, understanding how construction loans and progress payments work can be the difference between a smooth, on-time build and a stressful, stop–start experience. This deep-dive is written for first home buyers at the consideration stage, demystifying each step from finance pre-approval to the final draw. You’ll learn how timelines actually play out, how lenders release funds, where delays commonly happen—and what you can do right now to keep momentum and protect your budget. Throughout, we’ll also touch on practical design choices for QLD’s climate—like choosing a white colour bond roof for better thermal performance—and essential compliance considerations, including ensuring any pool has a glass fence or a government-certified fence installed and certified before handover. Keywords naturally addressed: construction loan QLD, progress payments Brisbane, building finance Gold Coast. What is a construction loan—and why it’s different A construction loan is a home loan released in stages as your home is built. Instead of getting the entire amount at once, your lender pays your builder at specific milestones (called “progress payments”). You typically make interest-only repayments during construction on the amount drawn so far; after the home is complete, your loan usually converts to standard principal-and-interest. Why first home buyers in QLD should care: You only pay interest on what’s been drawn, which helps cashflow. Lenders rely on a fixed-price building contract and a progress schedule that matches Queensland norms. Each stage is verified before the lender releases funds—this can involve your authorisation, the builder’s invoice, and sometimes a valuation or inspection. In simple terms: the bank pays for completed chunks of work, not promises—and you’re part of the sign-off loop. The end-to-end journey: From pre-approval to final draw 1) Pre-approval: your confidence check Pre-approval is your lender’s early thumbs-up on borrowing capacity. It’s not a blank cheque, but it gives you a working budget for land and build. Expect to provide: ID, payslips, bank statements, and details of any debts Estimate of project costs (land + construction + site costs + contingency) Notes on the type of build (custom home, modular prefabricated, knockdown–rebuild), location (e.g., Brisbane or Gold Coast), and design approach If you’re designing for QLD’s climate—like opting for a white colour bond roof to reflect heat—flag it. Energy-smart designs can reduce running costs, which some lenders view positively. First home buyer essentials: Ask your lender or broker about QLD first home buyer concessions and any current grants. Eligibility and rules change, so confirm the latest. 2) Choose your builder and lock in a fixed-price contract Queensland lenders prefer (and in practice, expect) a fixed-price contract with a clear progress payment schedule that aligns with state rules and industry standards. With The Markon Group (custom home builder) and Homes by Markon (build-ready pathway for clients), you can expect: A detailed scope of works and inclusions list A compliant progress schedule matched to QLD requirements Evidence of insurances (e.g., QBCC Home Warranty Insurance) and builder licences Clear specifications that include climate-smart features like a white colour bond roof as standard advice Considering modular prefabricated? The Markon Group also designs and imports custom-built modular prefabricated buildings. Lenders do fund modular projects. Your contract should clearly outline factory milestones, delivery logistics, and on-site installation stages so lender inspections and draws align with real progress. Pro tip: Get thorough site information early (soil tests, engineering, flood/bushfire overlays). This keeps budgets realistic and reduces valuation surprises. 3) Unconditional approval: the green light to start After your plans, specs, and fixed-price contract are final, the lender moves from pre-approval to unconditional (formal) approval. They’ll typically review: Signed build contract and progress payment schedule Plans, specifications, and any variations Builder licence and insurances (QBCC) On-completion valuation About valuations: The lender values the finished home based on land + construction. If the valuation lands lower than you hoped, The Markon Group can help adjust non-structural specs or inclusions to preserve quality while keeping the valuation within a comfortable range. 4) Land settlement (if applicable) If you’re purchasing land, that portion usually settles first. You’ll pay interest on the land loan while you wait for construction to begin. If you already own land, its equity may form part or all of your deposit. 5) Construction starts: progress payments begin Construction funds are released in stages. While exact names and percentages vary by contract, a typical QLD flow includes: Deposit Base/Slab Frame Enclosed/Lock-up Fixing (second fix) Practical Completion (Final draw) How each draw is released: Builder issues an invoice for the stage You authorise the claim The lender may request an inspection/valuation The lender releases funds to the builder Your role: Keep a simple checklist of what each stage covers (see below) so you can approve claims confidently. If you’re adding a pool, coordinate timing so a glass fence or a government-certified fence is in place and certified prior to handover. 6) Inspections, variations, and keeping momentum Lenders may send a valuer to confirm stage completion. Variations (changes to the contract) can trigger extra checks. To avoid delays: Minimise mid-build variations—batch decisions early (kitchen, bathrooms, flooring, façade, white colour bond roofing). If you must vary, ensure the price and timeline impact are clear and documented. Tell your lender promptly if it changes the contract sum. 7) Practical completion and final draw At practical completion, you’ll do a detailed walkthrough and generate a defect list (if any) with your builder. The builder provides: Compliance certificates (plumbing, electrical, energy efficiency as applicable) Warranties and manuals Pool compliance documentation if a pool is included (glass fence or government-certified fence must be installed and certified prior to handover) Final invoice for the lender’s last draw Once the lender releases the final payment, you receive keys and your loan converts to principal-and-interest (unless otherwise arranged). Progress payment stages: what’s included and what to check Note: Exact stage names and percentages vary by contract type. Always defer to the progress schedule in your signed contract and to QBCC guidelines where applicable. 1, Deposit Purpose: Secures your build slot and covers early work (engineering, surveys, admin). Your checks: Confirm deposit limits and documentation align with your contract. Keep proof of payment. 2, Base/Slab stage Work: Site cut, excavation, footings, slab, initial plumbing groundwork. Your checks: Slab thickness per engineering, termite management system, site drainage setup. 3, Frame stage Work: Structural frame and roof trusses installed. Your checks: Frame layout matches plans; verify prep for a white colour bond roof installation for heat reflection and longevity in QLD conditions. 4, Enclosed/Lock-up stage Work: External walls, windows, external doors, roof and cladding—home is weather-tight. Your checks: Windows/doors installed per spec; roof installed (white colour bond roof), and cladding sealed against weather. 5, Fixing stage (Second fix) Work: Internal linings, cabinetry, skirting, doors, tiling prep, electrical and plumbing fit-off in progress. Your checks: Cabinetry layout and finishes; bathroom waterproofing; lighting and power locations as selected. 6, Practical completion (Final draw) Work: Painting, flooring, final electrical/plumbing, appliances, external works. Pools (if included) must have compliant glass fencing or a government-certified fence installed and certified. Your checks: Thorough walkthrough with a defect list; confirm certificates and warranties; ensure pool compliance documentation is provided before handover. Remember: Lenders may request an inspection at any stage. Build a small time buffer to allow booking, inspection, and reporting. Your cashflow during the build Interest-only repayments: You pay interest on the amount drawn. Costs rise with each stage—plan for the ramp-up. Valuation/inspection fees: Some lenders charge per inspection. Ask for a fee schedule upfront. Rent and living costs: If you’re renting during the build in Brisbane or the Gold Coast, add a conservative buffer for potential weather or supply delays. Variations and upgrades: Keep a 5–10% contingency. Even smart upgrades can impact cashflow. Site and services: Allow for power/water/NBN connections, landscaping, driveway, and fencing (including a pool’s glass fence or government-certified fence if applicable). Pro tip: Early selections reduce variation risk. Lock in kitchen, bathrooms, flooring, façade materials, and confirm white colour bond roofing early. Brisbane and Gold Coast specifics that matter Climate-first design: A white colour bond roof reflects heat, making homes more comfortable with lower cooling costs—especially valuable in Brisbane and Gold Coast summers. Combine with shading, insulation, and cross-ventilation. Overlays and compliance: Flood or bushfire overlays can affect foundations, materials, and site levels. Address early—it can support better valuations and smoother lending. Pools and safety: Plan fencing timelines so pool compliance is achieved before handover. Glass fences are a popular choice for style and visibility; ensure they meet QLD standards and are certified. Suburb comparables: Valuers reference recent sales. If you’re in a fast-developing corridor, relevant comparables help substantiate the on-completion value. Timelines: a simple progress payment stages timeline Every build is unique, but here’s a practical timeline many first home buyers can use as a working plan: Month 0–1: Finance pre-approval; shortlist builder; design and pricing refinement Month 1–2: Fixed-price contract; unconditional approval; land settlement (if applicable) Month 2–3: Site start; Base/Slab progress payment Month 3–4: Frame progress payment Month 4–5: Enclosed/Lock-up progress payment Month 5–6: Fixing progress payment Month 6–7: Practical completion (Final draw), compliance checks, handover Modular prefabricated builds with The Markon Group can reduce on-site time because much of the build is completed in a controlled environment, then installed and finished on site—often smoothing the draw schedule and reducing weather risk. Tip for your visual: Sketch a horizontal timeline with simple milestone icons (slab, frame, lock-up, fixing, keys). Under each, note “Builder invoice → Your sign-off → Lender inspection (if requested) → Bank draw.” The 10 most common progress payment pitfalls—and how to avoid them 1, Vague or incomplete contracts Fix: Use a fixed-price contract with a clear progress schedule, inclusions, and specifications (including white colour bond roof). 2, Underestimating site costs Fix: Get soil tests, engineering, and overlay checks early. Keep a contingency. 3, Slow claim approvals Fix: Nominate one decision-maker; respond fast; pre-book valuations when possible. 4, Mid-build scope creep Fix: Finalise selections pre-start. Batch any required changes and understand impacts. 5, Valuation mismatches Fix: Work with your builder to align specs with valuation expectations; provide relevant local comparables. 6, Poor document management Fix: Keep a single digital folder for plans, contracts, insurances, variations, and certificates. Share promptly with your lender. 7, Pool fence compliance left to the last minute Fix: If a pool is included, plan for a glass fence or a government-certified fence early and schedule certification before handover. 8, Ignoring climate-smart design Fix: Choose a white colour bond roof, insulation, shading, and ventilation. It’s kinder on your budget and your comfort. 9, Weak contingency planning Fix: Hold 5–10% contingency for surprises; don’t max out every dollar on day one. 10, Communication gaps between lender, builder, and owner Fix: Keep everyone in the loop. Small updates prevent big delays. Lender expectations: keep draws moving Be prompt: Approve invoices quickly. A single missed email can stall trades. Anticipate inspections: Some draws trigger a valuer visit. Account for 2–5 business days. Share changes early: Variations that alter contract value or structure need lender visibility. Store everything: Your lender will love that one folder with the latest documents. FAQs for first home buyers in QLD Q: Is a construction loan harder to get than a loan for an established home? Different, not necessarily harder. There’s more paperwork (plans, contracts, progress schedules), but a good builder and clear documentation make it straightforward. Q: How do repayments work during construction? Typically interest-only on drawn funds. This helps early on, but increases as stages are paid. Budget for the ramp-up. Q: Can I include landscaping, driveway, and fencing in the contract? Yes; including these helps valuations and final draw planning. If a pool is included, ensure a compliant glass fence or government-certified fence is installed and certified before handover. Q: What happens if weather delays a stage? Your contract outlines allowable delays. Keep your lender informed so inspections and payments can be rescheduled without stress. Q: Do modular prefabricated homes affect the draw schedule? They can. Factory milestones may shift some funding to earlier manufacturing stages, with reduced on-site time. The Markon Group documents these milestones so lenders can align inspections and draws. Q: Do I need a bigger deposit for construction? Not necessarily. Requirements vary by lender and LVR. Land equity can help. Your broker can compare options. Handy checklists you can save Finance and paperwork Pre-approval in writing, with estimated project budget Fixed-price contract with a clear progress payment schedule Builder licence and QBCC Home Warranty Insurance On-completion valuation complete Folder with all documents: plans, inclusions, variations, certificates Selections and design Finalise kitchen, bathrooms, flooring, façade, and lighting early Confirm white colour bond roof and complementary thermal strategy (insulation, shading) If a pool is included, plan for a glass fence or a government-certified fence and schedule certification ahead of handover Stage-by-stage approval Review what each stage includes per your contract Check workmanship aligns with plans/specs before approving claims Respond quickly to lender/valuer requests to avoid idle days on site Handover readiness Practical completion inspection and defect list Collect warranties, manuals, and certificates (including pool compliance if relevant) Confirm home insurance and contents cover from handover date Set up your loan to switch to principal-and-interest (unless otherwise arranged) How The Markon Group and Homes by Markon make this easier The Markon Group is a custom home builder known for thoughtful design, honest advice, and quality execution across Queensland. The team also designs and imports custom-built modular prefabricated buildings—ideal when you want precision, quality control, and faster on-site delivery. Homes by Markon focuses on a client-friendly, build-ready pathway: Clear, compliant progress payment schedules aligned to lender expectations in QLD Detailed inclusions and transparent pricing (including climate-smart specifications like a white colour bond roof) Guidance on site costs, overlays, and valuation-aligned design choices Coordination with lenders and brokers to keep each draw moving Practical compliance planning, including pool fencing (glass fence or government-certified fence) and timely certification when pools are part of the plan Whether you’re in Brisbane, on the Gold Coast, or building regionally, you’ll benefit from teams who understand local conditions, council processes, and the small details that keep approvals—and trades—moving. From planning to keys: a realistic mindset The most successful first home builds in Queensland share three traits: Clarity: A fixed-price contract, well-defined progress schedule, and tidy documentation. Communication: Builder, lender, and owner talking early and often. Climate smarts: Design choices like a white colour bond roof, good insulation, and ventilation that cut running costs and keep homes comfortable. Follow the stages, stay across your approvals, and protect your contingency. Do that, and progress payments become a simple rhythm: build, verify, authorise, draw—repeat—until you’re holding the keys. Speak with Homes by Markon about build-ready steps If you’d like a friendly walkthrough of the whole process—from pre-approval to final draw—Homes by Markon can map your progress payment timeline, coordinate with your lender, and tailor your selections for Brisbane, Gold Coast, or anywhere in QLD. Let’s turn your first home from a plan into a confident, well-financed build. Contact The Markon Group today: 📍 Location: 20–24 Commerce Drive, Browns Plains, Brisbane 📞 Phone: +61 7 3153 2000 🌐 Website: www.markongroup.com.au ✉️ Email: info@homesbymarkon.com.au Building futures for Queensland families.
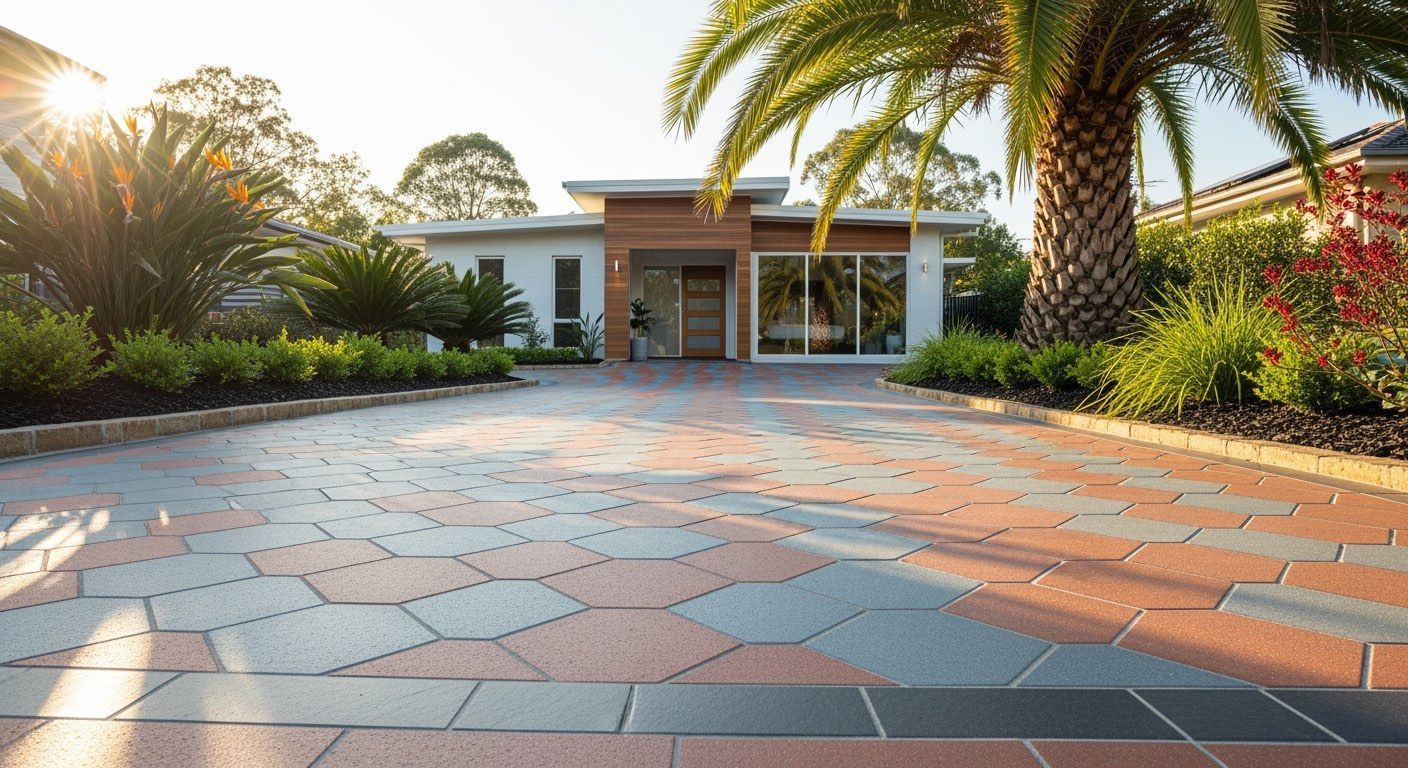
Choosing the right driveway surface in Queensland isn’t just about looks. It’s about how well it stands up to fierce summer sun, sudden downpours, salty coastal air, and weekend loads like boats or caravans—without cracking, rutting, or turning into a slippery mess. If you’re comparing an exposed aggregate driveway against pavers vs plain/coloured concrete, this guide gives you a clear, QLD-specific view of durability, maintenance, drainage, heat performance, and curb appeal—so you can make a confident choice and set your home up for decades of easy living. At The Markon Group, we see three priorities define driveway decisions for Queensland homes: Heat and UV performance: Will it stay cooler underfoot and resist fading? Wet-weather performance: Does it drain properly, and keep good traction when it lashes down? Longevity and upkeep: How much maintenance is realistic, and how easy is repair if something moves or stains? Throughout this article, we assume a cohesive exterior palette that includes a white colour bond roof for high heat reflectance and clean, modern street appeal. If your home includes a pool, or you’re planning one, we always integrate compliant glass fencing or a government-certified alternative—maintaining safety and views while keeping the material palette and drainage sensible around your driveway and paths. What Queensland Throws at Your Driveway Queensland stretches from hot, humid coasts to drier inland regions, but most areas have a few challenges in common: Intense UV and high radiant heat Dark, dense surfaces get hot fast and can fade or chalk without UV-stable sealers. Light-toned finishes and quality sealing make a big difference in comfort and longevity. Tropical downpours and storm events Heavy rain exposes poor falls and missing drains in one afternoon. Good design uses falls of roughly 1:80–1:100 and linear grates at garage thresholds to push water to a legal point of discharge. High humidity and shaded zones Damp corners can grow mould and algae on unsealed or smooth finishes. Textured surfaces and routine sealing help preserve grip and make cleaning easier. Reactive soils and coastal air Clay soils move, and salt air is corrosive. That means your driveway benefits from well-compacted bases, correct reinforcement, and appropriate sealers. Occasional heavy loads Boats, caravans, and delivery trucks ask more of your surface. Accounting for this in slab thickness or paver/base selection avoids ruts and cracks. Council compliance Crossovers, levels, finishes, and stormwater requirements must match your local council detail. We design to Australian Standards and align details in your plans so construction and approvals are straightforward. With those realities in mind, let’s look at your three strongest driveway options in QLD. Option 1: Exposed Aggregate Driveway What it is A concrete slab finished by washing or blasting back the surface to reveal decorative stones (aggregates). The pebbled texture looks premium and is naturally grippy underfoot. Durability in QLD Excellent compressive strength when the concrete is properly specified. The textured finish retains traction during summer downpours and in shaded, damp zones. UV-stable, vehicular-grade sealers protect against fading and reduce staining from oil, rust, and leaf tannins. Maintenance Resealing every 2–4 years (exposure-dependent) keeps the surface looking sharp and easier to clean. Annual soft pressure-wash is typically enough. Avoid harsh nozzles that can chew through the sealer. Localised repairs are possible, but achieving a perfect visual match can be tricky without records of the original blend and sealer. Curb Appeal “Premium coastal” in one move. A light, speckled exposed aggregate pairs beautifully with a white colour bond roof and modern facades. The texture reads as high-end, while the micro-variation in the stones hides dirt and tyre marks better than flat finishes. Heat and Colour Light tones reflect more heat, keeping the surface more comfortable underfoot in summer. Darker mixes can get very warm—choose lighter aggregates and cement tints for QLD conditions. Slip Resistance Naturally high due to the exposed texture—an advantage on slopes, at curved entries, and near garden taps or car-wash zones. Drainage Exposed aggregate is non-permeable, so you rely on designed falls and drains. Linear grates at the garage, edge strips to side setbacks, and connection to a legal discharge point ensure performance in storm bursts. Typical Cost (QLD, 2025 estimate) Around $120–$180 per m² installed, depending on blend, access, thickness, and site complexity. Lifespan 25+ years with good base preparation, reinforcement, correct jointing, and a resealing rhythm. Common Mistakes to Avoid Under-specifying thickness where vehicles turn or park heavy. Missing or shallow control joints, leading to random cracking. Budget sealers that yellow, peel, or wear quickly. Poor base compaction that leads to slab settlement and visible cracks. Best for: Homeowners who want a premium, textured finish with excellent wet traction and long service life—especially on modern homes and coastal facades anchored by a white colour bond roof. Option 2: Pavers (Concrete or Clay, Standard or Permeable) What they are Individual units laid over a compacted base and bedding sand, locked with jointing sand. Permeable pavers use open-graded aggregates in the base and joints so water can infiltrate. Durability in QLD Extremely durable when installed on a well-compacted base with robust edge restraints. Repairs are easy: lift and replace the specific pavers if services change, stains occur, or a tree root pushes up from below. For heavy loads, thicker pavers (e.g., 60–80 mm) and upgraded base layers resist rutting and wheel scuffing. Maintenance Reseal every 2–4 years to maintain colour and stain resistance (especially for concrete pavers). Polymeric jointing sand helps lock joints, resisting weeds and ant disturbance. Occasional re-levelling may be needed in spots if the base was under-specified or if large roots encroach. Curb Appeal Unmatched design flexibility: herringbone, stretcher, basketweave, borders, and colour banding. Permeable systems reduce runoff and pair beautifully with lush plantings, especially around pool zones enclosed by glass fencing or other government-certified fencing solutions. Heat and Colour Clay pavers tend to stay cooler underfoot than dense, dark concrete pavers. Light tones and textured surfaces reduce heat gain and glare. Slip Resistance Choose pavers with tested wet slip ratings and lean toward textured or shot-blasted finishes. Herringbone patterns also boost interlock and vehicle grip at turning points. Drainage Standard pavers shed water like concrete and depend on falls and drains. Permeable systems allow infiltration through joints into the engineered base, easing strain on stormwater systems and promoting healthier planting around the driveway edges. Typical Cost (QLD, 2025 estimate) Standard concrete pavers installed: approximately $120–$220 per m² (base thickness and pattern complexity matter). Permeable systems: approximately $180–$280 per m² due to specialised base aggregates and installation steps. Lifespan 25+ years with proper base, edge restraints, and periodic maintenance—plus the easiest long-term refresh options of any surface. Common Mistakes to Avoid Skimping on base thickness/compaction, leading to settlement or rutting. Omitting edge restraints—pavers “walk” under turning wheels and slowly open up. Using ordinary sand instead of polymeric/stabilised joints in high-rain or high-traffic areas. Best for: Homeowners who value design flexibility and easy repairs, or want stormwater benefits via permeable systems—especially in lush landscapes and around pool areas with compliant glass fencing. Option 3: Plain or Coloured Concrete What it is A monolithic concrete slab finished with a broom, stipple, trowel, stencil, or stamped pattern. Oxides can tint the slab for colour. Durability in QLD Very solid, reliable performance with correct reinforcement, jointing, and drainage. Random cracking is more visible on uniform finishes if joints are missed or subgrade prep is lacking. Most cracks are cosmetic but can be visually distracting. Maintenance Lower day-to-day maintenance than pavers, but still benefits from sealing to resist oil and leaf-tannin stains. Annual soft pressure-wash usually suffices. Reseal every 2–4 years to protect the finish and help with cleaning. Curb Appeal Clean, minimalist look that suits many facades and budgets. Broom or light texture recommended for traction. Stencil/stamped effects can mimic pavers, though heat and slip characteristics should be confirmed. Heat and Colour Light colours reflect heat and stay more comfortable underfoot. Dark oxides can become very hot in full sun. Slip Resistance Broom finishes are safer when wet than smooth trowel finishes. Add fine grit in sealers on slopes or shaded entries. Drainage Non-permeable—relies on good falls and drains. Linear grates at the garage make a big difference during summer bursts. Typical Cost (QLD, 2025 estimate) Approximately $90–$160 per m² depending on thickness, oxide, access, and finish choice. Lifespan 20–30 years with correct reinforcement, jointing, and periodic resealing. Common Mistakes to Avoid Overly smooth finishes that turn slippery in the wet. Control joints cut too late or too shallow to be effective. Skipping sealing, allowing deep stains to set. Best for: A clean, budget-aligned driveway that performs well with smart joint spacing and a light, heat-reflective finish—great for modern homes under a white colour bond roofline. Pavers vs Concrete vs Exposed Aggregate: Which Fits Your Site? Use this QLD-focused decision guide: Premium curb appeal, flat-to-gentle slopes, and reliable wet traction Exposed aggregate in lighter tones. It looks high-end, stays grippy, and complements contemporary facades and white colour bond rooflines. Design flexibility, ease of repair, and potential stormwater benefits Pavers. Standard interlocking pavers for a classic driveway; permeable pavers if you want infiltration and greener gardens. Clean, minimalist look on a sharper budget with sensible jointing and sealing Plain/coloured concrete with a broom finish and light colour to reduce heat. Special scenarios: Steep driveways Prioritise slip resistance. Exposed aggregate and textured pavers generally outperform smooth finishes and many stamped patterns. Heavy parking (boats, caravans, trailers) Increase slab thickness or paver/base specs in turning/parking zones to avoid ruts and random cracking. Tight verges and crossovers Precisely set falls and consider linear grates to avoid ponding at the footpath and to meet council detail. Near pool zones Keep traction high and textures consistent. Always maintain compliant glass fencing or other government-certified fencing around pools and consider the driveway-to-pool path interface. QLD-Specific Compliance and Best Practices Driveway crossing and council compliance The crossover must match council detail for levels, thickness, finish, and proximity to services. Align early in design to avoid rework. Stormwater and legal discharge Surface runoff must be directed to a legal point of discharge. Linear grates at the garage threshold stop backflow into the house during heavy bursts. Australian Standards alignment We design to relevant Australian Standards (e.g., residential pavements), ensuring compaction, reinforcement, and jointing practice follow proven guidelines. Tree root management Root barriers and separation techniques reduce future lifting or hollowing beneath slabs and pavers near established trees. Safety and sightlines Where the driveway interfaces with a pool area, maintain compliant separation with glass fencing or an approved alternative—preserving views and safe movement. Design Considerations That Elevate Curb Appeal Tone and reflectivity Lighter surfaces reflect more sun, run cooler, and harmonise with a white colour bond roof. Pale greys, sandy neutrals, and light, speckled aggregates are QLD naturals. Borders and banding Use a contrasting band or header course to frame the driveway and define garden edges. It adds design intent and can help visually hide future hairline cracks on concrete slabs. Lighting Low-voltage bollards, recessed edge lighting, or under-step LEDs improve safety and highlight texture at night—especially striking on exposed aggregate and honed pavers. Thresholds and transitions Flush thresholds to pathways improve accessibility. Linear grates at the garage keep interiors dry. Landscape integration Planting strips and permeable edges soften glare, reduce heat, and soak incidental runoff. They also create a more welcoming entry sequence. Long-Term Care: A Simple Maintenance Rhythm Quarterly Sweep or blow off grit and leaves; spot-treat fresh stains (oil, tannin, rust) before they set. Annually Soft pressure-wash to refresh. For pavers, check jointing sand and top up polymeric joints if needed; address ants or weeds promptly. Every 2–4 years Reseal with a UV-stable, vehicular-grade sealer suited to your surface. Consider adding a fine grit in steeper or shaded zones for extra traction. As needed Pavers: Re-level isolated dips or edges by lifting, re-screeding, and relaying. Concrete/aggregate: Inspect joints; caulk or re-cut where movement concentrates. Pro tip: Keep a small stash of spare pavers or a record of your exposed aggregate blend, cement tint, and sealer brand. It makes future touch-ups straightforward. Sustainability and Heat-Smart Choices for QLD High-reflectance finishes Light colours and speckled textures help lower surface temperatures and reduce the heat island effect around the facade. Permeable systems Permeable pavers keep more rain on-site, easing stormwater load and supporting healthier gardens. Pair with rain gardens or on-site detention where appropriate. Local materials and aggregates Reduce transport emissions and often deliver a regional aesthetic that suits coastal or hinterland settings. Build once, build well A robust base, correct reinforcement, smart joints, and designed drainage are the greenest choices—minimising repairs and premature replacement. Common Pitfalls We See (And How to Avoid Them) Insufficient base compaction It’s the root cause of settlement, rutting, and cracks. Proper proof-rolling and layered compaction pay off for decades. Late or shallow sawcuts (concrete) Control joints must be timely and deep enough to work. Plan the sawcut window and depth as part of the pour sequence. Missing edge restraints (pavers) Without a rigid edge, pavers drift and joints open. Kerb restraints or concrete haunching lock the pattern long-term. Poor drainage planning Water always wins. Set true falls from the outset and integrate strip drains connected to a legal discharge point. Budget sealers Cheap sealers can yellow, peel, or wear early in QLD sun. Use UV-stable, vehicular-grade products matched to your surface texture. Example Specifications by Driveway Type Use these as planning references; your final details will depend on soil, slope, traffic loads, and council requirements. 1,Exposed Aggregate (Standard Vehicle Use) Base: Compacted road base (typ. 75–100 mm) over proof-rolled subgrade; add geotextile over reactive clays. Slab: Nominal 100 mm thickness; higher in turning/parking zones. Finish: Exposed wash to an approved on-site sample; consistent reveal and texture. Joints: Control joints in sensible panels; isolation at walls, garage slab, and services. Falls/Drainage: Approximately 1:80 to linear grates or strip drains; no ponding at thresholds. Sealing: UV-stable vehicular-grade; monitor and reseal based on exposure. 2,Pavers (Interlocking, Non-Permeable) Subgrade: Proof-rolled and shaped to falls; stabilise soft spots as needed. Separation: Geotextile over clays to prevent base contamination. Base: Compacted road base (often 100–150 mm); thicker in heavy-use areas. Bedding: Washed concrete sand (approx. 20–30 mm), screeded to level and falls. Units: 60–80 mm concrete or clay pavers; herringbone patterns increase interlock. Joints/Edges: Polymeric sand; rigid edge restraints (haunch/kerb). Drainage: Designed falls to grates or soak features; consider permeable pavers for infiltration goals. 3,Permeable Pavers Layers: System-specific open-graded aggregates for base and bedding; geotextiles as required. Units: Rated permeable pavers with tested compressive and wet slip performance. Hydraulics: Provide overflow to stormwater for extreme events; inspect annually for silt build-up. 4,Plain/Coloured Concrete Base: Compacted road base (typ. 75–100 mm); increase in turning zones if needed. Slab: approx. 100 mm thickness (increase for heavy-use); choose light oxides for heat. Finish: Broom or lightly textured; add grit in sealer for slopes. Joints: Regular control joints and isolation at fixed elements; cut within recommended timing. Drainage/Sealing: As per exposed aggregate; reseal rhythm 2–4 years. Style Notes: Bringing It All Together Facade pairing A white colour bond roof sets a crisp, high-reflectance tone. Light driveway finishes keep the composition bright, modern, and heat-smart. Pool integration Where the driveway shares sightlines with the pool area, keep materials coherent and traction consistent. Always ensure fully compliant glass fencing or a government-certified alternative around the pool for safety and clear views. Cohesive outdoor flow Match or complement the driveway with pathways and entry thresholds so your approach feels intentional, safe, and welcoming—day and night. The Bottom Line Choose Exposed Aggregate for premium texture, strong wet traction, and modern curb appeal that complements light, reflective rooflines. Choose Pavers for design flexibility and the easiest repairs; go permeable if you want to support infiltration and greener gardens. Choose Plain/Coloured Concrete for a clean, budget-aligned solution—just commit to sensible jointing and a light, heat-reflective finish. Across all options, fundamentals matter most: base preparation, falls and drainage, reinforcement (or base layers for pavers), control joints, and UV-stable sealing. Get those right and your driveway will stay straight, safe, and stunning for a very long time. Plan Your Driveway as Part of Your Custom Home Design When designing a custom home with The Markon Group, your driveway specification is included as a standard step in the planning and selections process —no separate booking required. We’ll guide you through exposed aggregate, pavers, and plain/coloured concrete with QLD heat, UV, and wet-weather performance in mind, then integrate your choice into the architectural drawings, engineering, and build program. What’s included in the planning stage: Options matrix tailored to your site: exposed aggregate vs pavers vs concrete, with indicative costs, durability, and maintenance. Site-specific detail for base layers, reinforcement or paver selection, jointing approach, and thickness in turning/parking zones. Drainage and falls plan to legal discharge—linear grates, strip drains, and thresholds that keep water out of your garage. Council-ready crossover details and levels aligned to footpath/kerb requirements. Finish and colour guidance: light, heat-smart tones that complement a white colour bond roof for cooler, cohesive curb appeal. Integration with outdoor areas and any pool zones—always maintaining compliant glass fencing or a government-certified alternative for safety and clear sightlines. Future-ready provisions: conduits beneath the driveway for gates, lighting, EV charging, irrigation, and services—so you’re not cutting into it later. Build-sequence timing: when to pour, pave, and seal in relation to slab, façade works, and landscaping. Your consultant will cover driveway options early in selections. Already collaborating with our design team at The Markon Group? We’ll confirm levels, falls, and finishes so your chosen driveway looks seamless and performs flawlessly from day one.
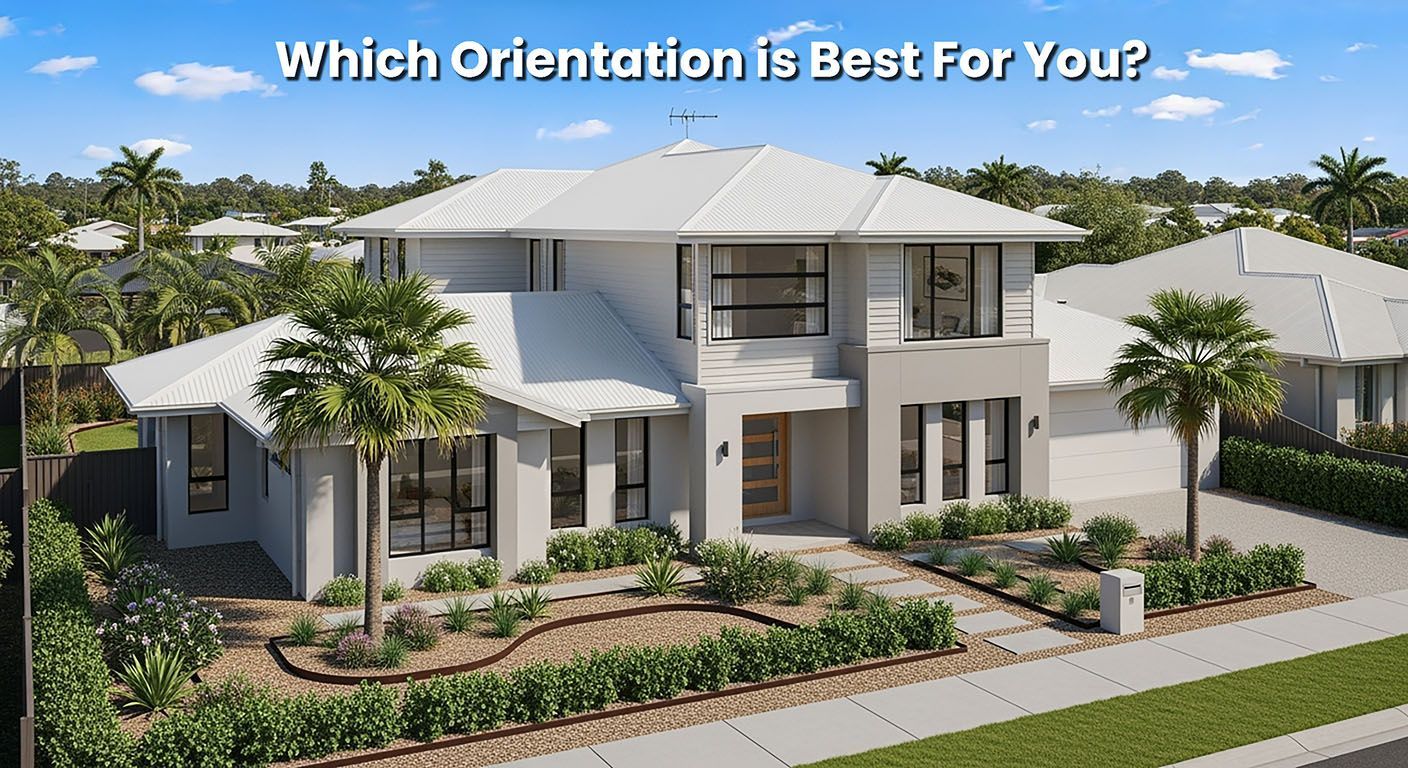
Do you already have a block—or are you still searching? If you already own a block, we’ll maximise what it gives you. If you’re still browsing real estate listings, here’s the short answer: the “best” block is the one that lets you place your main living areas and backyard to the north or north‑east, catch prevailing breezes, and shade the brutal west. The Markon Group can help you find a block with great aspects, then we’ll craft your plan to suit Queensland’s sun and wind so your home runs cooler, brighter, and cheaper. Below you’ll find a friendly, practical guide to what different block orientations actually mean for everyday living—complete with pros, cons, placement tips for rooms, and ideas for pools, gardens, and alfresco spaces. We’ve kept it Queensland‑specific, so it works from Brisbane to the Gold Coast, Sunshine Coast, and up into the tropics. Important note for all options: We specify white colour bond roofs because they stay cooler in the Queensland sun, cutting heat gain and helping your home feel comfortable with less air‑conditioning. And if you’re planning a pool, it must be enclosed with a glass fence or a government certified fence—safety first without blocking sightlines. Orientation 101 for Queensland North: Your friend. Predictable sun, easy to shade with eaves, beautiful winter warmth. East: Gentle morning sun; great for kitchens and bedrooms if you like waking with light. West: Harsh afternoon sun; keep windows modest and heavily shaded. South: Soft, cool daylight; great for studies, utilities, and quieter rooms. Breezes: In much of SEQ, summer breezes often arrive from the southeast to northeast. Design for cross‑ventilation and you’ll feel cooler for free. Street-to-South Block (Backyard to the North) This is the crowd favourite in Queensland because the backyard and main living spaces can face north. If you can choose your block, this is usually the easiest to turn into a bright, comfortable, energy‑smart home. Why it’s great Glorious north light pours into living, dining, and kitchen all year with eaves controlling summer heat. The backyard gets all‑day sun—fantastic for vegetable gardens, lawns that actually thrive, and a solar‑friendly clothesline. A pool in a north‑facing backyard warms pleasantly in the shoulder seasons and can be shaded in midsummer where needed. Be sure to include a glass fence or government certified fence for safety and clean views from the house. Where rooms want to go Living/dining/kitchen: Along the back, opening to a north or north‑east alfresco. Bedrooms: Main bedroom can borrow the calm of the north if well shaded; kids’ rooms to the east or south‑east for gentle morning light and cooler evenings. Study: South side for low‑glare, consistent light. Garage/laundry/pantry: West and street‑side to buffer heat and noise. Pros Easiest to achieve high comfort and lower energy bills. Simple solar panel layout on the north roof plane. Backyard privacy is easier—living faces away from the street. Cons The front façade can feel cool and shaded; use thoughtful landscaping and a welcoming entry porch. On tight blocks, deep single‑storey floor plans may need a central light court to keep the middle bright. Street-to-North Block (Backyard to the South) This one gets a bad rap it doesn’t deserve. You’ll need a few smart moves, but when it’s done well, you get a front garden that basks in winter sun and a very private, calm southern rear—perfect for work‑from‑home and sleeping. Why it’s good (yes, really) North light to the front means an opportunity for a sun‑kissed front courtyard or winter garden. The rear is cool and even‑lit—brilliant for studies, media rooms, or bedrooms if you prefer a cooler sleep. The “front courtyard” strategy Create a private, screened north courtyard behind a fence or green buffer at the front. Turn the living areas to face into this courtyard for winter warmth and year‑round light. Run an east‑facing alfresco down the side so summer afternoons are shaded and breezy. What about the backyard? A south‑facing backyard is cooler—lush, shade‑loving gardens thrive. If you’re set on a pool at the rear, place it where it captures morning/midday sun (east side is best) and consider a darker surface or a pool blanket to hold warmth. As always, enclose with a glass fence or government certified fence. Alternatively, place the pool in the sun‑loving front/side courtyard for warmth and easy passive supervision from the living room—again, ensure compliant fencing. Pros Front living with winter sun feels amazing; activation of the street improves neighbourhood vibe. Southern rear offers privacy and cool refuge during heatwaves. Cons Requires careful planning to get north light deep into the plan. South‑facing rear lawns can be softer/wetter; choose plants accordingly and improve drainage. Street-to-East Block (Backyard to the West) Morning sunshine on the façade, warm afternoons in the backyard. The trick here is to lean into the morning light while protecting yourself from that intense west. Why it’s workable Mornings are magic—kitchens and breakfast nooks love the light. You get a sunny backyard for late lunches and winter play. Design tactics Put the garage and a “service spine” (laundry, pantry, bathrooms) on the west to shield living zones. Push living and alfresco towards the south‑west corner but add deep shade: pergolas with adjustable screens, deciduous trees, and vertical fins. Keep west‑facing glazing modest; make windows taller and narrower, and use high‑performance glass. Pools and gardens A west‑backyard pool warms fast—great in spring/autumn—but must be shaded in midsummer. A pergola, cantilevered shade, or even a shade sail can drop radiant heat dramatically. Fence with glass or a government certified fence for safety and clear views. Place vegetable beds on the east or north side; reserve the harshest west edge for hardy natives or shaded seating. Pros Lovely morning light; active backyard in winter. Great for families who use the yard in late afternoons. Cons West heat needs serious external shading. Summer afternoons can be hot outdoors without trees/screens. Street-to-West Block (Backyard to the East) This can be a dark horse favourite. You’ll get gentle, golden morning light across the backyard and avoid the harshest late‑day heat. Why it’s appealing East backyard is calm and beautifully lit for morning coffee and weekend breakfasts. Summer afternoons are kinder—great for outdoor dinners without the blast. Design tactics Put garage and services on the west street side as a thermal shield. Open living and alfresco to the east and north‑east; you’ll get sunrise warmth without glare all day. Use a side courtyard to the north to pull winter sun deep into the plan. Pools and gardens A pool on the east warms in the morning; in midsummer it’s easy to keep comfortable with light shading. Always enclose with a glass fence or government certified fence. Veggies and herbs thrive on the east/north edges; reserve the west street side for robust screening plants. Pros Easy outdoor comfort in the afternoon; fewer heatwaves outdoors. Gentle, consistent daylight inside when designed with a north side courtyard. Cons West street façade can cop heat—over‑specify shading and insulation there. You’ll need to design consciously for winter sun penetration. Corner Blocks (Two Streets, Maximum Flexibility) Corner lots are an orientation Playground. You can usually choose which street to address with the garage and which side to open for sun and privacy. North‑East corner: Dreamy. Put garage on the south or west street; open living to the north/east with a wraparound alfresco. North‑West corner: Use the secondary street for the garage, then build a thickened west wall for shade and open to the north. South‑East corner: Place the garage on the east/south; carve a north courtyard for living. South‑West corner: Strong west management is key—garage and services on the west/southwest, with living folded to north/east. Pools are easy to supervise from multiple sides on corner blocks; position them on the north/east and always fence with glass or a government certified solution to maintain sightlines and comply with safety standards. Bedroom Placement by Orientation Early risers: East or south‑east bedrooms catch morning light and stay cooler at night. Lovers of long sleep‑ins: South bedrooms stay dimmer and calmer. View chasers: Northern bedrooms can be superb if deeply shaded with eaves and adjustable screens to prevent glare. Hot edges: Keep west bedrooms small, place wardrobes on the west wall as a buffer, and give them excellent external shading. Ceiling fans in every bedroom are a must in QLD; they deliver big comfort for tiny energy use. Alfresco and Outdoor Rooms With a north or east backyard: Alfresco to the north/east with a solid roof and adjustable screens—usable all year. With a west backyard: Alfresco with deep shade, filtered screens, and deciduous planting; aim to block low western sun while keeping breezes. With a south backyard: Consider an east‑side alfresco for afternoon enjoyment, plus a front or side north courtyard for winter lounging. Use light colours and permeable paving where you can; dark, dense paving radiates heat on summer evenings. Pools: Comfort, Placement, and Safety North backyard: Easy mode—sunny with controlled shade; pair with a pergola for midsummer relief. East backyard: Morning‑friendly and comfy in the afternoon shade. West backyard: Warm water, but manage glare and heat with shade and greenery. South backyard: Cooler; consider thermal covers, darker pool finishes, or a sunnier front/side courtyard pool. No matter the orientation, all pools must have a glass fence or government certified fence. We like frameless glass near living areas so adults can supervise easily without spoiling the view. Gardens and Planting by Aspect North: Productive veg plots, citrus, and lawn that gets good winter growth. East: Herbs, salads, and plants that like gentle morning sun. West: Hardy natives and shade trees that double as a sun shield for your home. South: Ferns, shade‑lovers, and cool retreats with seating. Layered planting also enhances privacy while filtering breezes—far better than solid walls that block airflow. Windows, Eaves, and Shading That Do the Heavy Lifting North windows: Can be generous. Size eaves to your latitude and window height so summer sun is blocked while winter sun reaches inside. East/West windows: Keep moderate in size; prefer vertical fins, operable screens, and deep verandas. South windows: Soft light; be mindful of winter heat loss in cooler inland areas. External shading beats internal blinds for heat control because it stops the sun before it gets into your glass. Roofs, Solar, and The Case for White Colour Bond Roof finish: We recommend white colour bond as standard across Queensland. The high reflectance reduces roof surface temperatures and attic heat, lowering cooling loads dramatically. Roof form: Simple, tidy planes make solar installation easier and keep maintenance low. Solar orientation: North is best for peak output; east‑west splits can match morning/evening household demand. Ventilation and insulation: Combine continuous insulation with passive roof ventilation for steady summer performance. Homes by Markon will balance roof aesthetics with performance, always favouring white colour bond for thermal comfort. Real‑Life Orientation Playbooks 1.The Sunny Entertainers (Street to South) Plan: Open‑plan living flows to a north alfresco and lawn. Pool: On the east‑north edge to catch morning/midday sun, shaded in late afternoon. Glass fenced for safety and uninterrupted views. Bedrooms: Kids to the south‑east; main suite gets filtered north light with deep eaves. Result: Daylight all year, easy cross‑ventilation, and naturally warm winter breakfasts. 2.The Cool and Calm Crew (Street to North) Plan: A front north courtyard acts as the “sun garden,” screened for privacy. Living faces this courtyard; rear rooms stay cool and quiet. Pool: In the front/side courtyard with compliant fencing; passive supervision is effortless from the kitchen. Bedrooms: South and east for deep sleep; study to the south for zero glare. Result: Bright front living with winter warmth; the rear is a restful, cool sanctuary in summer. 3.The Morning People (Street to West) Plan: Garage and services on the west; living wrapped to the east/north‑east with a side north courtyard. Pool: East side, glass fenced; perfect for morning laps and shaded evening lounging. Bedrooms: East for gentle light; wardrobes buffering any west‑edge rooms. Result: Golden mornings, comfortable afternoons, and low reliance on AC. 4.The Late‑Arvo Legends (Street to East) Plan: Kitchen enjoys morning light; service spine shields living from west heat. Alfresco has operable western screens and deciduous shade. Pool: West yard warms nicely—add an overhead shade system for midsummer. Bedrooms: East/south‑east for early rising kids; main to the south/north with good shading. Result: Buzzing winter backyard life, with heat managed in summer via shade and airflow. What If Your Block Is “Tricky”? Fixes That Work Carve a courtyard: Even on small lots, a north courtyard pulls light and breeze into the centre. Move the alfresco: East or north‑east alfrescoes are the comfort sweet spot in QLD. Stack the plan: Put garage, bathrooms, and laundry on the hot west. Go vertical: Clerestory windows and high louvres catch light and purge heat at night. Screen smartly: Vertical battens and operable louvres protect privacy while letting breezes through. Homes by Markon specialises in re‑stacking floor plans so awkward blocks become effortless places to live. Modular and Prefabricated—Orientation Still Leads The Markon Group also designs and imports custom modular prefabricated buildings. Modules are not one‑size‑fits‑all. We rotate, mirror, and stitch modules to your site so living faces north/east, west walls are insulated and shaded, and breezes cross the plan. You get factory precision plus climate‑smart orientation. Quick Buyer’s Guide: Choosing Between Two Blocks If one has the backyard to the north (street to south) and similar price—pick it. If both face north to the street, choose the one with better side setbacks for a north courtyard and fewer overshadowing risks. For east or west street blocks, pick the one with better tree cover and side access to build a shading “service spine” where needed. Check overshadowing from neighbours and future builds; winter sun angles matter. On sloping land, favour slopes that let you step the floor to capture northern light without huge retaining walls. If you’re not sure, The Markon Group can walk lots with you (physically or virtually) to identify the best aspects before you buy. FAQs: Orientation in Plain English Q: Is a south‑facing street really okay? A: Absolutely. It often delivers the best north‑facing backyard. Living rooms and gardens will be bright, and pools get natural warmth with good shading design. Q: Where should bedrooms go for the best sleep? A: East or south‑east if you like waking with light; south if you prefer it darker and cooler. Avoid west‑facing bedrooms or buffer them with wardrobes and heavy external shading. Q: Can I have big windows everywhere? A: You can have big north windows with correct eaves. Keep west windows modest and heavily shaded. East can be moderate; south is fine but watch winter heat loss in cooler zones. Q: Will a white colour bond roof really help? A: Yes. In Queensland, white colour bond keeps the roof and attic significantly cooler, lowering AC demand and improving comfort. Q: Where should the pool go? A: North or east yards are easiest. In west yards, provide deep shade. In south yards, consider a sunnier courtyard pool or use a thermal cover. Always include a glass fence or government certified fence. Orientation Checklist You Can Use Today Confirm true north on your block. Visit at 9am, 12pm, and 4pm—note hot spots, shade, and glare. Feel the breeze on a warm afternoon—what direction is it coming from? Decide where you want morning and evening activities—coffee spots, kid play, dinners. Sketch where a pool or veg garden would best fit, then plan shade. Mark where to build your “service spine” to shield hot edges (usually west). Commit to a white colour bond roof and external shading on east/west windows. How The Markon Group and Homes by Markon Make Orientation Easy Block‑finding help: We’ll shortlist and compare lots for the best light, breeze, and privacy—the aspects that matter most. Climate‑smart concept design: We place rooms, windows, alfresco, and courtyards for north light and coastal breezes, while shielding the west. Energy performance: Designs are tuned to meet or exceed code and star ratings without over‑relying on mechanical systems. Buildable details: Correct eave depths, elegant external screens, and a white colour bond roof that performs in Queensland heat. Modular mastery: For prefab projects, The Markon Group rotates and combines modules to suit your site—not the other way around. End‑to‑end delivery: We’re custom home builders—Homes by Markon turns orientation‑savvy plans into homes that feel “just right” every day. Ready to choose the right block —or unlock the full potential of the block you already own? Design a climate-smart floor plan with Homes by Markon.
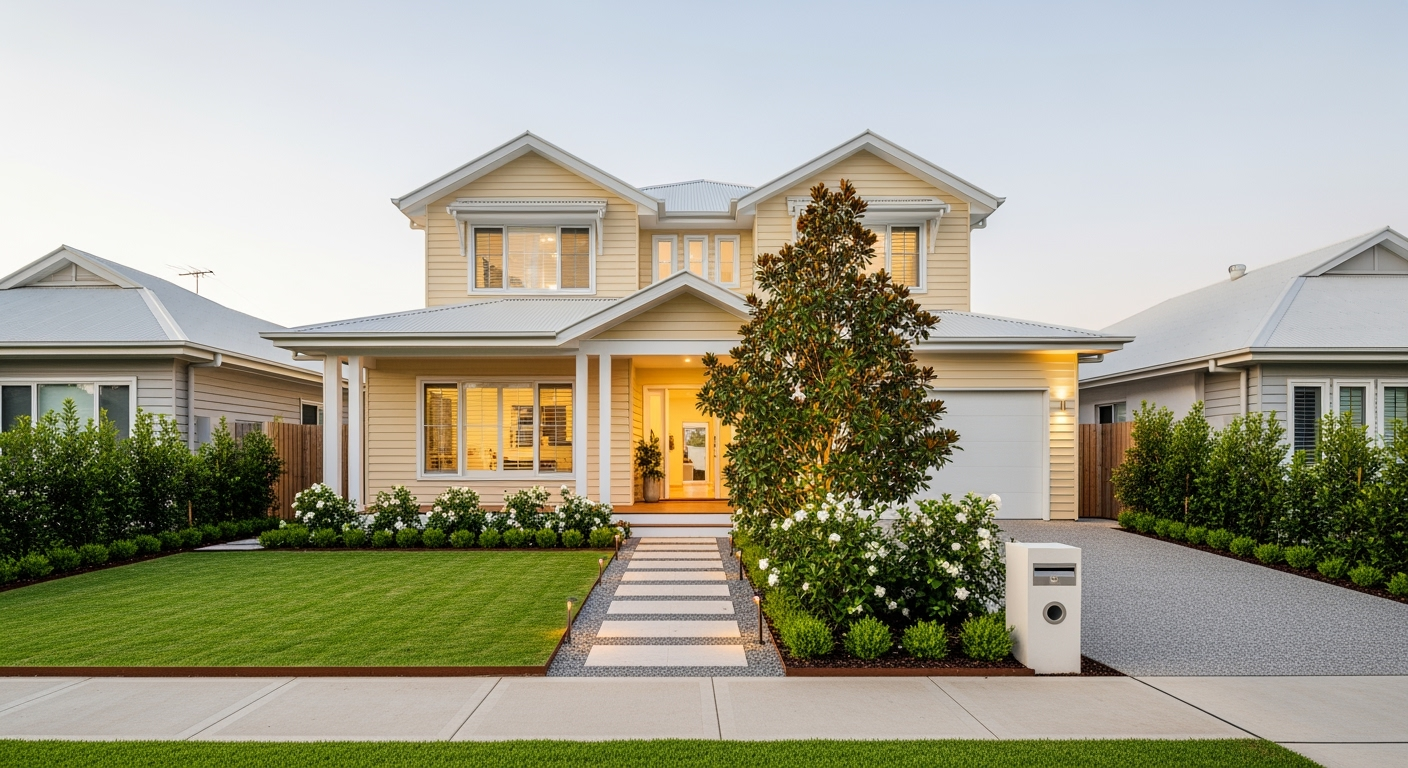
Queenslands climate, code and curbside reality Queensland (especially SEQ) brings hot, humid summers, summer downpours, and mild winters. New-build sites often have compacted subsoil and variable fill, with reflected western sun and heat off paving. That means: Prioritise heat- and humidity-tolerant species that handle summer storms and bounce back after short dry spells. Condition soil (rip, gypsum if clay, incorporate organics) and allow at least 300 mm quality topsoil in beds. Design for sun hours: a north or west-facing frontage may need tougher, heat-tolerant species and mid-tone paving to reduce heat. Plan water management early: ensure finished levels, driveway crossfall and garden gradients send water to legal discharge, not towards the slab. Compliance to keep in mind: Verge gardens in Brisbane need a continuous pedestrian clear path (generally 1.2 m), low plants only (max 700 mm), and no trees or hard structures; check the official guidelines before you plant Brisbane City Council – Verge gardens . Bushfire overlays: follow Queensland guidance and your BAL assessment; apply defendable space, low‑flammability plant selection, and non-combustible materials near the facade Queensland Reconstruction Authority – Bushfire Resilient Building Guidance , Queensland Government – Building in bushfire prone areas , Queensland Government – Prepare your garden for bushfire season . The front yard framework that works Think of your frontage as an “entry sequence” with clear bones, planting layers, and a focal point. 1.Entry sequence Driveway arrival → a direct, legible pedestrian path → framed front door Path width: 1.2 m feels generous for two-abreast; flare to 1.5 m at the threshold for comfort Keep bins and utilities neatly screened but accessible 2. Strong bones (hardscape) Durable edges (galvanised steel, concrete, stone) to keep lines crisp Limited, repeating materials for cohesion (e.g., honed concrete + steel edging + timber battens) Mid-tone paving or exposed aggregate to reduce glare and heat 3.Planting layers Structural: small trees or feature shrubs that anchor the composition Screening: hedges or clumps for privacy/sightline control Texture/fillers: strappy forms and grasses for movement and resilience Groundcovers: unify beds and suppress weeds Aim for 60–70% evergreen backbone so it looks composed year round 4.Focal point One “hero”: a specimen tree, sculptural grass mass, water bowl, or a custom letterbox with backlit house numbers 5.Night mode Low-glare path lighting, a subtle uplight on the feature tree, and address lighting (2700–3000K for warm residential feel) Planting palettes that thrive in Queensland Blending natives with proven exotics provides texture, seasonal interest, and resilience. Use 3–5 species per bed and repeat across the frontage to avoid visual clutter. Feature/small trees (choose one or two) Xanthostemon chrysanthus (Golden Penda) Tristaniopsis laurina (Water Gum) Elaeocarpus eumundii (Eumundi Quandong) Lagerstroemia indica cultivars (Crepe Myrtle; pick dwarf standards for smaller verges) Screening/hedging Psyllid‑resistant Syzygium australe cultivars (Lilly Pilly) Murraya paniculata (Orange Jessamine) near entries for fragrance Westringia fruticosa (Coastal Rosemary) for wind tolerance Strappy accents and grasses Lomandra longifolia cultivars (tidy and tough) Dianella caerulea varieties Dwarf, sterile Pennisetum or native Poa where appropriate Flowering and pollinator-friendly Callistemon (Bottlebrush), Grevillea, Scaevola, compact Hibiscus, Gardenia augusta near entries Groundcovers Myoporum parvifolium Carpobrotus (native pigface) in hot, open spots Trachelospermum asiaticum (Asiatic jasmine) as a contained groundcover Plant spacing and scale tips Don’t plant screening too tight—space to mature width to reduce hedging frequency. Drift mass the strappy plants in 3s and 5s for a designed, not dotty, look. Keep higher plants away from driveway sight lines. The best lawn types for Brisbane’s climate Select based on actual sun hours, foot traffic, shade, and your maintenance appetite. Industry guidance in SEQ consistently favours warm-season grasses—Buffalo, Zoysia, Couch—with Kikuyu reserved for full sun and strong containment. See practical overviews from SEQ turf specialists like myhomeTURF , The Turf Shed , and West Turf . Buffalo (e.g., Sir Walter DNA Certified, Palmetto, Sapphire) Pros: Best for part shade; soft underfoot; good wear; resilient root system Cons: Slower lateral repair than Couch; higher upfront cost Use when: You have trees/shade or south-facing frontages that get limited sun Zoysia (e.g., Empire, Nara native Zoysia) Pros: Low growth = less mowing; deep roots; heat- and drought-tolerant; tidy, premium look Cons: Slow to establish; moderate shade tolerance (aim ~5+ sun hours) Use when: You want low maintenance and a manicured look with decent sun Couch/Bermuda (e.g., TifTuf, Wintergreen) Pros: Fast repair; high wear tolerance; bright summer colour Cons: Needs full sun (~6–7+ hours); can thatch if overfed; invades beds without strong edging Use when: You have a full-sun frontage and want durability at a sharp price Install and care essentials Subsoil prep: rip/loosen compaction; shape falls away from the slab Underlay: use quality turf underlay; roll and water-in thoroughly Mowing heights: Buffalo higher; Couch lower; follow variety recommendations Hard edging: steel/aluminium/concrete to keep lines crisp and stop invasion Hardscaping that lasts (and stays cool) Materials and details Driveways: exposed aggregate concrete, coloured concrete with saw-cut joints, or permeable pavers where practical Paths: honed concrete or large-format pavers; consider stabilised decomposed granite for a soft look if slope/drainage allow Edges: galvanised steel or concrete extrusions for durability against whipper‑snippers Numbers/letterbox: coordinate with facade materials; ensure visibility day and night Comfort and safety Choose mid-tone, low-glare finishes to reduce radiant heat Require exterior slip resistance (e.g., approximate R11) on paths Keep gentle gradients and avoid trip lips at driveway crossings Lighting for street appeal and safety Path lighting: low bollards or in‑grade markers at 2.5–3.5 m intervals, staggered Feature accents: narrow-beam uplight on a focal tree or brick pier; avoid glare into neighbour windows Address lighting: backlit numbers or a subtle wall light by the letterbox Control: astronomical timer with manual override; warm white 2700–3000K Verge garden basics in Brisbane Brisbane City Council supports verge gardens in residential areas provided they are safe, accessible, and low-risk. Essentials: Maintain a continuous 1.2 m pedestrian access strip—even if there’s no concrete footpath Use low-growing plants (max 700 mm high); trees and tall shrubs are not permitted No hard structures (e.g., planter boxes), loose gravels, or irrigation systems in the verge garden area Keep sight lines clear near driveways and intersections; protect street trees (don’t prune/remove) Use water-wise plants; check “Before You Dig” for underground services Bushfire‑smart landscaping (for overlay/BAL‑rated sites) Follow your BAL assessment and QLD’s best-practice guidance to reduce risk. Core principles: Defendable space: keep 1–2 m adjacent to the house low and clear; use non‑combustible mulch (stone/gravel) near walls Plant selection: choose low‑flammability species (higher moisture, broad leaves, low resin) Break up fuels: avoid continuous canopies; separate shrubs and lift lower tree branches; prune routinely Materials: non‑combustible edging and paving near the facade; avoid timber sleepers against walls Maintenance: remove leaf litter, clean gutters, keep lawns short in fire weather Water-wise by design Hydro‑zone: group plants by water need; put thirstier plants in low points or near downpipes Irrigation: dripline under mulch for beds; separate zone for lawn; add a rain sensor and consider smart controllers Mulch: 50–75 mm of chunky organic mulch in beds; switch to stone near the facade in bushfire risk areas Stormwater: use permeable surfaces where practical; ensure falls away from the house to the legal point of discharge Small front yards: high impact in tight footprints One hero + two complementary species repeated beats a “plant zoo” Go vertical: espalier or trellis climbers to green the facade Multi-use path: widen by the door to double as a micro-porch with a bench and pot grouping Concealment: integrate a screened bin bay within the composition New build coordination: getting it right during construction Levels and falls: confirm finished floor levels (FFLs), driveway gradients, and crossovers early Services: locate water, NBN, power, stormwater before finalising lighting and plant pits Soil protection: set aside clean topsoil; avoid further compaction in garden zones Programme: install irrigation before planting; lay turf last (prefer shoulder seasons if possible) Budgets and expected impact Indicative Queensland pricing varies by site and finish, but you can plan in bands: Starter kerb appeal ($8k–$18k typical suburban frontage) Clean path, durable edges, Buffalo or Zoysia, 2–3 resilient plant masses, entry light Mid‑range ($18k–$40k) Feature tree, layered planting/screening, honed/aggregate path, custom letterbox & backlit numbers, irrigation zones, cohesive lighting Premium ($40k–$80k+) Architectural hardscape (permeable stone, custom steelwork), mature specimens, bespoke fencing/battens, designed lighting, integrated drainage/controls A well-presented frontage often helps generate more inspections and stronger first impressions with buyers of new builds. A simple seasonal care calendar (SEQ) Summer: Deep, infrequent watering; mow higher to shade the soil; check irrigation after storms Autumn: Light shape-prune; top up mulch; slow‑release feed for lawn Winter: Reduce irrigation; prune after flowering; adjust lighting timers Spring: Aerate compacted lawn; re‑edge beds; plant warm‑season perennials; refresh annual colour accents if desired Common pitfalls to avoid Over-planting species variety—repetition looks intentional and lowers maintenance Wrong lawn for the sun hours—Buffalo for shade, Couch for full sun, Zoysia in between Skipping edges—beds creep and lines get messy without hard edging Planting too close to paths/driveway—soft foliage gets damaged by cars, bins, and elbows Ignoring sight lines at the driveway—create clear views for safety and compliance Sample front yard concept (sunny, modern facade) Feature: Golden Penda (1) Screening: Lilly Pilly ‘Resilience’ hedge (6–8, planted to mature width) Texture: Lomandra ‘Tanika’ in drifts (12–16) Accent: Dianella ‘Cassa Blue’ clumps (9–12) Groundcover: Myoporum parvifolium along edges (as needed) Lawn: Empire Zoysia or TifTuf Couch depending on sun and use Hardscape: 1.2 m honed concrete path, galvanised steel edging, powder‑coated letterbox with backlit numbers Lighting: Two low bollards on the path, one uplight on the feature tree, one address light Checklists you can print Pre‑design checklist Facade style and colours finalised Sun/shade hours mapped (summer vs. winter) Privacy needs and driveway sight lines identified Council rules: verge garden, fence heights, driveway standards Services and stormwater plan obtained Maintenance preference (low / standard / high) agreed Budget band and timeline aligned with build Verge garden compliance (Brisbane) 1.2 m continuous pedestrian access preserved Plants max 700 mm high; no trees/tall shrubs No planter boxes, loose gravel, or irrigation systems in verge beds Sight lines kept clear at driveways and intersections Street trees protected; “Before You Dig” checked Bushfire overlay actions (if applicable) Confirm BAL and overlays; follow AS 3959 guidance for your class of work Create a low, non‑combustible zone 1–2 m around the house Separate plant masses; prune lower tree branches Use non‑combustible edging and mulch near the facade Establish a maintenance routine for leaf litter removal Irrigation and water-wise Hydro-zones grouped by water need Dripline under mulch in beds; separate lawn zone Rain sensor/smart controller planned Mulch depth 50–75 mm; stone near walls in bushfire risk areas Maintenance rhythm Quarterly: edge beds, check lighting, inspect irrigation Seasonal: fertilise lawn (lightly, slow‑release), prune after bloom, top up mulch After storms: check drainage, irrigation breaks, and lighting FAQs
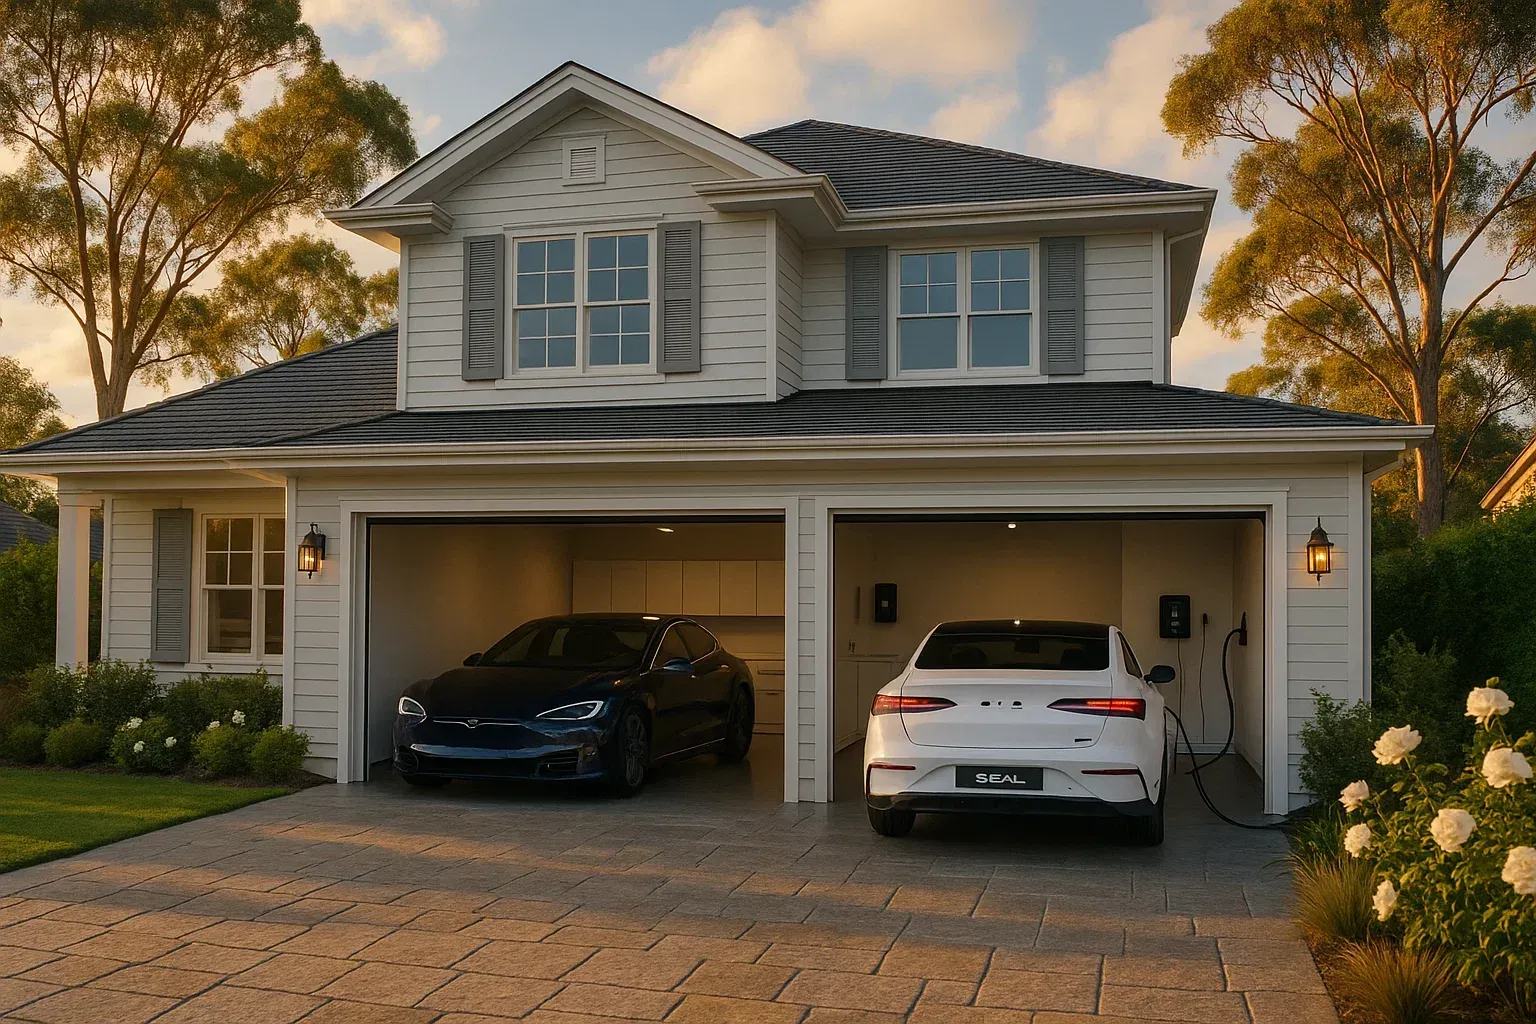
Time to consider EV charging in your new build – what you need to know for a future-ready home design A wall-mounted home EV charger in a Brisbane garage allows convenient overnight charging for your electric vehicle. Imagine pulling into your driveway on a warm Brisbane evening, the sun setting behind suburban gum trees. You step out of your electric vehicle (EV) and plug it straight into a charger on your garage wall – no detours to public charging stations, no waiting in line, just the simple satisfaction of charging at home while you unwind. By morning, your car is fully charged, ready for the commute or a weekend getaway. Sound futuristic? It’s closer than you think. EVs are rapidly becoming mainstream in Queensland – in fact, electric vehicle sales in QLD surged by nearly 80% in one quarter, making up over 8% of new car sales by mid-2025 . As more Queenslanders embrace electric cars, home charging is set to be the new normal . The majority of EV charging already happens at home, and building a new home is the perfect opportunity to make your garage EV-ready from day one . In this blog, we’ll explore why including EV charging in your new home build is worth it , especially for eco-conscious homeowners in Brisbane. We’ll demystify the difference between single-phase and three-phase power (and why it matters in South East Queensland), and show how planning ahead can save you money and headaches down the track. You’ll learn what’s involved in installing a home EV charger , the perks of working with a builder who truly understands future-proof design, and why The Markon Group – a family-run Brisbane builder – is a great team to help bring your sustainable, future-ready home to life. Let’s dive in! Why Plan for EV Charging in Your New Home? Building a new home is all about investing in the future – and part of that future is electric. Even if you don’t own an EV yet, there’s a good chance you will during your home’s lifetime (or you’ll host visitors who do). Planning for EV charging now ensures your home is ready for the fast-growing electric vehicle revolution . Consider this: Queensland’s government has been busy rolling out the Electric Super Highway , the world’s longest EV charging network within a single state, stretching from Coolangatta to Cairns. It’s clear the Sunshine State is gearing up for an electric transport future, and homeowners can ride this wave by setting up convenient charging at home. Including an EV charger during a new build is far easier and cheaper than retrofitting one later. When you plan ahead, you can incorporate the necessary electrical capacity, wiring and space for a charging station right into the house design. That means no tearing up walls or driveways down the track – your garage will be EV-ready on move-in day. Plus, an integrated charging setup looks neat and intentional (no ugly extension cords or makeshift solutions). It becomes a feature of your home, much like a modern kitchen or a smart home system, potentially adding resale value by appealing to the ever-growing segment of EV-driving buyers. There’s also the everyday convenience and cost savings to consider. Charging at home allows you to take advantage of off-peak electricity rates or soak up excess energy from any solar panels you install. It’s significantly cheaper per “fill-up” than petrol – and you’ll never have to visit a petrol station again (one less chore on your weekly list!). For Brisbane residents, imagine being able to leave the house each morning with a “full tank” courtesy of overnight off-peak power or Queensland’s abundant sunshine feeding your battery. It makes owning an EV utterly seamless. No scrambling to find a public charger around South Bank or Chermside; your home has you covered. Last but not least, choosing to include EV charging is a statement about your values . It shows you’re building not just for today, but for the cleaner, greener tomorrow. It aligns with a sustainable lifestyle – pairing nicely with solar power, home batteries, and energy-efficient design choices. You’re essentially future-proofing your new home for the technologies (and realities) of the coming decades. When the neighbors drive by and see that EV charger on your garage wall, they’ll see a home that’s ahead of the curve – and you’ll feel the peace of mind that comes with knowing you planned for the long run. Single-Phase vs. Three-Phase Power in SEQ: What’s the Difference? One technical aspect that inevitably pops up when planning for a home EV charger is power supply : should your house have single-phase or three-phase power? Let’s break it down in everyday terms, and specifically what it means for Brisbane and South East Queensland (SEQ) homes. Most homes in Australia (and indeed around Brisbane) run on single-phase power , which is like a single-lane road delivering electricity into your house. It’s typically 230 volts and perfectly adequate for standard appliances and lighting. Three-phase power , on the other hand, is like a three-lane highway: your home gets three active power lines instead of one, delivering 400+ volts between phases. The result? More capacity and a steadier flow of power , ready to handle heavier loads. In the past, three-phase was mainly for commercial sites or very large homes, but times are changing. With more people installing energy-hungry goodies like ducted air conditioning, pool heat pumps, large solar systems, and yes, EV chargers , three-phase is moving into the residential scene. In fact, more and more Queensland homeowners are choosing to upgrade to three-phase as they embrace these advanced technologies. So, what’s the practical difference for your EV charger? It comes down to charging speed. A single-phase connection can comfortably support up to about a 7 kW charger , which will charge an average EV battery overnight. A three-phase connection can allow for 11 kW or even 22 kW charging if your car and charger support it, meaning much faster top-ups. To put it another way: a standard 32-amp circuit on single-phase might add roughly 40-50 km of range per hour to your EV, whereas on three-phase that could jump to 120+ km per hour. That’s a big difference if you ever need a quick turnaround or you’re charging multiple EVs. Three-phase power is ideal for high-power EV charging and running multiple big appliances at once – it spreads the electrical load so you’re less likely to trip breakers when the car charger, aircon, and oven are all running. In SEQ, many new suburban developments still default to single-phase connections, but upgrading to three-phase is usually possible if the local infrastructure supports it. It often involves a higher connection fee or some extra work by Energex (the local network provider), but if you’re building new, this is the moment to decide. Importantly, having three-phase in a new build gives you more headroom for the future . Even if a 7 kW home EV charger suits you fine today, you might later find you want a second charger (two EV household, anyone?) or a charger that can deliver extra-fast charging. With three-phase, you’ll be ready. It’s about future-proofing. As one guide for homeowners puts it, three-phase offers better appliance support and room to grow – perfect if you plan on adding a second EV, battery storage, or other high-power systems down the line. That said, single-phase isn’t a deal-breaker for EVs. Plenty of EV drivers in Brisbane charge happily on single-phase power. A 7 kW (single-phase) charger can add around 30-50km of range per hour, which is ample for overnight charging in most cases. If you typically drive, say, 50 km a day, a single-phase home EV charger will refill that in a couple of hours each evening. So don’t panic if three-phase isn’t feasible in your location – you can still charge an EV just fine. The key is knowing the difference: three-phase will simply give you more speed and capacity , and if you have the option during your build (and the budget allows), it’s worth considering for the flexibility it provides. Upgrading later can be costly – often several thousands of dollars (a three-phase upgrade might cost $4,000–$6,500) if not planned initially – so it’s a one-time decision that’s best made with the long view in mind. Plan Ahead to Save on EV Charging (and Headaches!) One of the biggest themes in sustainable home design (and one we champion at The Markon Group) is planning ahead . When it comes to EV charging, a little foresight during the construction phase can save you a lot of hassle and money later. Think of it as laying the groundwork now so you’re not breaking ground later . What does planning ahead for an EV charger involve? It can be as simple as running the right cable and conduit to your garage or carport during the build . For example, if you upgrade to three-phase power, have your builder or electrician run a dedicated heavy-duty circuit (often a 6mm² or larger cable) from your switchboard to the intended charger location while the walls are open. Even if you don’t install the actual charger unit immediately, you’ll have “roughed in” the setup – making a future installation basically plug-and-play. This pre-wiring step is relatively inexpensive to do as part of a new build (it might just be a tiny line item in your electrical plan), but retrofitting it later could mean opening up walls, pulling cable through finished parts of the house, and patching/plastering afterwards. Incorporating it now means avoiding that mess and expense down the track. Another aspect of planning is space and layout . Decide where on your garage wall you’d mount an EV charger. Ideally it’s near where the car’s charging port will be when parked – you might even consider adding an extra power outlet or a shelving niche for charging equipment. If you’re building a double garage and foresee two EVs, map out two spots. These are small design considerations that cost nothing to think about, but make life easier later. We’ve seen clients who, years after moving in, wish they had placed their electrical panel or added a conduit in a certain spot for an EV charger – and kicking themselves that they didn’t do it initially. It’s all about foresight. Importantly, planning ahead can save you money on electrical upgrades . If your new home’s electrical system is designed with EV charging in mind, your builder can ensure the switchboard has capacity for an extra circuit, and that you have the right mains supply. For instance, adding a high-capacity circuit might require a switchboard upgrade or a larger mains connection if done later; during a build, those can be factored in much more smoothly. The cost of upping your mains or installing a bigger board is much easier to absorb in the construction phase than as a standalone project later on. And as noted, if you think you’ll want three-phase eventually, do it from the start. Many eco-conscious homeowners in Brisbane are now opting for three-phase upfront, not just for EVs but because they plan to add solar panels, battery storage, electric pool heaters and other future goodies that all benefit from a beefier supply. It’s all connected – literally! Let’s not forget the paperwork and compliance side. In Queensland, any significant electrical work (like installing a wired EV charger) requires a licensed electrician and must comply with standards. By planning these in advance, your builder (in coordination with an electrician) handles the approvals or designs to code as part of the build. It rolls into your building certification. Later on, if you suddenly decide to whack a charger in, you’d need to arrange separate permits or at least electrical inspections, which is totally doable but another round of admin and possibly fees. Planning ahead simplifies that – one plan, one approval, done. In short, future-proofing is easiest and cheapest at construction time . A little forward planning can save you from ripping up your nice new garage in a year or two. As the saying goes, build for the life you’re going to have, not just the life you have today. If there’s even a inkling that an EV (or two) is in your future, talk to your builder about making your home EV-ready now. You’ll thank yourself later when everything is ready to go the moment you drive home that shiny new electric car. What’s Involved in Installing a Home EV Charger? You might be wondering what actually goes into installing that nifty charger on your garage wall. The good news is, for a detached home, it’s usually a straightforward job for a qualified electrician – especially if you’ve planned ahead. Here’s an overview of what’s involved in adding a home EV charger in Queensland: Choosing the Right Charger: First, you’ll select a home charger unit (often called a Wallbox or EVSE – Electric Vehicle Supply Equipment). Most homeowners opt for a Level 2 AC charger, which typically delivers anywhere from 3.6 kW up to 7 kW on single-phase, or 11–22 kW on three-phase. These units come from various brands (Tesla, Schneider, Wallbox, Ocular, etc.), and many are universal (compatible with any EV). They’re usually wall-mounted and roughly the size of a large tablet or briefcase. Some have smart features like Wi-Fi connectivity (for monitoring usage or solar integration), while others are simple plug-and-charge. When building a new home, you don’t necessarily have to buy the charger immediately – but it’s good to decide the specs you’ll eventually want, so the wiring and power supply can be prepared accordingly. Electrical Wiring and Capacity: Installing a home EV charger is not as simple as plugging in a toaster. It involves running a dedicated circuit from your main switchboard to the charger location. This circuit needs to be rated for the charger’s load (for example, a 32A circuit for a ~7 kW charger). A licensed electrician will handle this – and indeed, Australian law requires a licensed electrician to install any dedicated EV charger . Often a new circuit breaker (and safety switch/RCD) is added to your switchboard for the charger. In some cases, especially for higher-capacity chargers, your electrician might need to upgrade your switchboard or even your connection to the grid to support the additional load. This is why planning is key: if your builder already accounted for this, you’ll have the space and capacity ready. If not, the electrician may need to swap out your board for a larger one or upgrade fuses – which adds cost. Installation and Mounting: The physical installation involves mounting the charger unit securely to the wall (garages are ideal, as chargers are weatherproof but last longer in sheltered locations). The electrician will then connect the unit to the dedicated power supply line. This might involve some drilling through walls or ceilings to route the cable, which is far easier if done pre-gyprock in a new build, but can also be done in existing homes (usually via crawlspaces or conduit along walls). The charger is wired into your switchboard, tested, and configured. The electrician will ensure it’s properly earthed and that all safety mechanisms are in place. Typically, they will also set up any smart functions or link it to your Wi-Fi if it’s a connected charger. Compliance and Testing: After installation, the electrician will test the charger – often with the EV or a testing device – to ensure it delivers the proper current and that safety cut-offs work. You’ll receive a compliance certificate or documentation as required. Queensland (and Australian) standards are strict on electrical work, so you can rest assured that when installed correctly, these chargers are very safe. They have multiple layers of protection (circuit breakers, residual current devices, etc.) to prevent any electrical faults. It’s one reason doing it the right way (with the right professionals) is crucial – you don’t want DIY or unqualified installations when we’re talking about high electrical loads. Using Your Home EV Charger: Once it’s in, using your charger is blissfully easy. For most units, it’s simply a matter of parking your car, taking the charger’s tethered cable (or your car’s own charging cable if the unit uses a socket), and plugging it into the car. Charging begins automatically. Many chargers have indicator lights to show charging status, and some can be programmed via an app to charge at specific times (like overnight off-peak hours). From day one, you’ll love the convenience. It’s as routine as charging your phone at night – plug in, go to sleep, and wake up to a “full tank.” If you have solar panels on your roof, you might even configure your charger or home energy system to preferentially use solar power to charge during the day. How good is that – driving on pure Queensland sunshine ? In summary, installing a home EV charger involves a bit of electrical work but is a one-time job that yields daily benefits . For new builds, it’s even smoother, since all the wiring can be laid in advance. And with a professional doing the work, you’ll have confidence that your setup is safe, compliant, and optimized. At The Markon Group, we often coordinate with our trusted electricians during the build so that, whether our client wants the charger installed immediately or just the provisions in place, everything is done right. Seeing that charger on the wall when you move in – or the capped conduit waiting for a future unit – really underscores that your home is EV-ready and built for the future. Future-Proof Design: Work with a Builder Who “Gets It” It’s one thing to decide you want cool sustainable features in your new home – it’s another to actually implement them seamlessly. This is where working with a builder who truly “gets” future-proof design makes all the difference. By future-proof, we mean a home designed to adapt to evolving technology and lifestyles: think EV charging, solar power, home automation, battery storage, smart appliances, advanced networking and more. As technology marches on, you want a house that can march right along with it, rather than one that gets left behind and requires constant retrofits. A forward-thinking builder in Brisbane will bring up these topics early in the design phase. They’ll ask questions like: “Do you plan to drive an electric car in the near future?” “Should we include extra data cabling for that home office or smart fridge?” “How about positioning your switchboard and wiring routes to accommodate solar inverter and battery installation later?” These are the kinds of conversations that not every builder will have – especially the volume builders churning out cookie-cutter homes. But a custom builder attuned to future-proofing will ensure your new home isn’t obsolete the day you move in . They stay on top of trends and emerging norms. For example, not so long ago, hardly any homes had dedicated EV charging circuits; now, a savvy builder will rough-in an EV charger provision as a standard recommendation, much like wiring for air-conditioning or alarm systems. Working with a builder who understands these things can save you money and frustration . They can coordinate all the necessary trades and components during construction. If you want solar panels on the roof, they’ll design the roof for it (orientation, pitch, clear of shading). If you want an EV charger, they’ll make sure the garage has the right amperage and perhaps even an extra conduit in place. It’s all done in one go. Contrast this with a scenario where you move into a brand new house only to find out that adding an EV charger means tearing out half the garage drywall because no one thought of the conduit – yikes. Another benefit is compliance and quality. Builders experienced in future-proof design are familiar with local regulations and best practices for these installations. They know, for example, that Energex (in SEQ) might have certain requirements for connecting a solar system or that EV chargers should be on their own circuit. They design and build proactively with those in mind, so when the time comes, there are no nasty surprises or rework required. It’s a holistic approach – your home is viewed as an ecosystem that should work in harmony from the get-go. Let’s talk specifically about The Markon Group for a moment. We pride ourselves on being exactly this kind of builder. Our philosophy is that a home should fit your life, not the other way around . And your life is moving into an era of electric vehicles and smart everything. We see it as our job not only to pour the slab and raise the walls, but to anticipate your future needs as much as possible. That’s why we love discussing things like EV charging, solar integration, energy-efficient fixtures, and smart home systems with clients right from the start. We keep up with industry developments and Queensland building innovations, so we can make suggestions you might not even have thought of. Building a home is a partnership – we bring expertise on what’s coming down the line (from building code changes to tech trends), and you bring your vision of how you want to live. Somewhere in the middle, we craft a house that’s ready for whatever the future holds. In practical terms, working with a future-focused builder means fewer compromises . You won’t hear, “Oh sorry, we can’t do that” when you ask about an EV charging outlet or a battery storage nook or a three-phase upgrade. Instead, you’ll get solutions and enthusiasm. We’ve heard horror stories of people asking big project builders about solar or electric vehicle provisions and getting blank stares or huge variation quotes. A builder who “gets it” will either include it upfront or design it in such a way that adding it is straightforward. The result? Your home is not just built for now, but for 5, 10, 20 years from now . When your kids start driving electric, or you decide to buy an electric boat (hey, could happen!), or new smart appliances hit the market, your home will be ready to accommodate those with minimal fuss. Why Choose a Family-Run Builder Like The Markon Group? Choosing a builder is as much about trust and values as it is about floorplans and fixtures. The Markon Group is a proud family-run builder based in Browns Plains, Brisbane, and we believe that makes a difference in how we approach every project – including integrating features like EV charging for our clients. We often say we’re “Approachable, Friendly, Family Builders that Care,” and our clients seem to agree. But what does that mean in practice for you and your future-ready home? For one, it means personalized service and genuine partnership . As a family business, when you talk to us, you’re likely talking to one of the company owners or a tight-knit team member – not a corporate sales rep ticking boxes. We take the time to listen to your ideas (the crazier, the better – we love a challenge!) and actually incorporate them. If you come to us saying, “We’d love to include an EV charger and maybe plan for solar and a rainwater tank,” you won’t get a blank look or a cookie-cutter response. You’ll get excited collaborators who say, “Great, let’s make a plan.” In our experience, great homes are built when the builder and homeowner are on the same page and excited about the vision . Being family-run, we treat your project like it’s for one of our own – we want it to be perfect for you. Next, a builder like us brings local expertise and longevity . We’ve been building homes around South East Queensland for over three decades. This means we’ve seen trends come and go, and we know what works in our climate and community. Brisbane’s hot summers, occasional severe storms, the local council regulations, the quirks of Queenslander culture – we factor all that in. When we integrate something like an EV charger, we know to consider things like ventilation in a garage (for battery charging heat dissipation, for instance), or the impact on your electrical load during peak summer AC usage. We design holistically. Our homes stand the test of time not just because we use quality materials, but because they’re thoughtfully designed with the homeowner’s needs and QLD conditions in mind . Also, being a smaller family builder allows us to be flexible and innovative . We’re not stuck churning out the same template house 100 times a year. Every Markon build is unique, and that means if you want the latest tech or a custom feature, we can probably do it (and we’ll enjoy doing it!). We stay updated on the latest in sustainable building – for instance, new energy-efficient construction methods, or new products like home battery systems, smart thermostats, and yes, EV charging equipment. We bring that knowledge to you. It’s no coincidence that our blog covers topics like solar power, home automation, and EV charging – we’re always educating both ourselves and our customers. We want to lead by example as builders of the future. Finally, when you choose a family-run builder like The Markon Group, you get accountability and heart . Our name – our family name, effectively – is on every home we build. We don’t hide behind a brand façade. That means we deeply care about our reputation and your satisfaction. If we commit to making your home EV-ready, we’ll do it diligently and transparently. We’ll explain the process, costs, and benefits in plain language. There’s no upsell game or fine print surprises. This integrity builds trust – the kind of trust where you feel comfortable asking any question (“Hey, can I plug in two cars at once?” – answer: yes, we’ll design for that!) and you know we have your best interests at heart. We want you to not only love your home on the day you move in, but also years later when those “future-proof” features we included start to really pay off. In short, The Markon Group is not just a builder – we’re your partners in creating a home that fits your life. And if your life is leaning towards electric vehicles and sustainable living, we’re right there with you, ready to make it happen. Ask us about including EV charging in your new build. We are a great family custom home builder and would love the opportunity to discuss your future build — reach out to us today. Contact The Markon Group today: 📍 Location: 20–24 Commerce Drive, Browns Plains, Brisbane 📞 Phone: +61 7 3153 2000 🌐 Website: www.markongroup.com.au ✉️ Email: info@homesbymarkon.com.au Building futures for Queensland families.
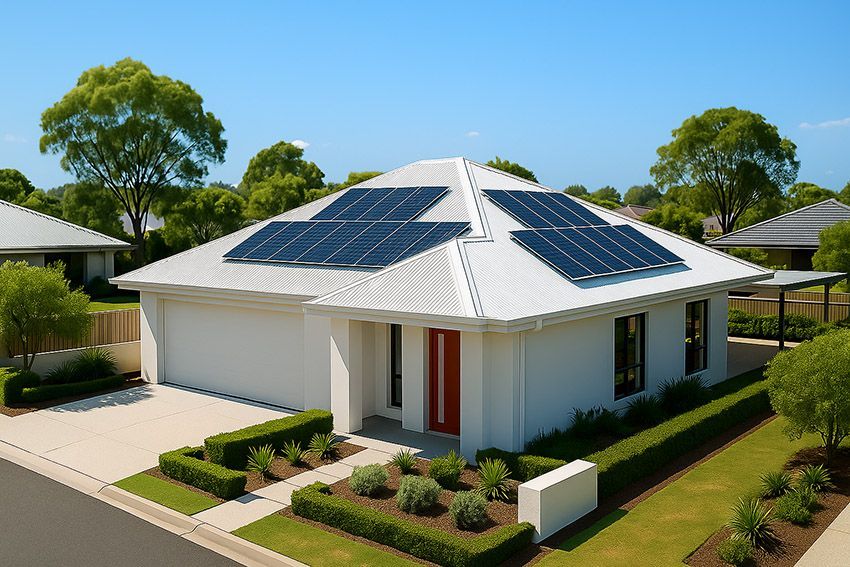
If you’re building in South-East Queensland, your north-facing roof is prime real estate for solar. But don’t forget — east and west-facing planes are also strong performers, especially for morning and afternoon loads. Whatever your array mix, every vent, flue, whirlybird, antenna, or skylight you allow on those planes steals space, complicates panel layout, and can cast shade that cuts generation for years. The fix is simple and smart: during design and rough-in, reroute services through the attic and exit them on the south roof (or gable end) wherever compliant. Plan it once, benefit for decades. The Markon Group bakes this coordination into our custom design process so your roof is solar-ready from day one. Why the North Roof Is Gold (But East & West Matter Too) In the southern hemisphere, the sun tracks across the northern sky . For Brisbane and SEQ, that means your north-facing roof plane receives the most consistent sunlight across the day and year. This is the premium surface for solar. But here’s the nuance: East-facing roofs pick up the bright morning sun , giving you power as your home wakes up. West-facing roofs capture the afternoon sun , valuable when appliances, pool pumps, or A/C units run hardest. That’s why in many modern solar designs, a mix of north, east, and west is used for a balanced generation curve. The critical rule? Keep all these productive planes clear of services . The south roof is the workhorse for penetrations—it’s the least productive face in SEQ, and the perfect place for vents, flues, skylights, antennas, and penetrations that would otherwise choke your array. The Culprits Stealing Your Sun Here’s what typically lands on the north, east, or west planes —and why they belong on the south : Bathroom/Toilet Exhaust Vents Kitchen Rangehood Ducts Plumbing Vent Stacks (DWV) Whirlybirds / Roof Ventilators Flues (Gas Appliances, Heaters, Fireplaces) Skylights / Solar Tubes Antennas, Satellite Dishes, Data/Conduit Stubs Parapets, Dormers, Satellite A/C Penetrations All of these clutter productive roof faces. By design, they should be rerouted to the south roof or gable end . Attic Rerouting 101: How We Preserve Your Solar Planes With a custom builder, you don’t need to project-manage the trade-offs. We design them in. The playbook: Declare the “Solar Priority Zones” Shade the north, east, and west planes as no services here. Reserve them for PV array layout. Direct all penetrations to the south roof . Create Service Corridors in the Attic Use attic runs to cross rafters/trusses and pop out on the south . Maintain compliance for duct length, fan sizing, and insulation. Choose Exit Points Smartly South roof preferred. Gable ends/walls secondary option. Eaves vents discreet and solar-friendly. Consolidate Services Cluster cowls together on the south face . Use low-profile flashings to minimise wind exposure. Map PV Arrays Early Plan for north as primary, east and west as strong secondary. Keep those planes clear so string layout is easy and efficient. When to Decide: Your Build Timeline Concept Design Orient roof forms so north plane is generous. Allow good east and west areas for future-proofing. Note: All services to be designed for the south roof . Pre-Contract / Selections Confirm appliance choices, skylights, and service exit needs. Document service-free north/east/west planes. Frame Stage & Rough-In Mark attic service corridors. Confirm duct diameters and fan capacities for rerouted paths. Roof Sheeting/Tiling Install all penetrations on south roof first. Photograph as-builts for solar installer handover. Comfort & Efficiency: No Compromise Even if duct runs are longer, performance is protected by: Upsizing fans Using insulated ducting Keeping bends minimal Maintaining condensate falls Result: You keep comfort inside while keeping solar yield outside. Future-Proofing with South Roof Services By designating the south roof as the service zone , you: Maximise panel rows on north . Keep east and west free for future morning/afternoon expansion. Create upgrade space for EV chargers, pool heating, or bigger batteries later. Roof Types: Colorbond vs Tile Colorbond : Easy for solar racking, penetrations best placed south-side. Tile : Dedicated vent tiles; again, south-side is best. Whichever roof you choose, fewer holes on north/east/west = more PV. Dollars & Sense: A Simple Illustration Let’s say rerouting lets you add 4 extra panels that would’ve been blocked by a vent and a flue. 4 panels × 400 W each = 1.6 kW added capacity. Average ~4 sun-hours/day across the year in SEQ (illustrative). Daily energy: 1.6 kW × 4 h = 6.4 kWh/day . Annual energy: 6.4 × 365 = 2,336 kWh/year . At $0.30/kWh , that’s roughly $700/year in energy value. Even if rerouting costs $1,000–$2,000 , the payback is short , and the benefit lasts the life of the system. Expanding to East & West Planes: Bigger Payback Now consider this: By keeping the east plane free , you can later add 6 panels (2.4 kW) for early-morning generation. By keeping the west plane free , you can later add 6 panels (2.4 kW) for late-afternoon load coverage. Together, that’s another 4.8 kW potential capacity you’ve preserved by simply rerouting services to the south . At 4.8 kW × ~4 hours/day = 19.2 kWh/day . Over a year: 7,000 kWh/year . Value at $0.30/kWh = over $2,100 annually . That’s the kind of capacity you’ll want as EV chargers , air conditioners , or pool heat pumps become part of your lifestyle. Keeping east and west planes clear is future-proofing in action. The Markon Method: Solar-Smart by Default At The Markon Group , we: Reserve north, east, and west for solar. Designate the south roof for penetrations. Brief every trade on the service-free plan. Hand you a solar-ready home , not a compromised one. Quick Checklist Confirm PV target size (north first, east/west optional). Mark solar priority zones (north/east/west). Nominate south roof as the sole service exit. Plan skylights carefully, away from PV grids. Provide as-built roof plan to solar installer. Your Next Step A solar-smart roof doesn’t happen by accident—it’s designed. As a caring, family-run custom builder, The Markon Group ensures your north-facing roof is maximised, your east and west are protected, and all services are directed to the south where they belong. The Markon group will endeavour to keep your North/East/West roof free from services allowing the solar design team of your choice the freedom to create the best case solution for optimal panel placement. Explore solar-smart home roof designs with The Markon Group. Let’s plan your service-free solar planes together—so you get the most out of Brisbane’s sunshine today, and for decades ahead. Contact The Markon Group today: 📍 Location: 20–24 Commerce Drive, Browns Plains, Brisbane 📞 Phone: +61 7 3153 2000 🌐 Website: www.markongroup.com.au ✉️ Email: info@homesbymarkon.com.au Building futures for Queensland families.
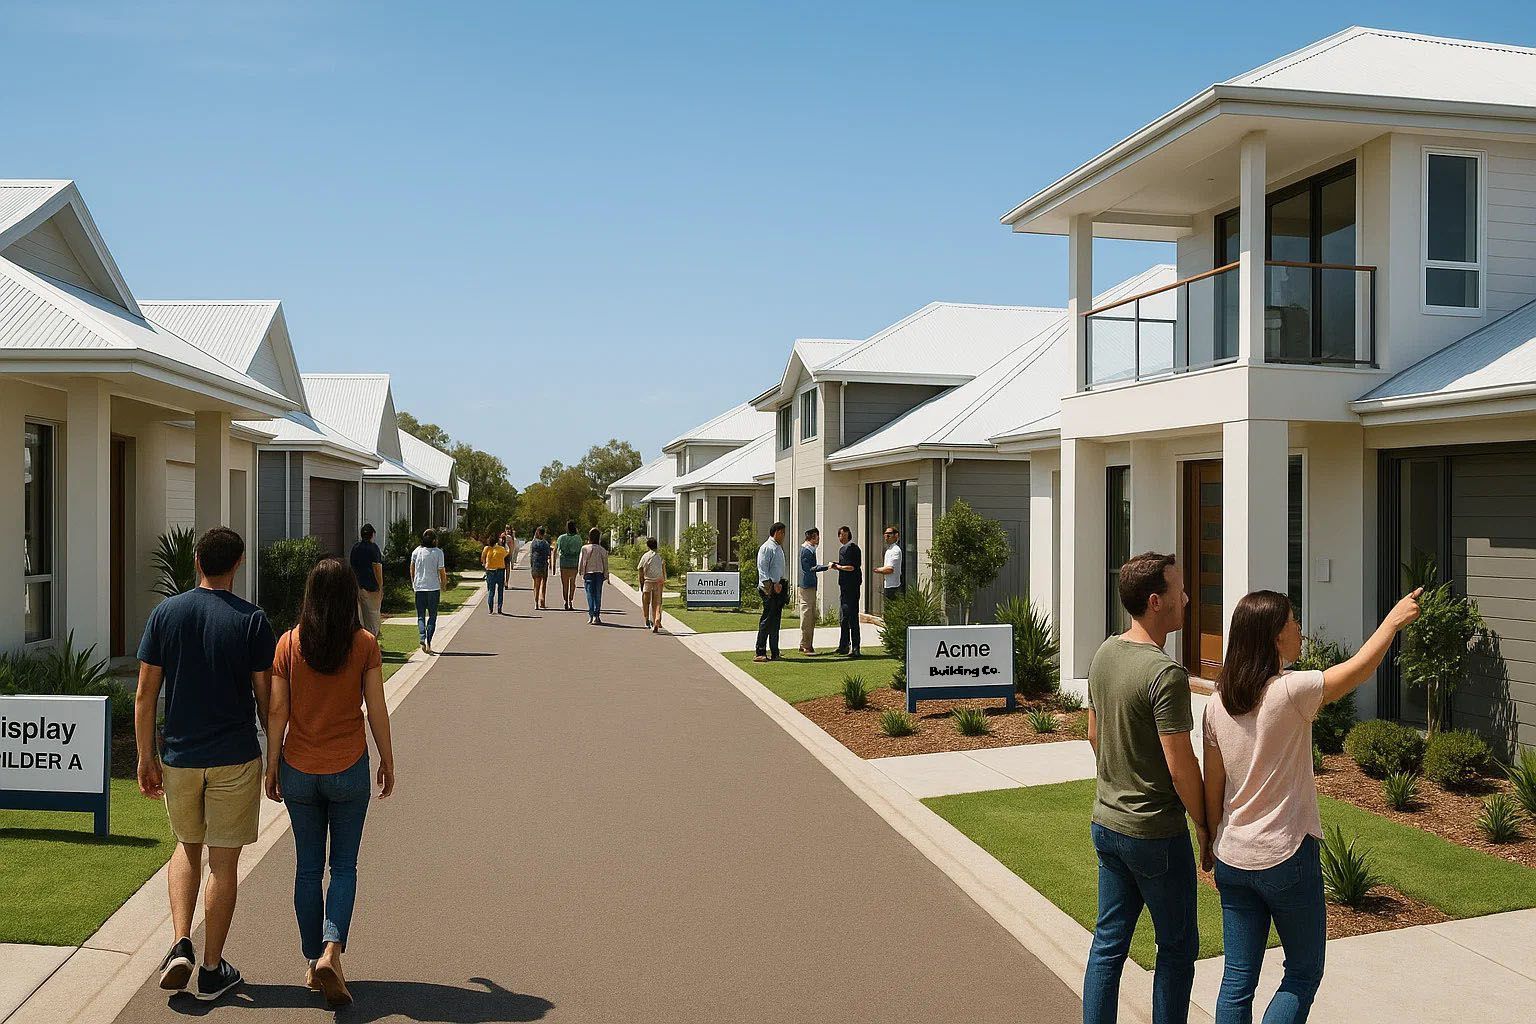
Walking into a display home can feel like stepping into a dream. Every surface gleams, the décor is picture-perfect, and the space seems larger and more luxurious than you imagined possible. It’s easy to fall in love with what you see and imagine yourself living there. But here’s the catch: the display home you tour is not usually the same as the base version of that design. It often showcases premium finishes, extra features, and structural changes that are upgrades, not standard inclusions. Without careful questioning, what you think you’re getting and what’s actually included in the quoted price can be very different. At The Markon Group, we believe clarity is everything. That’s why we have moved away from relying on traditional display homes and instead focus on a custom, inclusions-first approach. Rather than asking you to decode what is and isn’t included in a display, we sit down with you to design your home from the ground up. We encourage your design input, guide you with our expertise, and ensure the final plan is practical, safe, and fully compliant with Queensland’s building regulations. This blog will walk you through the most common display home traps, explain how to spot the differences between inclusions and upgrades, and show why our custom approach offers a clearer, more personalised pathway to your dream home. What Exactly Is a Display Home? A display home (or model home) is a fully built example house that builders open to the public. It’s essentially a showcase: the builder outfits it with high-end options and decor to impress potential buyers. Walking through one is meant to help you imagine living there. In Queensland, display homes are often grouped in “display villages,” letting you hop between different builders’ models in one location. They are great for ideas and inspiration – you can experience the layout, feel the space, and see the quality of work. The Trap: A display home’s primary purpose is to sell the builder’s product. Builders know how to dress up these homes with expensive upgrades and luxury features not included in the base price . Those stone benchtops, premium appliances, and designer light fixtures that made you go “wow!” are often optional extras. The home may be styled with bespoke furniture and perfectly landscaped gardens (often by professional designers), creating an emotional pull. It’s easy to assume the beautiful features are standard – but many are not. As one Queensland couple discovered, the “extras” they fell in love with in a display added over $40,000 to the price once they saw the contract . In short, a display home is not a transparent representation of what comes in the basic build. It’s more like a fully-loaded luxury car at the showroom: great to admire, but you must check what the “drive-away” price actually includes. Standard Inclusions vs. Upgrades – Know the Difference One of the most important concepts to understand when shopping for a new home is “standard inclusions” vs. “upgrades.” In simple terms, standard inclusions are the features and fittings that come included in the base price of the home. These typically cover all the essentials needed for a functional house – for example, the basic structure, standard finish materials, kitchen appliances, bathroom fixtures, flooring of a certain type, paint, etc. An upgrade is anything offered beyond that standard list, usually at an extra cost. Upgrades let you personalise the home – think of higher-grade materials (stone countertops instead of laminate), additional lighting, premium appliance packages, luxury tapware, or smart home systems. The tricky part is that every builder’s inclusions list is different. A feature that one builder includes as standard might be an upgrade with another. For instance, one company’s base price might include laminated cabinets and a laminate benchtop in the kitchen, while another’s includes stone counters as standard. This variation is why comparing builders solely on base price is dangerous – you must compare inclusions lists side by side. Builders often categorise inclusion levels (e.g. “Standard”, “Silver”, “Gold” packages) to target different budgets. Always clarify which level was used to price the display home or the advertised house-and-land package. In a display home context, ask to see the standard inclusions list. You may be surprised how many items in the display are missing from that list. Most display homes showcase nearly every upgrade possible , with a separate inclusions list than what’s advertised in the base price . This means the display home’s true build cost is significantly higher than the sticker price first quoted . It’s a classic “what you see isn’t what you get” scenario. By understanding inclusions vs. upgrades, you can ask the right questions: Is that floor tile included? Is this stone feature wall standard or extra? Every “wow” feature should prompt you to verify if it’s included. Also, be on the lookout for promotional upgrades packages . Sometimes builders advertise deals like “Free Luxury Kitchen Upgrade!” or “$50k of extras included!”. While enticing, these promos often have fine print – the “free” items might be conditional on using the builder’s finance or subject to certain house designs. Always dig into what is actuallyincluded in any promotion. Remember the adage: if it sounds too good to be true, it probably is. A transparent builder will spell out exactly what comes standard and what’s not, so you’re never left in the dark. At The Markon Group , we make sure our inclusions are clear, and we offer upfront pricing without hidden surprises. This way, you’re empowered to make decisions based on full transparency, not flashy marketing tactics. Common Display Home Traps to Avoid Visiting display homes is still a useful part of the journey – as long as you keep your wits about you . Below we’ve compiled some of the most common display home traps Queensland buyers should avoid, and how to spot them. The Luxe Kitchen & Bathroom Illusion It’s no surprise the kitchen and bathrooms in a display home are often decked out to the nines – these are big ticket selling points. The trap here is assuming those finishes come standard. Check the cabinetry, benchtops and appliances: That gorgeous waterfall-edge stone island in the display might be an upgrade, with the standard inclusion being a thinner laminate counter. Soft-close drawers, integrated bins, high-end ovens or a butler’s pantry configuration could all be extras. Similarly in bathrooms, displays often feature full-height wall tiling, frameless shower screens, dual vanities and designer faucets as standard décor – but many volume builders’ base prices only include half-height tiling, a basic mirror, and standard tapware. Ask what the base kitchen and bath specs are. It’s not fun to discover later that the freestanding tub or twin shower you fell in love with was never in the standard price. One quick tip: if you see brand-name appliances in the display (Smeg fridge, Miele oven, etc.), confirm if an appliance allowance is included or if those are upgrades. Many builders include only a basic appliance package by default. Lighting and Electrical Extras Ever notice how display homes feel so bright and inviting? That’s because they often have extensive lighting upgrades . You’ll see dozens of downlights, feature pendant lights over the kitchen island, maybe LED strip lighting under cabinets, and extra power points everywhere for convenience. In contrast, a typical base home inclusion might be a single standard light fixture per room (often a simple batten holder) and a limited number of power outlets. Converting those to a grid of downlights or adding ambient lighting can be costly upgrades. Don’t assume the electrical plan you see is what you get. It’s wise to ask: How many downlights and power points are included in the base price? If the display home has smart lighting or fancy switches (like dimmers or home automation systems), those are definitely upgrades. The same goes for air conditioning and fans – a display might have ducted air con and designer ceiling fans on show, while the standard home might include no air conditioning (or just a single split-system) and basic fans. Always clarify, so you’re not left in the dark (literally) when your new home is built. Stunning Facades vs. Standard Elevations The facade is the external face and style of the house – think of the combination of materials, windows, roof lines, and that all-important street appeal. Builders typically offer multiple facade options for each home design, ranging from included (often a simpler look) to premium (with extra cost). Display homes almost invariably feature one of the premium facades. That could mean upgraded render or stone cladding, a feature front porch with timber posts, a higher roof pitch, or special window designs – details that make the home pop. The trap is falling in love with a facade that isn’t included in the base price. For example, the display might show a Hamptons-style facade with decorative gables and expensive cladding, whereas the standard might be a plain brick front. Facade upgrades can add several thousands of dollars to tens of thousands, depending on how elaborate. When touring the display, ask the consultant: “Is this the standard facade? If not, what’s the cost difference for this look?” Also be cautious of the landscaping and driveway in front – a display’s beautiful driveway, pathways, and garden beds are usually not included at all (more on landscaping next). Visualize the home without the fancy facade elements to decide if you’d be happy with the standard look or if you need to budget for an upgrade. Beautiful Landscaping and Outdoor Features The manicured lawns, flowering plants, stylish fencing and even the BBQ deck you see outside display homes set a lovely scene – but these are often not part of the home contract . In most cases, landscaping is entirely up to the buyer after handover, unless you add it as an extra or it’s part of a special turnkey package. That means the turf, garden beds, retaining walls, and irrigation you see in a display are likely add-ons. The same goes for features like pools, built-in barbeque areas, or extensive outdoor paving. Builders may include a basic concrete slab for an outdoor patio, but the fancy pergola or tiled alfresco with downlights in the display is probably an upgrade or decorator option. Don’t assume your home will come with the letterbox, exposed aggregate driveway, or neat pathway shown either – these too are often excluded by volume builders . A transparent builder will remind you that “driveways & landscaping…are almost never included” in the base price . When evaluating a display, mentally strip back the outside to bare basics. Imagine the home with just soil around it – that’s usually how a new house is delivered. You’ll then understand what additional work (and cost) will be needed later to get it to look like the display. Hidden Site Costs and Compliance Surprises Some of the costliest traps are the ones you can’t see by just walking through a display. A display home sits on a perfectly prepared, flat block in a new estate – but your land might not be so straightforward. Many project builders’ base prices assume ideal site conditions (flat block, standard soil, no special requirements). If your situation deviates, site costs can mount quickly. For example, if your land has a slope or poor soil, you might need additional earthworks, retaining walls, or deeper foundations – none of which show up in the display home but all of which cost money . One couple in Queensland learned this the hard way: their attractive low initial quote ballooned with charges for site clearing, soil testing, improved insulation and a retaining wall for their sloping block . These kinds of costs drove them well over budget. To avoid surprises, get clarity on site costs early . A good builder will do a soil test and contour survey to give you a firm site cost estimate up front (for instance, at Markon we conduct these early and provide a fixed siteworks quote – no nasty surprises later). Also, Queensland’s environment brings some special building considerations that can affect cost and design, even if they’re not obvious in a display home. For instance, if you’re building in North Queensland or any designated cyclone region, your home will need engineering for high wind loads. Strong tie-downs, reinforced windows, and cyclonic roof structures are mandatory for safety – and they do add cost (retrofitting a home for cyclones can cost an extra $16k–$20k , so it’s better built in from the start) . Similarly, if your land is in a bushfire-prone area , it will have a BAL (Bushfire Attack Level) rating that dictates certain materials and designs (like toughened glazing, metal screens, non-combustible cladding, etc.). Building to a higher BAL can add several thousand up to tens of thousands of dollars to a build . These things won’t be apparent in a display home far from the bush, but your site might need them. Finally, that seemingly solid ground – what’s beneath it matters. Different soil types (classified from A through E, P in Australian standards) have different reactivity; highly reactive clay soils or soft soil need more robust footings . If a display home sits on an easy site but you’re building on clay or on a steep slope, expect extra foundation costs or retaining structures for safety. The trap to avoid here is not accounting for these site-specific costs in your budget. Always ask the builder how they handle site costs and whether things like connecting to services (water, sewer, stormwater) are included or extra . Often, volume builders exclude many “site essentials” from the base price , meaning you must budget additionally for items that are absolutely necessary to make the home livable. Knowledge is power – when you know your site and regulatory requirements, you can plan accordingly and avoid getting caught off guard by compliance-related upgrades. Queensland Building Considerations (In a Nutshell) We just touched on a few Queensland-specific factors, but let’s summarise them briefly so you know what to watch for: Cyclone Wind Zones: Northern parts of QLD (and even some coastal areas further south) fall into cyclonic wind regions (often called Region C or D). Homes here require enhanced structural systems – sturdier roof connections, stronger garage doors, etc. This cyclone-proofing is critical for safety, but it’s something to factor into costs if you’re building in these areas. It’s one reason a base home design from Brisbane might need modifications for Townsville. Always check if the standard design is rated for your region’s wind classification. BAL (Bushfire) Ratings: If you’re looking at land near bushland or in rural fringes, find out its BAL rating. The higher the BAL (ranging from BAL Low up to FZ – Flame Zone), the more fire-resistant features your house must have. These can include using specific roofing, sealing gaps, installing metal mesh screens, and using fire-rated external materials. Higher BAL requirements can add cost, but they’re absolutely necessary in bushfire zones. Builders usually need a BAL report for building approval in those areas, so this isn’t optional – it’s required compliance. Soil and Slope: Queensland soil varies widely – from the sandy soils by the coast to reactive clay in western Brisbane or black soil in certain regional areas. A soil test (geotechnical test) will classify your soil. Difficult soils or fill may require piering, extra thick slabs, or special footings. Likewise, a sloping block might need excavation or split-level design, adding to cost. None of this is reflected in a flat display lot, so evaluate your own land conditions. The key is to get a builder who investigates these conditions upfront and designs your foundations accordingly (and tells you the cost impact early on). The Markon Group, for example, conducts soil tests and site surveys early and provides a fixed quote for site works . It’s all about avoiding surprises. Climate and Energy Requirements: Queensland’s climate (whether the tropical humidity up north or the hot summers in the south-east) means you’ll want proper insulation, ventilation and possibly upgrades like sarking (reflective foil under the roof) or higher-rated glass to keep your home comfortable. The National Construction Code now requires new homes meet certain energy efficiency standards (7-Star energy rating). Sometimes display homes feature high ceilings or expansive glass which look great, but remember that meeting energy efficiency might require things like better insulation or glazing upgrades – ensure your quote addresses this. In summary, Queenslanders should be mindful of local conditions – wind, fire, soil, flood – when translating a display home into reality. A good builder will guide you through these and incorporate solutions into the design and quote. Don’t be overwhelmed by these considerations; just keep them in the back of your mind so you ask the right questions. This ensures your dream home is not only beautiful but also safe, legal, and suitable for the Queensland environment. The Markon Group Difference: No Gimmicks, All Custom By now you might be thinking: “Wow, there’s a lot the display home didn’t show me!” – and you’re right. This is exactly why The Markon Group has moved away from the traditional display home model . Rather than pouring resources into maintaining flashy show homes with every bell and whistle, we focus on a client-first, custom home approach from the start. What does that mean for you? First, it means transparency and personal guidance. When you engage with Markon, you aren’t dealing with a pushy sales rep trying to upsell upgrades; you’re meeting directly with our leadership and experienced team. In fact, our Head of Sales Rob Quinn and Company Director Mark Uzzell personally walk clients through the full list of inclusions and options. We take the time to sit down with you, in plain English, and explain exactly what’s included in your home and what’s not, so you’re never guessing or assuming. (No question is “too silly” – we love questions! We want you to understand every detail .) Second, our design process encourages your input at every step . Unlike a volume builder’s cookie-cutter plan where changes incur fees, Markon starts with a blank canvas or a flexible design and co-designs with you. We genuinely want to hear your ideas, wishlist, and concerns. Then our experts provide guidance to ensure those ideas are practical, safe, and compliant with QLD building codes. This collaboration ensures you get a home tailored to your lifestyle without the common budget blowouts. We reverse-engineer your design to fit a realistic budget, rather than hitting you with upgrade costs later. Our philosophy is “a home should fit your life, not the other way around,” and we stand by that. As Markon’s team likes to say, we “design a home that fits your life – not a cookie-cutter plan” . Third, Markon believes in an “inclusions-first” approach. This means our focus is on getting the standard home package right – high-quality inclusions upfront so you’re not misled by an artificially low base price. Our inclusions-first display homes show you what you’ll actually get in the contract (or we’ll clearly tell you otherwise). We maintain selected display or demonstration homes that are honest in presentation – often showcasing different specification levels – so you can visualise the results without a sales trick. It’s about trust. In fact, we often prefer to arrange private walkthroughs of completed client homes or our Style Studio rather than a glitzy display village. This way, you can see real craftsmanship and standard finishes in context. By engaging with us, you’ll get a comprehensive inclusions list from day one and a fixed-price contract covering everything we discussed – no nasty surprises down the track. Industry experts often suggest budgeting at least 10–15% on top of a volume builder’s base price to cover “missing pieces”, but with Markon, those pieces are addressed upfront in your personalised quote. Finally, our approach is about education and partnership. Building a home can be complex, especially if you’re new to it, so we see ourselves as your guides. From helping you understand regulatory steps (like council approvals, QBCC warranties, energy requirements) to giving frank advice on where to spend or save, we’ve got your back. We’re proud to be “Approachable, Friendly, Family Builders that Care,” as many clients have called us. For over three decades, we’ve built homes around South East Queensland that stand the test of time – not just because of quality materials, but because they were thoughtfully designed with the homeowner’s needs and the QLD conditions in mind. We don’t need flashy gimmicks or fine print. Our reward is seeing you move into a home that feels truly yours and knowing you had a smooth, enjoyable journey getting there. Checklist for Display Home Visits Even if you choose the custom path with a builder like us, you’ll likely still visit a few display homes for ideas. Keep this handy checklist in mind to evaluate any display home critically: 🔍 Get the inclusion list: Always ask the consultant for the standard inclusions list for that home. Compare it against what you see. Mark or note any item in the display that you don’t find on the list – that’s likely an upgrade (e.g. fancy handles, flooring type, higher ceilings). 💡 Count the lights and power points : Look at ceilings and walls – how many downlights, feature lights, and power outlets are there in each room? Then ask what the standard electrical plan includes. This will quickly tell you how much has been upgraded. 🚪 Check doors, windows & heights: Are the internal doors taller or nicer than usual? Is the ceiling higher than the normal 2.4m? Many displays have higher ceilings or deluxe doors – beautiful, but extras. Confirm standard ceiling height and door/window upgrades. 🍽️ Inspect the kitchen closely: Note the benchtop material, brand of appliances, presence of a walk-in pantry, soft-close drawers, etc. Cross-check which of those are included. Often the display has the “gourmet kitchen” package – ask if that’s standard or an add-on. The same scrutiny should apply to bathrooms (tapware, shower screens, niche in showers, etc.). 🌳 Step outside: Look at the facade and yard. Ask “What does the base price facade look like?” and “Are any of these landscaping features included?”. Don’t forget to ask about the driveway, fencing, decks or any outdoor structure – they often aren’t included by default. 🏷️ Clarify promotions and prices: If a promotion is advertised (“Free air-con” or “Upgrade package included”), ask for all conditions in writing. Sometimes “free” means the item is included but installation is not, etc. Get the full picture so you’re not misled by marketing gloss. 🗺️ Discuss your land: Tell the salesperson about your block (or type of block you’ll buy) – slope, size, location. Ask if the price would change for your site conditions. A good rep will flag things like site costs, BAL, or service connection fees if relevant. If they insist “Oh, it’s all standard, no extra costs,” be cautious – push for specifics or a site inspection clause. Also unless you are fully cashed up if you are taking a loan allow 1/3 for land and 2/3 for the build or you may run out of funds for the build before you start. 📑 Request a sample contract: If you’re serious about a builder, ask to see a sample building contract or specifications schedule before paying a deposit. Go through it (even if it’s long) to see what’s included and what’s excluded. This is where those “hidden” exclusions (like stormwater, temporary fencing, etc.) might appear. Better to know now than later. Using this checklist will help you see through the sparkle of any display home and focus on the facts and figures that matter. It empowers you to compare builders on an apples-to-apples basis. Remember, a display home is a tool for you – you’re not just there to be sold to; you’re there to evaluate the builder’s offering critically. Mini Glossary of Terms Building a home comes with a lot of jargon. Here’s a quick mini glossary of a few terms we’ve mentioned, in everyday language: Display Home: A fully constructed model home open for public tours, showcasing a builder’s work. It usually includes many optional upgrades and high-end styling to impress buyers, rather than representing the basic version of the home. Standard Inclusions: The list of finishes, fixtures, and features that are included in the base price of a home build. This covers everything the builder considers “standard” – if it’s not on this list, assume it’s not included and would cost extra. Upgrade: An optional item or higher-spec finish that is not included in the standard inclusions. Buyers can choose to add upgrades (for additional cost) to personalise or enhance their home – e.g. upgraded appliances, better flooring, extra lighting, etc. Site Costs: The expenses related to preparing your specific block of land for construction. Site costs can include earthworks (cutting, filling, levelling the ground), retaining walls, piering or deeper footings for certain soil types, connections to services (water, sewer, electricity), and addressing any slope or access issues. These costs are often in addition to the basic house price. Facade: The front exterior appearance of a house – its architectural face. Builders often have different facade styles (modern, classic, Hamptons, etc.) for the same floor plan. A facade choice can affect materials (brick, render, cladding) and windows/roof design. Premium facades shown on displays usually cost extra over the standard facade option. BAL (Bushfire Attack Level): A rating that measures a home’s potential exposure to bushfire risk, based on location and surrounding vegetation. Ratings range from BAL Low up to BAL FZ (Flame Zone). If your site has a BAL rating, your home must be constructed with specific materials and methods to withstand bushfire conditions – higher ratings mean more stringent (and costly) requirements. QBCC: Queensland Building and Construction Commission, the licensing authority and regulator for builders in QLD. A QBCC-licensed builder (like Markon, QBCC #1313179) offers the protection of proper contracts, home warranty insurance, and compliance with Queensland’s building standards. Always ensure your builder is licensed – it’s your safety net. FAQ – Frequently Asked Questions Q: If display homes have so many upgrades, how can I trust what I’m getting in my build? A: Great question. The key is demanding transparency. Insist on seeing all standard inclusions in writing and get any upgrade pricing clarified before signing a contract. A reliable builder will happily walk you through every item. At The Markon Group, for instance, we provide a detailed inclusions list with every quote and make sure you understand it fully. We don’t want any “gotcha” moments – our goal is that you know exactly what your home will include (and exclude) from day one. If a builder is cagey about details or says “it’s all included, don’t worry,” that’s a red flag – dig deeper or consider walking away. Trust comes from clarity and honesty in the planning stage. Q: Are site costs really not included in the base price? A: In many cases, yes – base prices often exclude specific site-related expenses. This is why you’ll see fine print like “price assumes level lot, M class soil, 500mm fall” on ads. If your lot doesn’t meet those ideal conditions, extra costs apply. Site costs can include things like soil tests, excavation, retaining walls, additional foundation requirements, or connecting utilities further than a standard length. Some builders offer “fixed site cost” packages for peace of mind – they’ll wear any extra cost above a set amount – but you pay a little premium for that insurance. Always discuss site costs upfront. For example, we conduct a site inspection early and give you a fixed quote for site works, so our clients aren’t hit with unexpected fees mid-build. Bottom line: assume nothing about site costs; get it assessed. Q: Why doesn’t The Markon Group have a traditional display centre? A: We made a conscious decision to focus on inclusions-first and custom design , rather than investing in expensive display homes that only show one version of a product. Traditional display homes can actually limit clients’ imagination to one layout or style, and often they set unrealistic expectations with all those upgrades. Instead, Markon Group prefers to use our Style Studio, inclusions showroom and real client homes to demonstrate quality and options. We also value the personal touch – we’d rather sit down with you to go through plans and finishes that match your needs than walk you through a generic display that might not align with what you want. This approach saves costs (which we pass on to clients value-wise) and leads to a more genuine understanding. We do have select “display” homes, but these are by appointment and are geared towards showing true standard inclusions at various spec levels, not dressing everything up just for show. It’s a different philosophy: we want you to see honest examples and get hands-on with the materials and products that will go into your home. Q: How does Markon ensure my custom design stays on budget and meets regulations? A: Our process is built around collaboration and practical guidance . After our initial consultation about your vision and budget, our team (including Mark, Rob, and our design experts) will craft a concept that aligns with both. We provide an “early fit-for-budget pathway” – essentially a reality-check document – after the first design meeting. This shows how your wish list fits into your target budget and flags any items that might cause overruns. From there, we tweak the design with you in a loop, so you’re making informed choices. Throughout, we ensure all proposals comply with Queensland building codes, local council rules, and structural requirements. Our deep experience in QLD means if, say, you want a big open living room with a certain window style, we know to incorporate the right engineering for cyclonic winds or energy efficiency from the get-go. We also handle all approvals and inspections, guiding the design so it sails through certification. In short, we don’t let you design something impossible – we coach your choices with cost and compliance in mind, before it becomes a costly plan on paper. That’s how we keep your dream home both feasible and fabulous! Q: I have a tight budget. Is a custom build with Markon really attainable for me? A: It might surprise you, but yes , it often is! People assume custom equals expensive, but as we’ve discussed, a “cheap” display home can end up expensive when you add what you truly want. Markon’s custom approach is about maximising value . We tailor the home to what you need and can afford, so you’re not paying for pointless extras or rooms you don’t use. We also plan thoroughly to avoid mid-build variations (which are budget killers). Many of our clients are first-home buyers or families on sensible budgets – not luxury mansion seekers. By designing smart (efficient layouts, focusing on features you care about, and selecting good-value materials), we often come in comparable to a project builder price for a similar size home, especially once that project builder’s upgrade and site costs are factored in. Plus, you get the benefit of a personal design and higher baseline specs. We’re totally upfront about costs; if your wish list can’t match your budget, we’ll say so and help adjust it. Our goal is to deliver your dream within your budget – it’s about being clever and creative, not cutting corners. So don’t write off custom building – come have a chat and we’ll explore options together. Ready to Experience the Difference? Buying or building a home is a huge milestone – it should be exciting, not full of uncertainty. We hope this guide has shone a light on the common display home traps and given you more confidence to ask the right questions. At The Markon Group, we’re passionate about creating beautiful homes built around you without the smoke and mirrors. If you’re in Queensland and looking to build, why not come and see the honest approach in action? We warmly invite you to book a tour of our inclusions-first display homes – come inspect the quality of our standard inclusions, touch the materials, and see exactly what you can expect in a Markon home. You’ll be guided by one of our friendly experts (likely Rob or Mark themselves), in a zero-pressure, consultative visit. Or, if you’re brimming with your own ideas already, let’s start with a personalised design conversation . We’d love to sit down with you, hear about your dream home vision, and show how we can make it a reality – on time, on budget, with no surprises. Your home should be a reflection of you, and the journey to get there should be enjoyable. Get in touch with our team today to take the first step. Whether it’s an informative tour or an initial brainstorming chat over coffee, we’re here to help you build smarter and avoid the traps – delivering a home where the only surprise is just how perfectly you it turns out to be. We look forward to building something great together!

Building your first home in Queensland is an exciting journey from dreaming up custom designs to finally getting the keys. But before construction begins, there’s a critical step that can feel daunting: signing the building contract . This legally binding document will shape your entire build experience, so understanding it is essential. Unlike buying an existing house (where you sign a standard purchase agreement and get a finished home), building a home means entering a detailed construction contract with a builder. The process and paperwork are different and first-time builders often have little idea what to expect. Don’t worry – in this guide, we’ll walk you through what to look for in a Queensland building contract, explaining each part in plain English. We’ll start by exploring why building contracts matter (and how they differ from a normal house purchase). From there, we’ll look at how your custom home design choices and inclusions need to be locked in before you sign. We’ll explain the importance of an inclusions checklist (and what it typically covers) so you won’t miss any details. You’ll learn about progress payments – those milestone payments you’ll make as your build progresses – including typical Queensland stages like slab, frame, and handover. We’ll also demystify contract clauses about variations, timelines, warranties, insurance, defects and cooling-off periods. To keep you safe, we’ll highlight red flags first-home builders should avoid. Along the way, you’ll see how The Markon Group’s client-first approach addresses these issues with transparency and meticulous planning. Finally, we’ll wrap up with practical tips for approaching the contract stage confidently. Let’s dive in. Why Building Contracts Matter (Especially in QLD) A building contract is more than just paperwork – it’s the roadmap for turning your dream home into reality. In Queensland (QLD), a residential construction contract sets out what will be built, how, when, and for how much . It differs greatly from a contract to buy an existing home. When purchasing an established property, the contract of sale is relatively short-term and straightforward (you agree on a price, do inspections, and settle). In a building contract QLD first-home buyers will encounter a much more detailed agreement that covers the entire construction process. This includes stages of work, progress payments, specifications, timelines, warranties and more. Why does this matter? Because building a home is a complex, months-long project with many moving parts. A well-written contract protects you by clearly defining the builder’s obligations – and your own. It ensures you get the home as designed and agreed , and that you only pay for work once it’s properly completed. In Queensland, for example, contracts over $3,300 must include a detailed payment schedule and meet certain legal requirements to protect homeowners. If a contract is vague or one-sided, you risk disputes, delays, cost blowouts or unfinished work. As one legal expert notes, a vague scope of work or unclear terms is a huge red flag – it makes it hard to hold the builder accountable and invites disagreements later. In short, the contract is your safety net . It holds the builder to delivering what was promised, and gives you recourse if things go wrong. Another key difference in QLD: when building new, you benefit from certain protections that don’t apply to buying established homes. For instance, Queensland law mandates a cooling-off period after signing a building contract (usually 5 business days) during which you can withdraw. Also, the builder must take out a Home Warranty Insurance policy for your project – a scheme that protects you if the builder can’t finish the job or fix defects. These safeguards don’t exist when buying an existing home “as is.” So, your building contract is not only a blueprint for construction, it also triggers these consumer protections to give first-home builders peace of mind. Bottom line: Take the building contract seriously and read it thoroughly. It’s longer and more detailed than a house purchase contract, but for good reason. In the next sections, we’ll break down its key components so you know what to look for. From Design to Contract: Locking in Your Custom Home Plan One of the most exciting parts of building a custom home is the design phase – choosing layouts, styles, finishes, and all the personal touches. But here’s a pro tip: make your design decisions before you sign the contract, not after. All those client-driven changes and selections need to be documented up front, because once the contract is signed, any change typically becomes a variation (which can add cost or time). In other words, the contract should lock in exactly what you’re getting in your new home, based on the plans and specifications you’ve agreed on. How do you ensure that happens? Work closely with your builder or designer on a detailed specification and inclusions list during the planning stage. This includes everything from the big-ticket items (like number of rooms, ceiling height, type of roof) down to the little details (like tapware model, paint colors, power outlet locations). It may feel tedious to nail down so much in advance, but it’s vital. The building contract will reference these plans and specs as the “scope of work.” A well-defined scope means fewer misunderstandings later. As construction lawyers often warn, an ambiguous scope of work is a recipe for disputes – you don’t want language like “build to agreed standard” without specifics. Instead, the contract should clearly attach or reference your finalized plans, engineering drawings, and an inclusions checklist as appendices. That way, both you and the builder know exactly what’s included in the price and what isn’t. At The Markon Group, we make this a cornerstone of our process. We take the time to “deeply envision your idea” during design, finalizing every detail with meticulous attention so the contract accurately reflects your dream home. The result? When it’s time to sign, we’re all on the same page. There are no loose ends or assumptions – every material, fixture and finish has been chosen and listed. This approach ensures that your contract isn’t just a legal formality, but a precise mirror of the plan you’ve approved. It also minimizes the need for variations later on, since everything you want is already accounted for. (Remember, variations – changes after signing – are one of the most common causes of budget blowouts and disputes, so planning ahead saves money and stress.) Tip: Before signing, double-check that all your requested inclusions or upgrades are written into the contract or attached documents. Verbal promises or sketch drawings aren’t enough. If it’s important to you, make sure it’s in writing. Ensure the plans and product schedules are final. If you’re unsure about any terminology, ask questions now. By locking in your custom home design details pre-contract, you set the stage for a smoother build with far fewer surprises. The Inclusions Checklist: Don’t Leave Anything Out One of the most important documents in your building contract pack is the Inclusions Checklist (sometimes called the specification or inclusions list). Simply put, inclusions are all the items, materials and services that are included in your contract price. This checklist spells out what you’re getting for your money – and by omission, it also reveals what’s excluded (anything not listed). First-home builders should scrutinize this list carefully. Why is the inclusions checklist so crucial? Because it manages expectations and prevents “I thought that was included!” moments down the track. Common inclusions encompass things like: the bricks or cladding for your exterior, roofing materials, window types, flooring (tiles, carpet, etc.), kitchen cabinetry, appliances, bathroom fixtures, paint, light fittings, and so on. It also covers services like obtaining building approvals, site cleanup, and connection of basic utilities. Basically, it’s a detailed inventory of what the builder will supply and do. For example, your list might specify the brand and model of oven, the number of LED downlights per room, the size of the hot water system, the landscaping allowance, and even the color of the garage door. Equally important are any exclusions or allowances noted. Exclusions could be things like landscaping, fencing, window coverings, or floor coverings (if you plan to do those yourself later). Allowances or provisional sums might be used for items that can’t be fixed yet – for instance, a provisional sum for rock excavation if it’s uncertain, or an allowance for tiles if you haven’t chosen a specific tile but a budget per square meter is set. Take note of these, because if the actual cost exceeds the allowance, you may pay extra. The more fixed inclusions (and fewer open allowances) you have, the more certainty you have about the final price. A thorough inclusions checklist protects you from both disappointment and extra costs. Imagine assuming that stone kitchen benchtops were included, only to find the standard inclusion was laminate – that could be a nasty surprise. By reviewing the list, you can identify any elements you want to upgrade or clarify before signing. As one building lawyer advises, insist on a detailed description of materials and finishes, down to brands and model numbers if possible. If anything is vague (e.g. “tapware: chrome mixer”), ask for specifics (which brand/model?) or at least clarify the budget allocated. This way, you know exactly what you’re getting. What to look for on an inclusions list : Does it cover all rooms and aspects of the build? Does it list flooring in every area (and is it the type you expect)? Are kitchen appliances included – which ones, what brand? What about bathroom accessories like towel rails and mirrors? Is paint included (often yes, two coats)? Light fixtures? External works like driveway, turf, or clothesline? Each builder’s “standard inclusions” vary, so compare this list with your wish list. If something is missing, discuss adding it or at least know it’s not in the contract (so you can budget for it separately). For example, insulation is a key inclusion to check: ensure the contract specifies the insulation rating (e.g. R2.5 batts in walls) appropriate for QLD climate – good insulation can save on energy bills. Energy-efficient fixtures like the hot water system or air-conditioning – are they included and suitable for your home’s size? If the standard inclusions seem low-end (e.g. a basic 1.5HP aircon for a large living area), you might negotiate an upgrade now rather than later. Other items first-timers often overlook include: garbage disposal units, full height tiling in showers, outdoor taps, letterbox, NBN connection – check if they’re in the list. The Markon Group provides a very detailed inclusions list as part of our fixed-price proposal . In fact, you’ll see every inclusion spelled out, any provisional sums (if needed), and even a progress payment schedule in the proposal – “no surprises later”. We believe transparency up front is key. By the time our clients sign the contract, they know exactly what’s included in their new home, line by line. This not only gives peace of mind, but also helps your lender; most banks in QLD want to see a fixed-price contract with a clear inclusions list before approving construction finance. It shows that the price is locked down and reduces the risk of cost overruns. Remember: Read the inclusions checklist before signing and keep a copy. It’s your reference throughout the build to ensure you’re getting everything you paid for. During construction, if something looks different than expected, you can refer back to the contract and inclusions list to discuss it with your builder. This list is truly your friend – take the time to understand it, and you’ll avoid that classic first-timer mistake of assuming something was included when it wasn’t. Progress Payments: How They Work in Queensland When building a house, you don’t pay the full contract price up front. Instead, you’ll pay in stages as the work progresses – these are progress payments . Understanding how progress payments are structured in Queensland is crucial, since it affects your cash flow, your loan, and your protection as a consumer. A good building contract will lay out a clear progress payment schedule linked to specific construction milestones. Here’s what a typical Queensland progress payment schedule might look like (using common stages for a standard home build): Deposit: Usually 5% of the contract price, paid when you sign the contract. In QLD, the law actually caps the deposit at 5% for work over $20,000 – so beware if a contractor asks for more (that’s a red flag and not allowed). The deposit secures your spot in the builder’s schedule and covers initial costs like drafting plans or building approvals. Base Stage (Slab Stage) : Often around 10% of the contract, due when the concrete slab (or house footings) are completed. At this stage, the foundations are in place – you can literally see the outline of your home on the ground. Frame Stage : About 15% due when the timber frame of the house is up and approved by an inspecto. Now the “skeleton” of your home is standing (walls and roof frame, though not enclosed yet). Enclosed Stage (Lock-Up Stage) : The largest payment, roughly 30-35%, due once the house is at “lock-up” – meaning the roof is on, external walls are finished, and windows/doors are installed. At this point, the home can be secured and is weather-tight. (Some contracts split this into two stages: Roof Stage and Lock-Up, but generally by lock-up you’ve paid around 50% of the contract in total.) Fixing Stage : Usually around 20% due when the interior is largely fitted out. This covers work like plastering, installing cabinets, doors, skirting boards, and so on – all the internal fixtures and fittings that make the house look more finished. Practical Completion (Handover Stage) : The final balance (often 10-15%) is paid when the house is practically complete. “Practical completion” means the home is finished and ready to live in, aside from possibly some minor defects or touch-ups noted on a handover inspection. You should not pay this last installment until you’ve done a walkthrough, any significant defects are fixed, and you have confirmation (like a completion certificate) that the building is done. These percentages are a typical example; your contract might vary slightly, but all progress payments must be proportional to work completed by law . In fact, Queensland no longer prescribes exact stage percentages, but it does require that payment schedules are fair – e.g. by the time you’ve paid 50% of the price, at least 50% of the work should be done. You should never be asked to pay ahead of work; if a builder tried to front-load the payments, that’s a concern. Linking payments to stages also helps you as the owner. It means you can (and should) inspect the work at each stage before paying. The QBCC (Queensland Building and Construction Commission) recommends only paying once a stage is fully completed as per contract. For example, at frame stage – is the entire frame up and approved? At enclosed stage – are all external doors/windows in? If something’s not right, you can hold off payment until it is, giving the builder strong incentive to do quality work on schedule. . Progress payments and your loan : Most first-home builders use a construction loan, which releases funds in segments to match these stages. Your bank will likely want to see the contract schedule, and they may send an inspector or ask for photos at each drawdown. Markon Group, for instance, aligns the payment schedule with common lender stages and keeps the bank informed at each milestone. We also update you at every stage claim in plain English – no jargon – so you know what you’re paying for. Clear communication about progress payments is part of our honest, client-first approach. For your planning, note that you’ll need to contribute your deposit (and perhaps some early stage payments) from your own savings if the bank loan doesn’t kick in until after slab. Ensure you understand from your lender how they handle each stage. For instance, some lenders require you to pay the deposit first, then they fund subsequent stages. Tip: Never pay a progress invoice before the stage is finished, and never pay more than the contract specifies. Paying too early or too much can actually void some of your protections under the Home Warranty Scheme. Stick to the schedule. Also, check that the contract’s description of each stage is clear (e.g. “Enclosed stage means roof on, external cladding complete, doors/windows fixed in place”). This avoids arguments about what constitutes completion of a stage. If you have an independent inspector, you can have them inspect at key stages to verify work before you pay – an extra peace of mind step some first-timers take. In summary, progress payments are there to protect both you and the builder: you pay for work as it’s done (not all up front), and the builder gets funds to keep the project moving. A fair schedule with defined stages is a hallmark of a good building contract in QLD. Understanding it will help you budget and avoid disputes. Variations: Changes, Costs, and How to Avoid Surprises After your contract is signed and work begins, any change to the agreed plans or inclusions is called a variation . This could be initiated by you (the owner) – for example, you decide to add an extra power point, or change a tile selection. Or it could be required by the builder or circumstances – say, a certain material is unavailable and needs substituting. Variations are normal in construction, but they can significantly affect your budget and timeline if not managed carefully. The best strategy is to minimize variations through thorough upfront planning (remember our earlier advice to lock in design decisions before contract). Here’s what to know about variations: By definition, a variation is a change to the contract after signing. That means it usually involves altering the work to be done, the price, and/or the timeframe. For instance, if you upgrade the kitchen benchtop from laminate to stone mid-build, that’s a variation likely increasing the contract price. Or if a structural post needs to be moved, resulting in engineering changes – that could be a variation affecting time and cost. Variations must be documented in writing and agreed by both parties. A good contract will have a clause outlining the variation process. In QLD, the law actually requires that before any variation work is done, the contractor gives you a written variation document detailing the change and its price/time impact, and you sign to accept it. (Only exception is emergency work for safety, which still must be documented ASAP.) Never rely on verbal “yeah, we can do that” changes. Always insist on written variation forms – this avoids confusion and gives you a record if disputes arise. Undocumented variations are notorious for causing disputes and budget blowouts. When reviewing a variation document, check that it clearly states: what the change is, how much it will cost (added or deducted), and any extra time needed to complete it. Also, if it’s an owner-initiated variation, note if the payment for it is due immediately or at next progress claim. Many builders will require you to pay for the variation as soon as it’s executed (especially if it involves additional work or materials upfront). Others might roll it into the final payment. Clarify this to manage your cash flow. Why avoid variations? Primarily to keep your project on budget and on schedule. Every variation typically carries not just the cost of the change but also often an administrative fee or at least the hidden cost of disrupting the workflow. One small change might be fine, but multiple changes can add up to serious dollars. Plus, certain variations could trigger adjustments to your Home Warranty Insurance if they significantly change the contract value – the builder has to notify QBCC of that. Planning well and finalizing your choices in the design phase means you won’t have the dreaded experience of a pile of variation addendum forms and invoices. That said, sometimes variations are unavoidable. Unexpected things can crop up (perhaps an engineer requires a footing redesign, or you encounter rock during excavation). This is why having a contingency in your budget is wise – many people set aside maybe 5-10% of the contract price as a buffer. If you have no variations, great – money saved. But if you do, you’re prepared. Markon Group’s approach : We strive to eliminate surprise variations through meticulous pre-contract planning. Our detailed design and specifications process means clients rarely need to change things mid-build – because we got it right upfront. On the rare occasion a variation is needed, we handle it transparently and promptly in writing , so you always know the cost and impact before proceeding. We also cap provisional sums and make them realistic, to reduce the chance of cost overruns. It’s all part of our “no surprises” philosophy. Advice for first-timers: Try to stick to the plan once construction starts. If you get an impulsive idea (“What if we added a skylight here?”), remember it will come at a premium now. It might be better to implement non-essential changes after handover as a renovation, rather than disturb the contract. However, if something truly isn’t right or you need to change it for your satisfaction, go through the proper channels – talk to your builder, get a quote, sign a variation. Keep records of all variations in your project folder. This will ensure the final account is clear and agreed by both sides. In summary, variations can be contract savers (allowing necessary flexibility) but also potential budget busters. Limit them by planning ahead, and manage them by insisting on documentation. A well-planned contract is your best defense against costly variations. Key Contract Clauses to Watch For Building contracts can be long documents full of legal and technical terms. While you don’t need to become a legal expert, you should zero in on a few key clauses that have big implications for your build. Here are the main contract elements and clauses first-home builders in Queensland should pay close attention to: Timeline and Completion Date : Look for clauses about the construction period or completion date. Does the contract state an expected start and finish date, or a duration (e.g. “240 days from commencement”)? Open-ended timelines like “work will be completed in a reasonable time” are not good enough. You want a clear end date or timeframe. Also check allowances for delays – e.g. weather days or extension of time (EOT) provisions. Some delays (rain, supply shortages) might extend the completion date lawfully, but the contract should outline how that works (builder usually must notify you in writing of claimed delays). Importantly, see if there’s a liquidated damages clause – this is basically a penalty the builder pays you for late completion (often a set dollar amount per day beyond the agreed date). LDs give you some compensation if the build runs late and motivate the builder to finish on time. Not all contracts have LDs, but it’s worth asking about if timing is critical (for example, if you’re renting and delays would cost you). Progress Payment Schedule: We covered this above, but double-check the actual contract schedule matches what you discussed. It should list each stage, its percentage or dollar amount, and at what point it’s due (e.g. “within 5 working days of stage completion and invoice”). Also ensure it complies with QLD rules (e.g. deposit ≤ 5%) – if not, raise it. A clear payment clause protects you from paying too much upfront. Variations Clause : We also covered this. Ensure the contract explains how variations will be handled, that they must be in writing and signed by you q . It might reference a QBCC Form or similar. The clause should also state that if a variation will delay the project, the completion date can be extended by a reasonable period – this is standard. Just be aware of it: if you initiate a big change, you can’t hold the original finish date. Understand the process so you’re not taken by surprise. Warranties and Defects Liability : A quality builder will stand by their work, and the contract should reflect this. Look for a defects liability period clause (sometimes called maintenance period). This is the timeframe after completion during which the builder is obliged to come back and fix any defects that arise. Typically in QLD it’s around 6 to 12 months (common is 6 months for non-structural issues, often 12 months in many contracts). Check how long yours is and what it covers. For example, if cracks appear in plaster or a door warps during the first year, you notify the builder and they should rectify it at no cost. Also note any exclusions (some minor issues like hairline paint cracks might be considered “normal settlement” and not defects – the contract or QBCC standards will guide that). Additionally, Queensland’s law provides statutory warranties beyond that period for serious defects. Through the QBCC Home Warranty Scheme, structural defects are covered up to 6 years 6 months from completion, and non-structural for 12 months. Your contract may not spell all that out, but it should not negate those rights. It likely references the QBCC Act or warranty insurance. Ensure the contract doesn’t have any clause trying to make you waive warranties – that wouldn’t override the law anyway. Also, many contracts include a clause that the builder will pass on manufacturers’ warranties (for appliances, fixtures, etc.) to you. This is important – e.g., your hot water system might have a 5-year factory warranty; you should get those documents at handover. Insurance and Risk : The contract should clarify who is responsible for insurance during construction. In QLD, builders are required to have certain insurances. Specifically, check that it states the builder will maintain Contract Works Insurance (covering the building works/materials for fire, theft, storm, etc. during build) and Public Liability Insurance (covering accidents on site). These protect you from liability if, say, a storm damages the partly built house or a person is injured on site. Also verify the contract says the builder will take out the QBCC Home Warranty Insurance on your behalf (this is mandatory for residential work over $3,300). You will pay the premium (usually rolled into your contract price or deposit), but the policy protects you if the builder dies, disappears or is bankrupt and can’t finish the work or fix defects. Before you sign, the builder should give you a copy of the QBCC Consumer Building Guide and later, proof that this home warranty policy has been taken out. These are legal requirements in QLD – make sure they happen. Cooling-Off Period : By law, your contract must mention your right to a cooling-off period (5 business days). This means after you receive the signed contract (and the QBCC Consumer Building Guide for contracts $20k+), you have 5 days where you can change your mind and terminate for any reason . If you do so, you must give written notice and you’ll get your deposit back minus a small termination fee (up to $100 plus any out-of-pocket expenses the builder incurred like preparing plans). It’s rare to use cooling-off, but it’s a nice safety hatch if you feel you’ve rushed into the wrong decision. Ensure you know the exact window of your cooling-off (it usually starts the day after you receive all contract documents). And note: if you took independent legal advice before signing, you actually waive the cooling-off right – because presumably your decision was fully informed. Termination and Dispute Resolution : Scan the clauses about what happens if either party wants to end the contract or if there’s a dispute. Hopefully you’ll never need these, but it’s good to know the basics. Usually, the contract will allow termination by the owner or builder only in specific cases (e.g. significant breach or if one side fails to remedy a breach after notice). If there’s a dispute, many contracts require some steps like mediation or going through QBCC dispute resolution before court. Some may have arbitration clauses. Just be aware of any clause that heavily favors the builder, like requiring disputes to be handled in a distant location or you paying legal fees regardless of outcome. Most standard QLD contracts (like those by HIA or Master Builders) are fairly balanced for domestic builds. If anything odd stands out, ask about it or get legal advice. Special Conditions : Check if any special conditions have been added. Builders sometimes add their own clauses at the end. Read these carefully as they can modify the standard terms. For instance, a special condition might say “Owner must provide access to site via neighboring lot” or something about rain delays. Make sure you understand any added terms. If any seem unfair or unclear, discuss them before signing. Lastly, warranty of title and site conditions: The contract may include that you, the owner, have the right to build on the land (you own it) and that you’ve disclosed any easements or covenants. Ensure you have done so. Also, often you warrant the land is suitable to access, etc. If you know of any site challenges (like underground rocks, known contamination), tell the builder now; surprises later could be a variation at your cost if not disclosed. That’s a lot of clauses, but in summary, watch for anything related to time, money, quality, and your rights . Those are the big ones. It’s often worth having a solicitor experienced in building contracts glance over it – they can spot hidden pitfalls. The Markon Group always encourages clients to understand their contract, and we explain each stage in plain English as we go. We pride ourselves on contracts that have clear, fair terms abiding by all QLD requirements (as a QBCC-licensed builder, our contracts and warranties meet QLD standards). The contract should be a win-win: you know exactly what to expect from us, and we outline what we need from you. With that clarity, both parties can proceed confidently. Red Flags for First-Time Builders Navigating a building contract for the first time can be tricky. Here are some red flags to watch out for – warning signs that something isn’t right. If you encounter any of these, pause and investigate further (or seek advice) before proceeding: Excessive Deposit Request : In Queensland, a builder cannot legally ask for more than 5% deposit on a fixed-price contract over $20,000. If you see a contract or invoice asking for 10% or 20% deposit without a valid reason (only very specialized off-site work contracts allow higher deposit), that’s a red flag. It may indicate the builder has cash flow issues or isn’t following QBCC rules. Incomplete or Vague Scope/Specs : Be wary if the contract lacks detail in the plans or inclusions. Vague descriptions like “build to standard practice” or missing documentation (no finishes schedule, etc.) put you at risk. A proper contract should have all relevant drawings, engineering, and a comprehensive inclusions list attached. If it doesn’t, ask why – don’t accept “we’ll sort that out later” because later you might find you’re paying more for what you thought was included. No Fixed Price / Cost-Plus Contract for First Home : Most first-home buyers should opt for a fixed-price contract (where the price is set, barring variations you approve). If a builder pushes you towards a cost-plus contract (where you pay actual costs plus a margin), be cautious – this is open-ended and can be dramatically higher than expected. Cost-plus might make sense for very custom projects or renovations with unknowns, but for a standard new home, a fixed price is the norm and gives you budget certainty. An unwillingness to fix the price could be a red flag unless there’s a valid reason. Unclear Progress Payment Terms : If the payment schedule is oddly structured (e.g. front-loaded with big payments early, or just says “payments as requested”), that’s not acceptable. You should see defined stage payments that make sense with work done. Also, if a builder asks for cash payments outside of the contract schedule, be very careful – all payments should be per the contract to keep your QBCC insurance protection. No Written Variations Policy : If the builder gives the impression that “we can handle changes on the fly, no paperwork needed,” that’s a red flag. All changes need documentation. A builder reluctant to do paperwork might later spring huge bills on you. The contract should have a clear variation clause; if not, that absence itself is a concern. Lack of Builder’s Insurance or License Info : The contract (or builder) should provide their QBCC license number (which you can verify on the QBCC website) and evidence of insurance for the project. By signing, you should soon after get a Certificate of Insurance for the QBCC Home Warranty. If a builder is evasive about their license or says insurance isn’t necessary, do not proceed. In QLD, every builder must be licensed and insured for residential work – if not, you have little protection. Rushing You to Sign without Time to Review : High-pressure sales tactics like “This price is only valid if you sign today!” or “Hurry, or you’ll miss the slot” are red flags. A reputable builder will give you a reasonable time to read the contract and even encourage you to seek independent advice. If you’re being rushed, they might be hiding something in the terms or trying to lock you in before you discover issues. Take your time – it’s better to delay signing than regret a hastily signed contract. Contractor Doesn’t Allow Inspections or Communication : If, during discussions, a builder says you won’t be allowed on site or can’t get an independent inspector, etc., be cautious. While safety and coordination mean you can’t roam the site freely, you as the owner should have opportunities for stage inspections (especially at handover). A builder who refuses any transparency or insists you just wait until it’s done could be trying to cut corners unseen. Good builders are proud of their work and welcome you (safely) to see progress. Unrealistically Low Price or Big Promises : Lastly, if one contract bid is significantly lower than others without clear explanation, or the builder promises an unrealistically quick build time, your alarm bells should ring. If it sounds too good to be true, it often is. Some dishonest builders hook customers with a low price, then use contract variations or poor quality work to make up costs. Always do due diligence on the builder’s reputation. Check reviews, past projects, and if possible talk to previous clients. The cheapest contract is not necessarily the best if it comes with headaches. In summary, trust your instincts. If something in the contract feels off or one of these red flags appears, step back and seek clarification. It’s much easier to resolve or walk away before you sign than after. The Markon Group takes pride in transparency – you’ll find none of these red flags with us. Our contracts are clear, our pricing fair and fixed, and our communication honest. We want you to fully understand and be comfortable with every clause before you commit. The Markon Group Difference: A Client-First, Transparent Approach Building a home is personal – it’s likely the biggest investment of your life and a deeply emotional journey turning your vision into bricks and mortar. At The Markon Group, we don’t take that lightly. We’ve built our reputation in South-East Queensland over 35+ years by putting clients first and fostering trust at every step. Here’s how our approach makes the building contract stage (and everything leading up to it) as smooth and reassuring as possible: Comprehensive Design & Planning Before Contract : We handle everything end-to-end – from initial ideas, through design and selections, to approvals – before asking you to sign a contract. By coordinating all these steps early, we ensure that the contract is a true reflection of a well-thought-out plan. Every inclusion is selected, every cost is considered, and your input is fully incorporated. This thorough pre-contract process means our contracts have virtually no grey areas. As we like to say, the only surprises in our contracts are good ones! (like seeing all your dream features itemized clearly). Fixed, Transparent Build Plan : First-home buyers often worry about hidden costs. With Markon, you get a fixed-price contract with a detailed inclusions checklist and transparent pricing. We lay out exactly what’s included and what’s not in plain language. In our fixed-price proposals, for example, you’ll see all inclusions listed and any provisional sums clearly noted, plus the progress payment schedule up front. This level of detail gives you confidence that nothing has been overlooked. We also help align your contract with any lender requirements or grants – sequencing signatures or start dates if needed to fit things like First Home Guarantee timelines. Our goal is a contract that not only suits you but also sets you up for success with financing. Client Education and Communication : We believe an informed client is a happy client. Throughout the design and contracting stage, we guide you through each decision without jargon. Got a question about a clause or a building term? We’ll explain it in everyday terms. In fact, our team makes a point to outline your progress payments and stages in advance and ensure you understand how the build will unfold This guidance continues during the build – we provide milestone updates at each stage claim and are always available to discuss any aspect of your project. When you work with Markon, you’re never left in the dark or wondering “what did I sign up for?” – we walk that journey with you, as partners. Quality and Accountability : A contract is only as good as the builder who stands behind it. With Markon Group, you have the assurance of a QBCC-licensed, family-run builder with decades of experience and a track record of beautifully crafted homes. We meet all Queensland standards for contracts, insurance and warranties – no shortcuts. But beyond ticking the boxes, we instill quality in our company culture. “Trusted : Experienced : Innovative” isn’t just a tagline; it’s how we operate. When we say we’ll do something, we do it – and our contract commitments are treated as promises. Every home we build is like it’s our own, and that ethic is written into our contracts with robust warranties and a dedication to follow-through. At handover, we don’t disappear – we’re here long after move-in, ready to assist if any issues arise. Minimizing Stress for First-Home Buyers : We know building your first home can be overwhelming. Markon’s approach is tailored to first-timers: we handle the heavy lifting of approvals, we coordinate with your bank or broker on payment schedules, and we even keep an eye on any first-home buyer grants or concessions you could benefit from (we’ll time things so you don’t miss out). Our team’s warmth and accessibility means you can ask us anything at any time – there are no silly questions. We’d rather you feel completely comfortable than have any lingering doubts. By making the process as turnkey as possible, we turn what could be an overwhelming process into an exciting, enjoyable journey. When you look at your contract with The Markon Group, we want you to feel a sense of relief – “Ah, everything’s in order and I know where we’re heading.” In short, The Markon Group difference is all about transparency, preparation, and partnership . Every contract we sign is built on months of careful planning and honest communication. We treat our clients like part of the family – your success and satisfaction are our priorities. That means no cutting corners, no hidden fees, and no nasty surprises. We’re immensely proud of the homes we build and the relationships we build along with them. As a first-home buyer, you can trust that with Markon, your contract (and your home) will be in safe hands from day one. Practical Tips for First-Home Buyers at the Contract Stage Finally, let’s wrap up with some practical tips as you approach signing a building contract in Queensland. Keep these in mind to ensure you’re fully prepared and protected: Do Your Homework : Before you even get the contract, research your builder. Verify their QBCC license status and history. Read reviews or ask for references. A solid contract with a shaky builder is still a risk – you want both a good contract and a reputable builder. Read Every Page of the Contract : It might be long, but take the time to read the contract thoroughly (including the general conditions, any schedules, and attachments like plans or inclusions). Many issues can be spotted just by reading. Highlight sections that you find confusing or concerning to discuss with your builder. Ask Questions (and Don’t Be Afraid to Negotiate : If something isn’t clear – ask. A professional builder will happily clarify. If a clause seems unfair, raise it. Sometimes minor tweaks can be made, or at least you can get reassurance on how things will be handled. For example, if there’s no liquidated damages clause, you might ask, “What happens if we run significantly over schedule – how is that handled?” This lets the builder explain and perhaps you can negotiate adding a reasonable term. Remember, it’s your contract too ; you have a say until you sign. Get Independent Advice if Needed: Especially for first-timers, spending a little on a lawyer’s review can pay off big. They might catch unusual clauses or simply give you peace of mind that it’s standard. In QLD, many solicitors offer a fixed fee review for building contracts. Also, your lender might require proof of a signed contract – they won’t usually review terms, but your broker may highlight if anything looks off relative to loan conditions. Check the Essentials Are Attached : Before signing, ensure the contract pack includes all necessary documents: the detailed plans, specifications/inclusions list, any special conditions, and the QBCC Consumer Building Guide (for contracts $20k+). By law, the builder must give you that guide which summarises your rights. Don’t sign if you haven’t seen it or if any promised document (like soil report or engineering drawings) are missing. All attachments should be signed or initialed by both parties to prevent later changes. Be Financially Ready : Know the timing of payments and make sure your finances (or loan) are lined up accordingly. Keep funds aside for your deposit and any gap between stage payments and loan drawdowns. Also, set aside a contingency fund (even 5% of contract value) for any unexpected variations or upgrades you decide on. This will reduce stress if something pops up. Keep Communication Open : Establish a good rapport with your builder or their contract administrator. Know who your point of contact is for contract matters or questions. Good communication can resolve issues before they escalate. If you’re unsure about a small matter (say, a product in the inclusions list), it’s better to clarify now than to assume incorrectly. Understand Your Commitments : The contract isn’t just about the builder’s obligations – it outlines yours too. Common owner responsibilities include: providing access to the site, paying invoices on time, having the site ready (e.g. demolishing an old structure if applicable), and maintaining insurance on the land itself. Make sure you fulfill your side of the deal to avoid breaching the contract. For instance, have you arranged the construction insurance on the existing property if needed, or will the builder cover it? These details should be clear. Monitor the Build (but Stay Flexible : Once signed, use the contract as your guide. Monitor that stages finish around the predicted times, and compare the work to the inclusions list. However, also understand that some flex is normal – a week of bad weather can push things, a backorder on tiles might shuffle the schedule. The contract provides mechanisms for such delays (extension of time notices). As long as communication is there, don’t panic over small hiccups. The contract protects you against major ones. Keep All Documents Safe : Maintain a folder (digital and/or physical) with your signed contract, receipts of payments, variation documents, insurance certificates, etc. Having an organized record will be invaluable if any dispute or confusion arises. And when the build is complete, you’ll want all this paperwork for reference during the warranty period. Approaching a building contract may feel intimidating, but with knowledge and diligence, you can sign with confidence. Thousands of Queenslanders successfully build new homes every year – you can too. The key is to be informed, stay engaged, and choose the right partners. Remember : The building contract is there to protect you just as much as the builder. It’s the framework that ensures your dream home is delivered as promised. With the tips and insights from this guide, you’re now equipped to review any contract and spot what matters. Take your time, lean on expert advice when needed, and soon you’ll be on your way from contract signing to breaking ground on your very own home. Request our inclusions checklist before you build . As a final takeaway, we’d like to help you even further. The Markon Group offers a comprehensive Inclusions Checklist for first-home builders – a handy tool to make sure you’ve thought of everything to include in your contract. Contact us to request your free copy of this inclusions checklist before you build. It’s the perfect starting point to ensure nothing is overlooked, setting you up for a smooth design-to-contract process. Let’s turn your dream home into a reality, with a rock-solid contract to match. We’re here to assist every step of the way – happy building! Contact The Markon Group today: 📍 Location: 20–24 Commerce Drive, Browns Plains, Brisbane 📞 Phone: +61 7 3153 2000 🌐 Website: www.markongroup.com.au ✉️ Email: info@homesbymarkon.com.au Building futures for Queensland families.
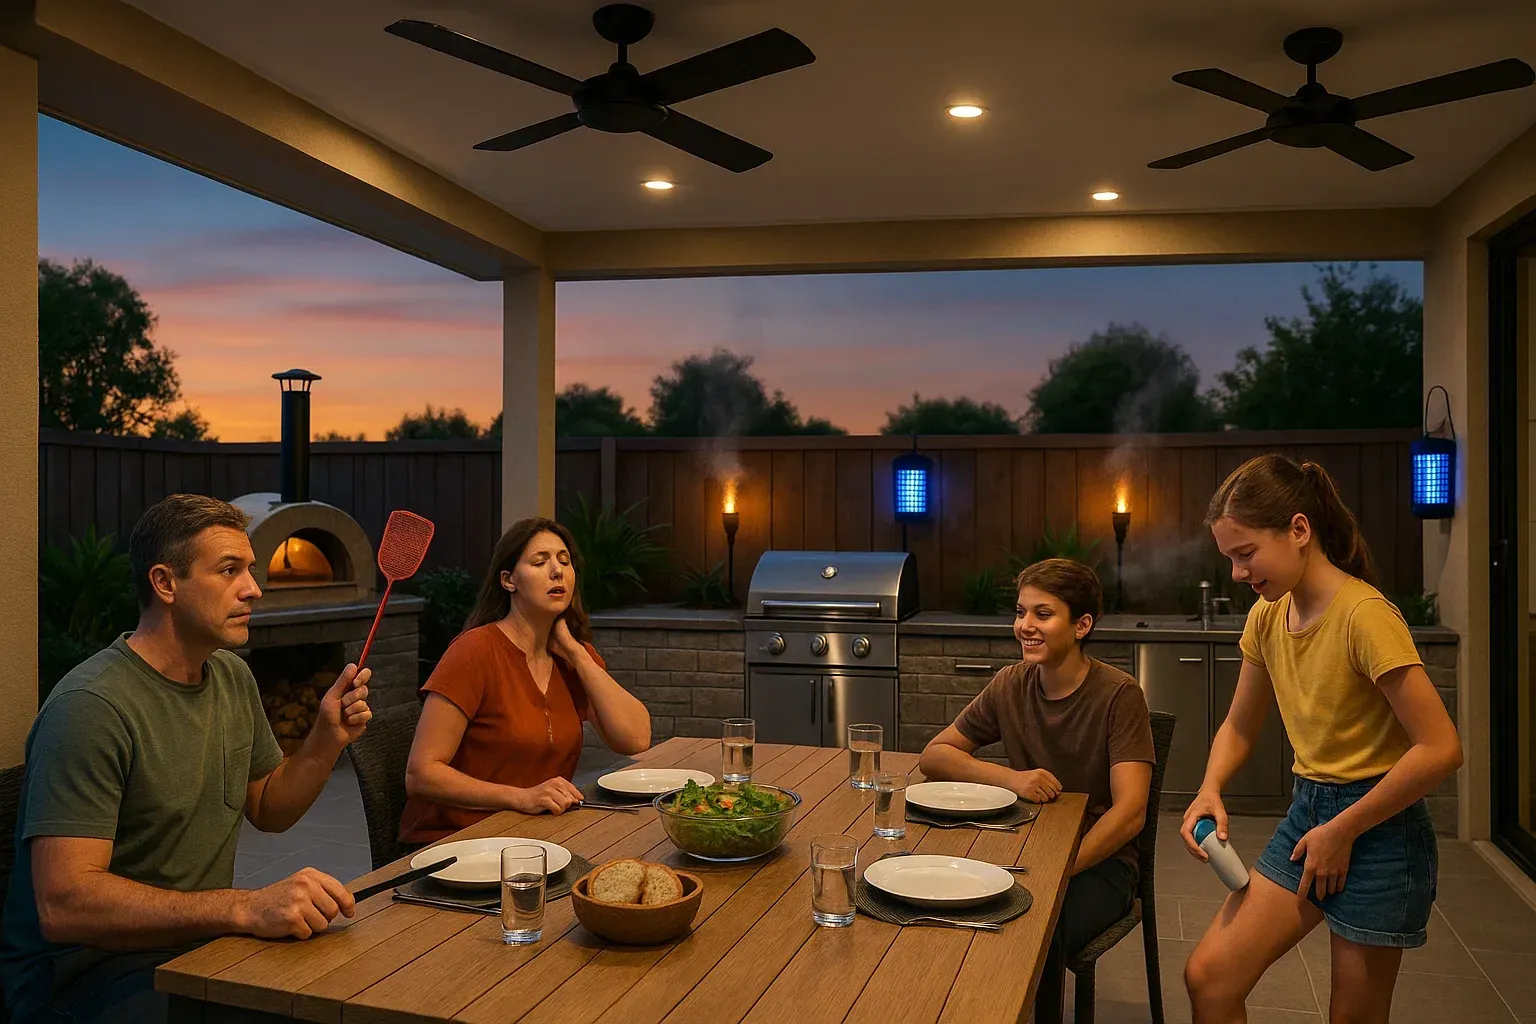
Time to control those little critters and take back your entertainment area
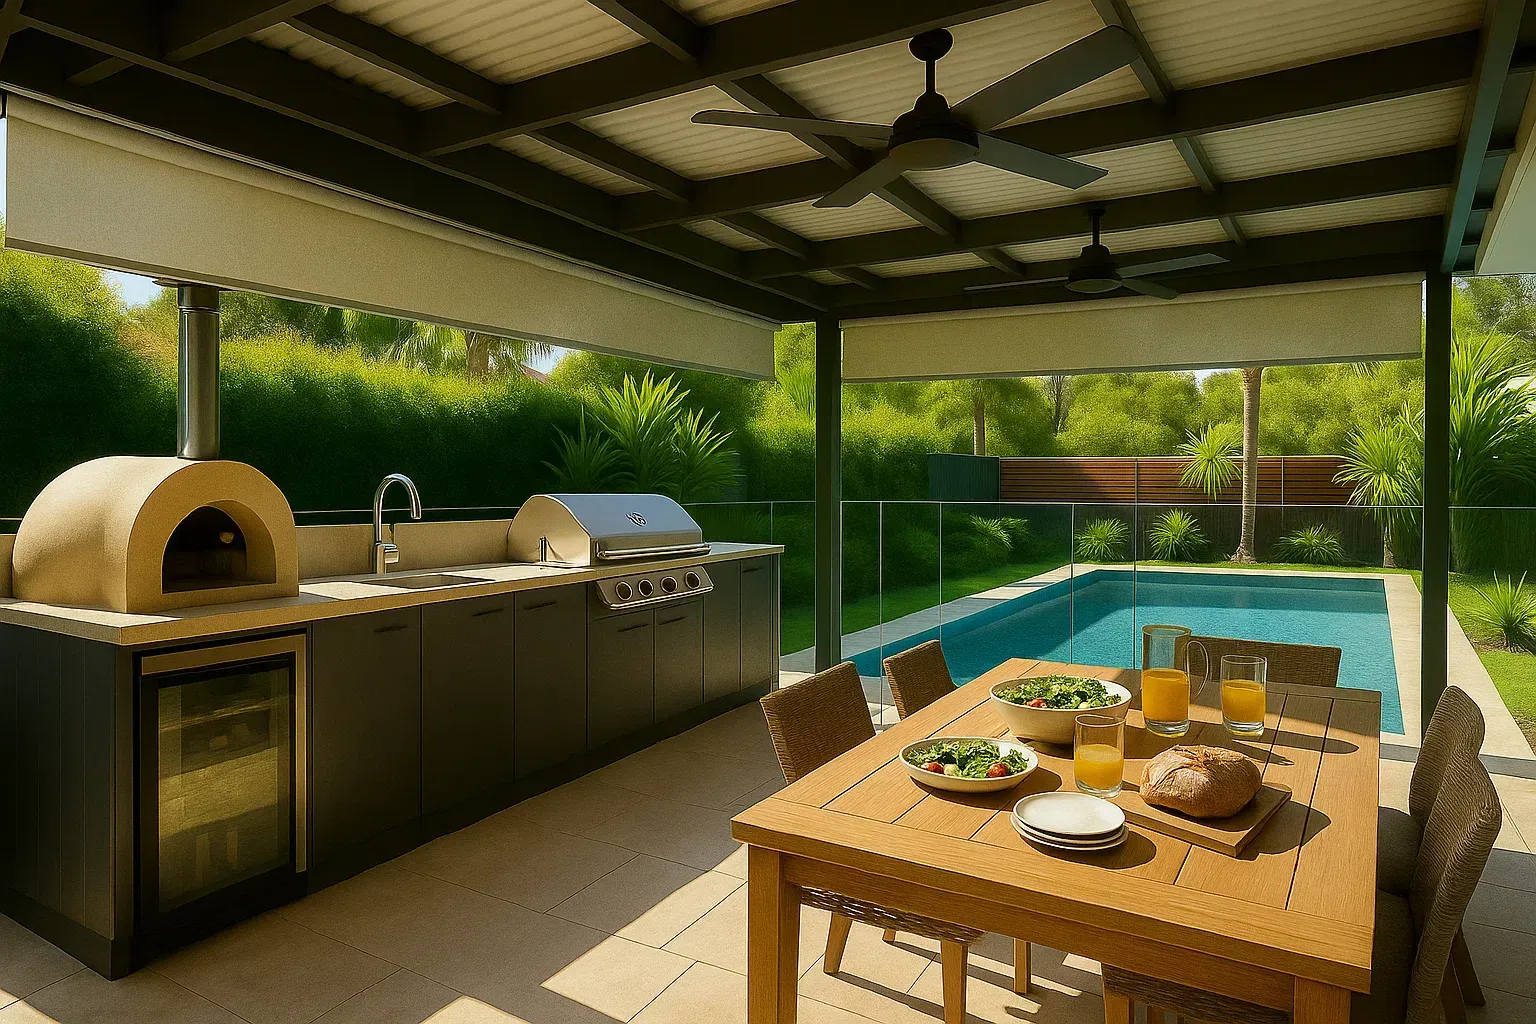
Transform your backyard into the ultimate gathering spot.
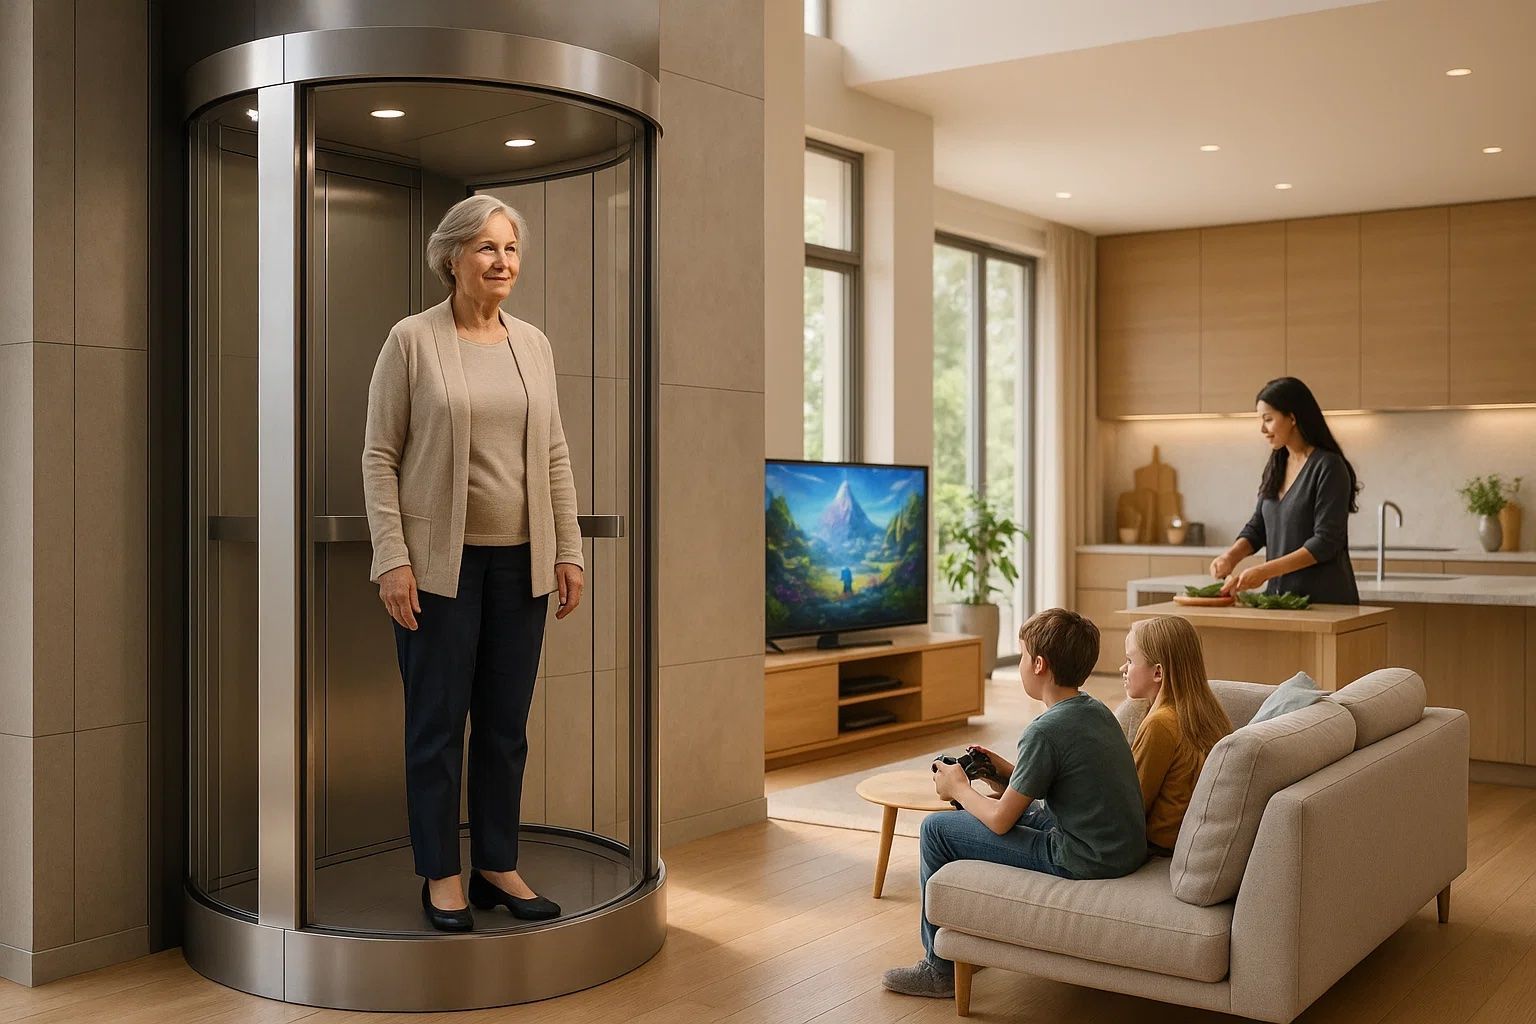
Multi Generational Housing becoming more common - Is it right for you ? Read On to find out.

Breaking Free From the Cookie-Cutter Trap

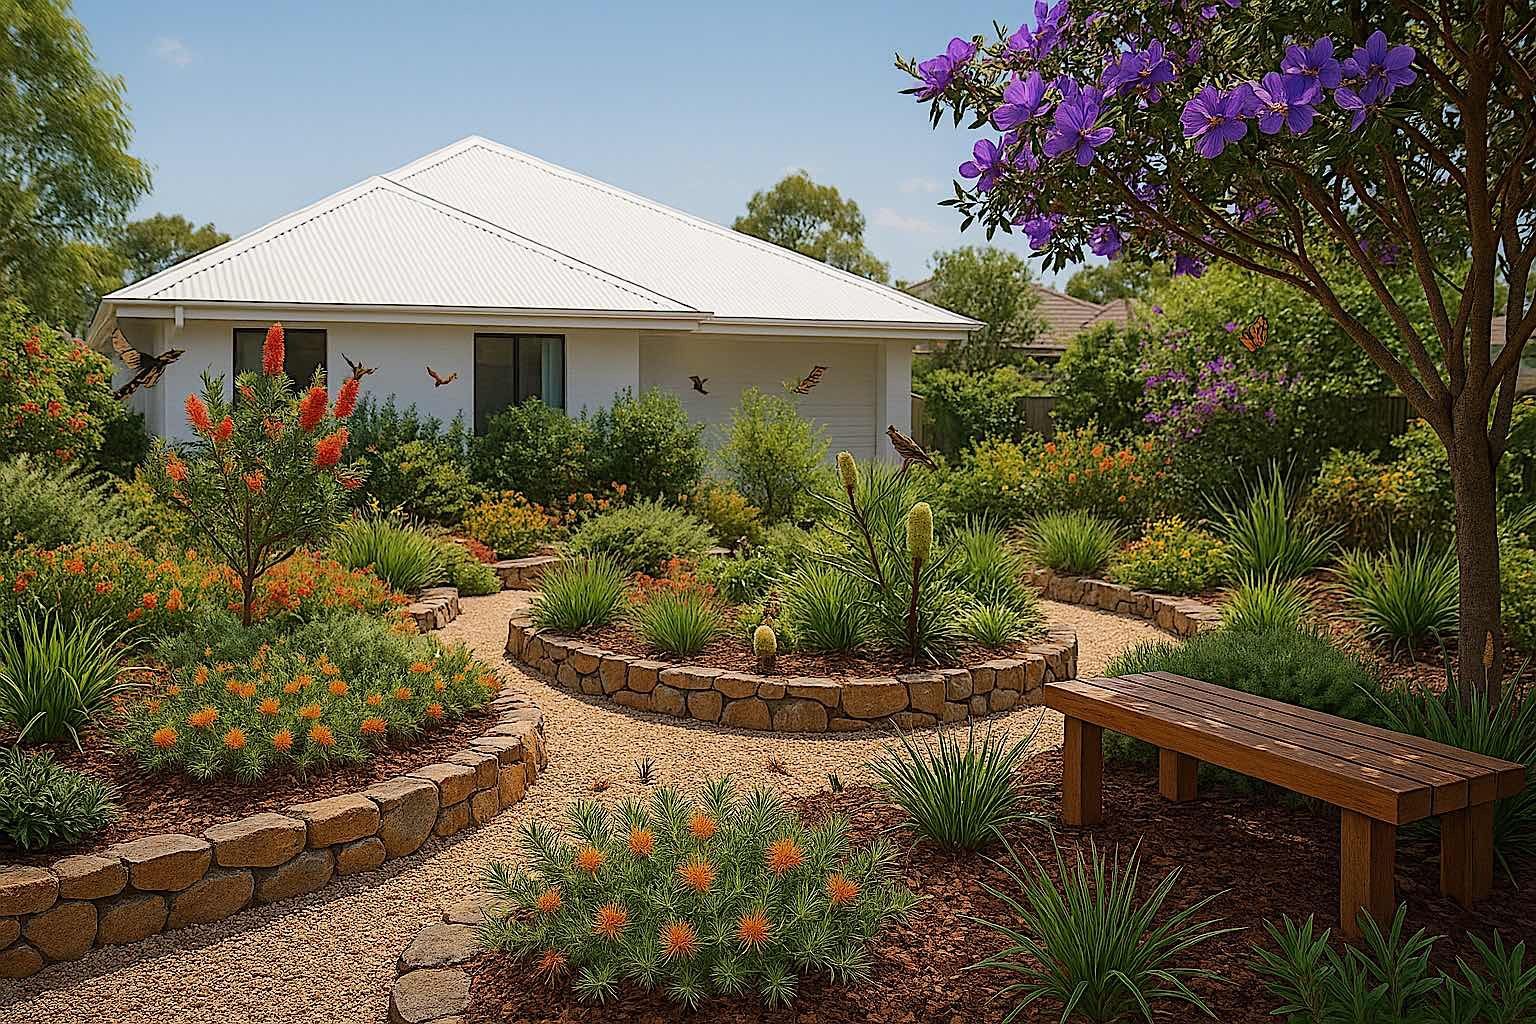
Gardening design ideas and tips

By The Markon Group — helping Australians design spaces they love coming home to.
Time to consider solar for your build - What you need to know
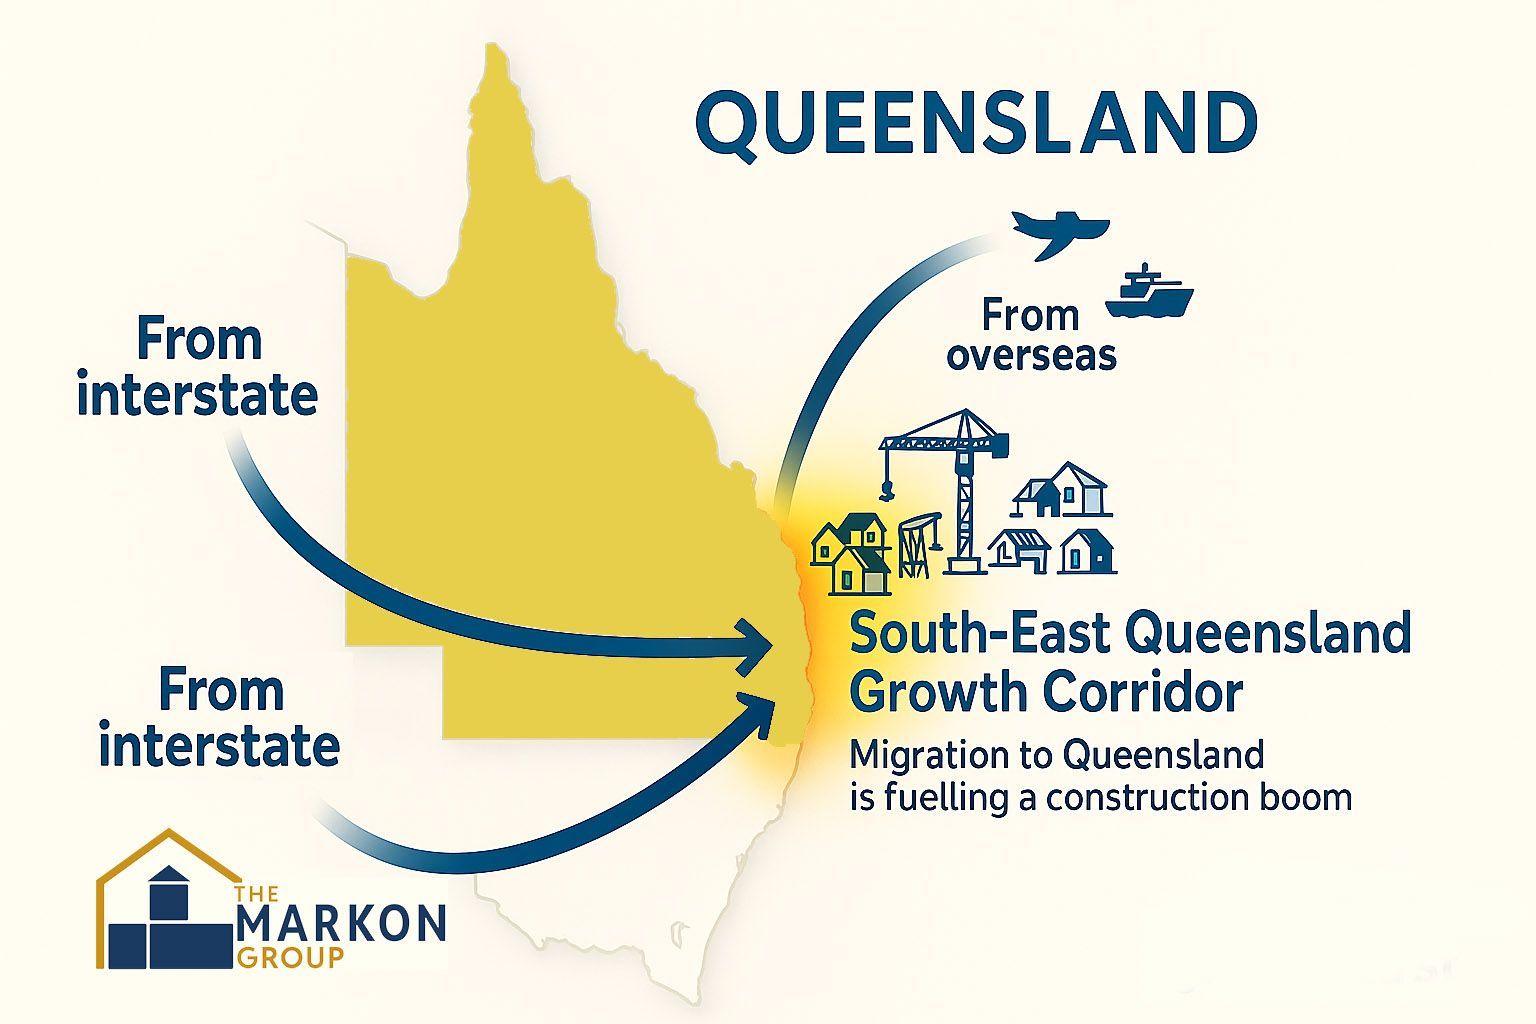
How Interstate Migration Is Reshaping Queensland’s Building Industry Queensland has long been a lifestyle magnet, but the last few years have turned that appeal into a structural force for the state’s construction market. Net inflows from other states—driven by affordability, climate, flexible work, and business relocations—are changing what we build, where we build, and how we deliver it. For builders, developers, suppliers, and policymakers, understanding these shifts is now a core competency. Below is a practical, industry-focused look at the effects of interstate migration on Queensland’s building sector—and how to position for the next cycle. 1) Demand Shock: More People, New Household Patterns Household formation accelerates. Migrants don’t just add heads; they add dwellings. Interstate movers skew toward working-age professionals, families, and downsizers seeking lifestyle gains. That mix boosts demand for detached homes in growth corridors, low-maintenance townhouses near services, and well-located apartments that balance price with amenity. Tenure preference broadens. New arrivals split between buying and renting, often renting first to “test” locations. This lifts pressure on the rental market and speeds up absorption for build-to-rent (BTR) projects, while still supporting owner-occupier estates. Product expectations rise. Migrants bring design and amenity benchmarks from Sydney and Melbourne—think smarter small-lot designs, energy-efficient envelopes, premium joinery, EV-ready garages, and strata amenities with lower ongoing costs. Projects that look “standard” in Queensland terms can feel dated to incoming buyers. 2) Geography: Growth Corridors and the SEQ Gravity SEQ remains the beating heart. Brisbane, Gold Coast, Sunshine Coast, Logan, Ipswich, and Moreton Bay capture most inflows thanks to jobs, universities, hospitals, and transport. Demand ripples outward along rail and motorway spines, creating “string of pearls” opportunities for staged subdivisions and medium-density pockets. Regional Queensland catches spillover. Lifestyle towns with good digital connectivity (e.g., Toowoomba, Wide Bay–Burnett, Cairns fringes) attract hybrid workers and downsizers. The challenge here is sequencing infrastructure with growth so councils aren’t overwhelmed. Infill vs greenfield. Interstate migrants with larger equity chunks often prefer infill with amenity and shorter commutes. But value-conscious families still drive robust greenfield demand, especially where schools, childcare, and retail catch up quickly. 3) Pipeline Pressures: Approvals, Lots, and Infrastructure Approvals whiplash. Rapid demand exposes bottlenecks: planning backlogs, civil works capacity, utility connections, and flood-resilience requirements. Developers who lock in trunk infrastructure sequencing and engage early with councils reduce timeline risk. Serviced land is the constraint. The issue isn’t raw land—it’s shovel-ready lots. Funding headworks, aligning with regional infrastructure plans, and standardising civil designs can shave months off delivery. Land partnerships (developer + builder + civil contractor) with shared KPIs are gaining traction. Brownfield complexity. Infill sites may need remediation, acoustic treatments near corridors, or flood overlays. Early technical due diligence (Geotech, hydraulic, bushfire) is now non-negotiable to avoid redesign cycles. 4) Price & Program: The New Cost Reality Build costs have reset. Even as material spikes cool from their peaks, labour scarcity and compliance uplift (energy, accessibility, resilience) keep baseline costs elevated. Migrant demand sustains volumes, limiting the depth of any downturn in trades prices. Time is the silent margin killer. Interest carry, prelims, and overheads compound when approvals stretch or supply hiccups occur. Builders who standardise details, pre-order critical components, and use parallel rather than sequential approvals improve cash conversion. Spec selection becomes strategy. Offering curated, pre-validated upgrade packs cuts variation drag and warranty risk. Migrant buyers expect choice—but within a disciplined palette that protects schedules. 5) Labour Market: Skills Gaps and Delivery Models Trades are the pinch point. Structural carpentry, roofing, finishing trades, and site supervisors remain tight. Migration helps demand more than supply because many newcomers aren’t in licensed trades or choose other sectors. Apprenticeships + fast-track pathways. Partnerships with TAFEs, targeted apprenticeship cohorts, and recognition-of-prior-learning programs are key. Builders that sponsor pipelines now will own capacity later. Offsite construction steps up. Modular, panelised, and bathroom pod solutions reduce on-site labour intensity and are ideal for repetitive product (townhouses, walk-up apartments, social/affordable housing, remote/regional builds). For Queensland’s climate zones, DfMA detailing for cyclonic/wind categories and corrosion resistance is essential. 6) Product Shifts: What’s Selling to Interstate Migrants Detached small lot with smart planning. Narrow frontages with functional storage, cross-ventilation, and outdoor rooms. Heat-smart roofs, shading, and ceiling fans trump ducted systems alone. Townhouses with low running costs. Fee-sensitive schemes (efficient body corporate budgets), durable common areas, EV charging provisions, and pet-friendly bylaws. Designs that flex for multi-generational living win. Apartment formats that “live big.” Efficient cores, dual aspect where possible, acoustic privacy, and balconies sized for real use. Communal storage, bike rooms, and co-working niches support hybrid work. BTR and affordable. Migration supports stabilised occupancy for BTR, while government co-investment and inclusionary zoning can tip projects over the line. For affordable and social housing, speed of delivery and lifecycle costs are decisive—favouring prefabrication. 7) Compliance & Risk: Queensland Nuances Matter Climate and resilience. Designs must address wind categories, bushfire overlays, flood resilience, and corrosion (especially coastal). Interstate plans often need re-engineering for Queensland conditions. NCC and Queensland legislation. Energy efficiency updates, accessibility provisions, and product conformity requirements change detailing and procurement. For offshore/DFMA supply, ensure evidence of suitability, product certification, and a clean chain of custody to pass certifier scrutiny. Builder solvency vigilance. Demand can mask thin margins. Transparent cost indices in contracts, escalation clauses tied to verified inputs, and milestone-based cash flows help keep builders solvent through the cycle. 8) Supply Chain: Diversify and Standardise Dual-sourcing critical items. Windows/doors, framing systems, roofing, and wet-area packages need contingency suppliers. Hold template shop drawings so swaps don’t trigger re-documentation. Local + offshore blend. Use offshore manufacturing for repeatable components (pods, cabinets, steel frames) and lock local capacity for site-critical tasks. Pre-qualification of offshore vendors against Queensland codes avoids surprises at handover. Inventory as a strategic asset. For fast movers (fixings, membranes, tapware ranges), modest buffer stock shortens programs and protects against small disruptions that cause big delays. 9) Regional Spotlight: Practical Plays Brisbane: Infill townhouses and mid-rise near transport; premium downsizer apartments in inner-south/inner-north; BTR close to employment hubs. Gold Coast: Medium-density near light rail and coastal corridors; corrosion-resistant specs; balconies and shading are selling points; careful flood planning in low-lying zones. Sunshine Coast: Owner-occupier apartments and small-lot detached; health precinct adjacency is a drawcard; strict attention to stormwater and coastal conditions. Ipswich/Logan/Moreton Bay: High-volume detached and townhouses; value-engineered designs; early utility engagement; community infrastructure (schools/childcare) timing is critical. 10) Opportunities for Builders & Developers Standardise to scale: Create a kit-of-parts library (stairs, wet cores, façade panels) that works across wind categories, with pre-certified details. Promise speed credibly: Market program certainty—offer transparent timelines backed by offsite production slots and locked procurement. Energy & comfort as value, not cost: Sell lifecycle savings (insulation, glazing, fans, solar-ready roof trusses) that matter to interstate buyers used to higher energy standards. Data-driven land buying: Blend sales CRM, enquiry postcodes, and transport catchment data to prioritise sites where migrant demand actually lands. Partnership delivery models: Upfront MOUs with councils on trunk works; framework agreements with trades; DfMA partnerships with certified offshore factories. Aftercare as a differentiator: Interstate buyers prize hassle-free ownership. Offer digital defect logging, clear manuals, and responsive warranty windows. 11) Policy Levers That Help (and How to Engage) Streamlined approvals: Support code-assessable pathways for compliant small-lot and townhouse typologies. Infrastructure alignment: Advocate for forward-funded water, transport, and school capacity in growth corridors. Industrial land for offsite: Zoning and services for modular factories reduce transport and lead times. Certification clarity for DfMA: Standardised evidence-of-suitability packs for prefabricated elements to cut certifier friction. Industry bodies and local councils are open to solutions that lift throughput without sacrificing quality—arrive with data, standard details, and a track record of compliance. 12) The 18–36 Month Outlook Demand stays above the long-run average, even if interest rates ease only gradually. Migration remains a structural tailwind. Cost inflation moderates but doesn’t reverse to pre-pandemic levels; labour stays tight, keeping emphasis on productivity and DfMA. Winners will be those who control time: approvals, procurement, and predictable delivery—plus products tuned to interstate expectations. Final Take Interstate migration isn’t a one-off surge; it’s redefining Queensland’s housing mix, delivery models, and quality benchmarks. For the building industry, the playbook is clear: design for Queensland conditions, industrialise delivery, de-risk approvals, and communicate lifecycle value. Do that, and the state’s population tailwind becomes your competitive moat. Reach out to our team by contacting us anytime below
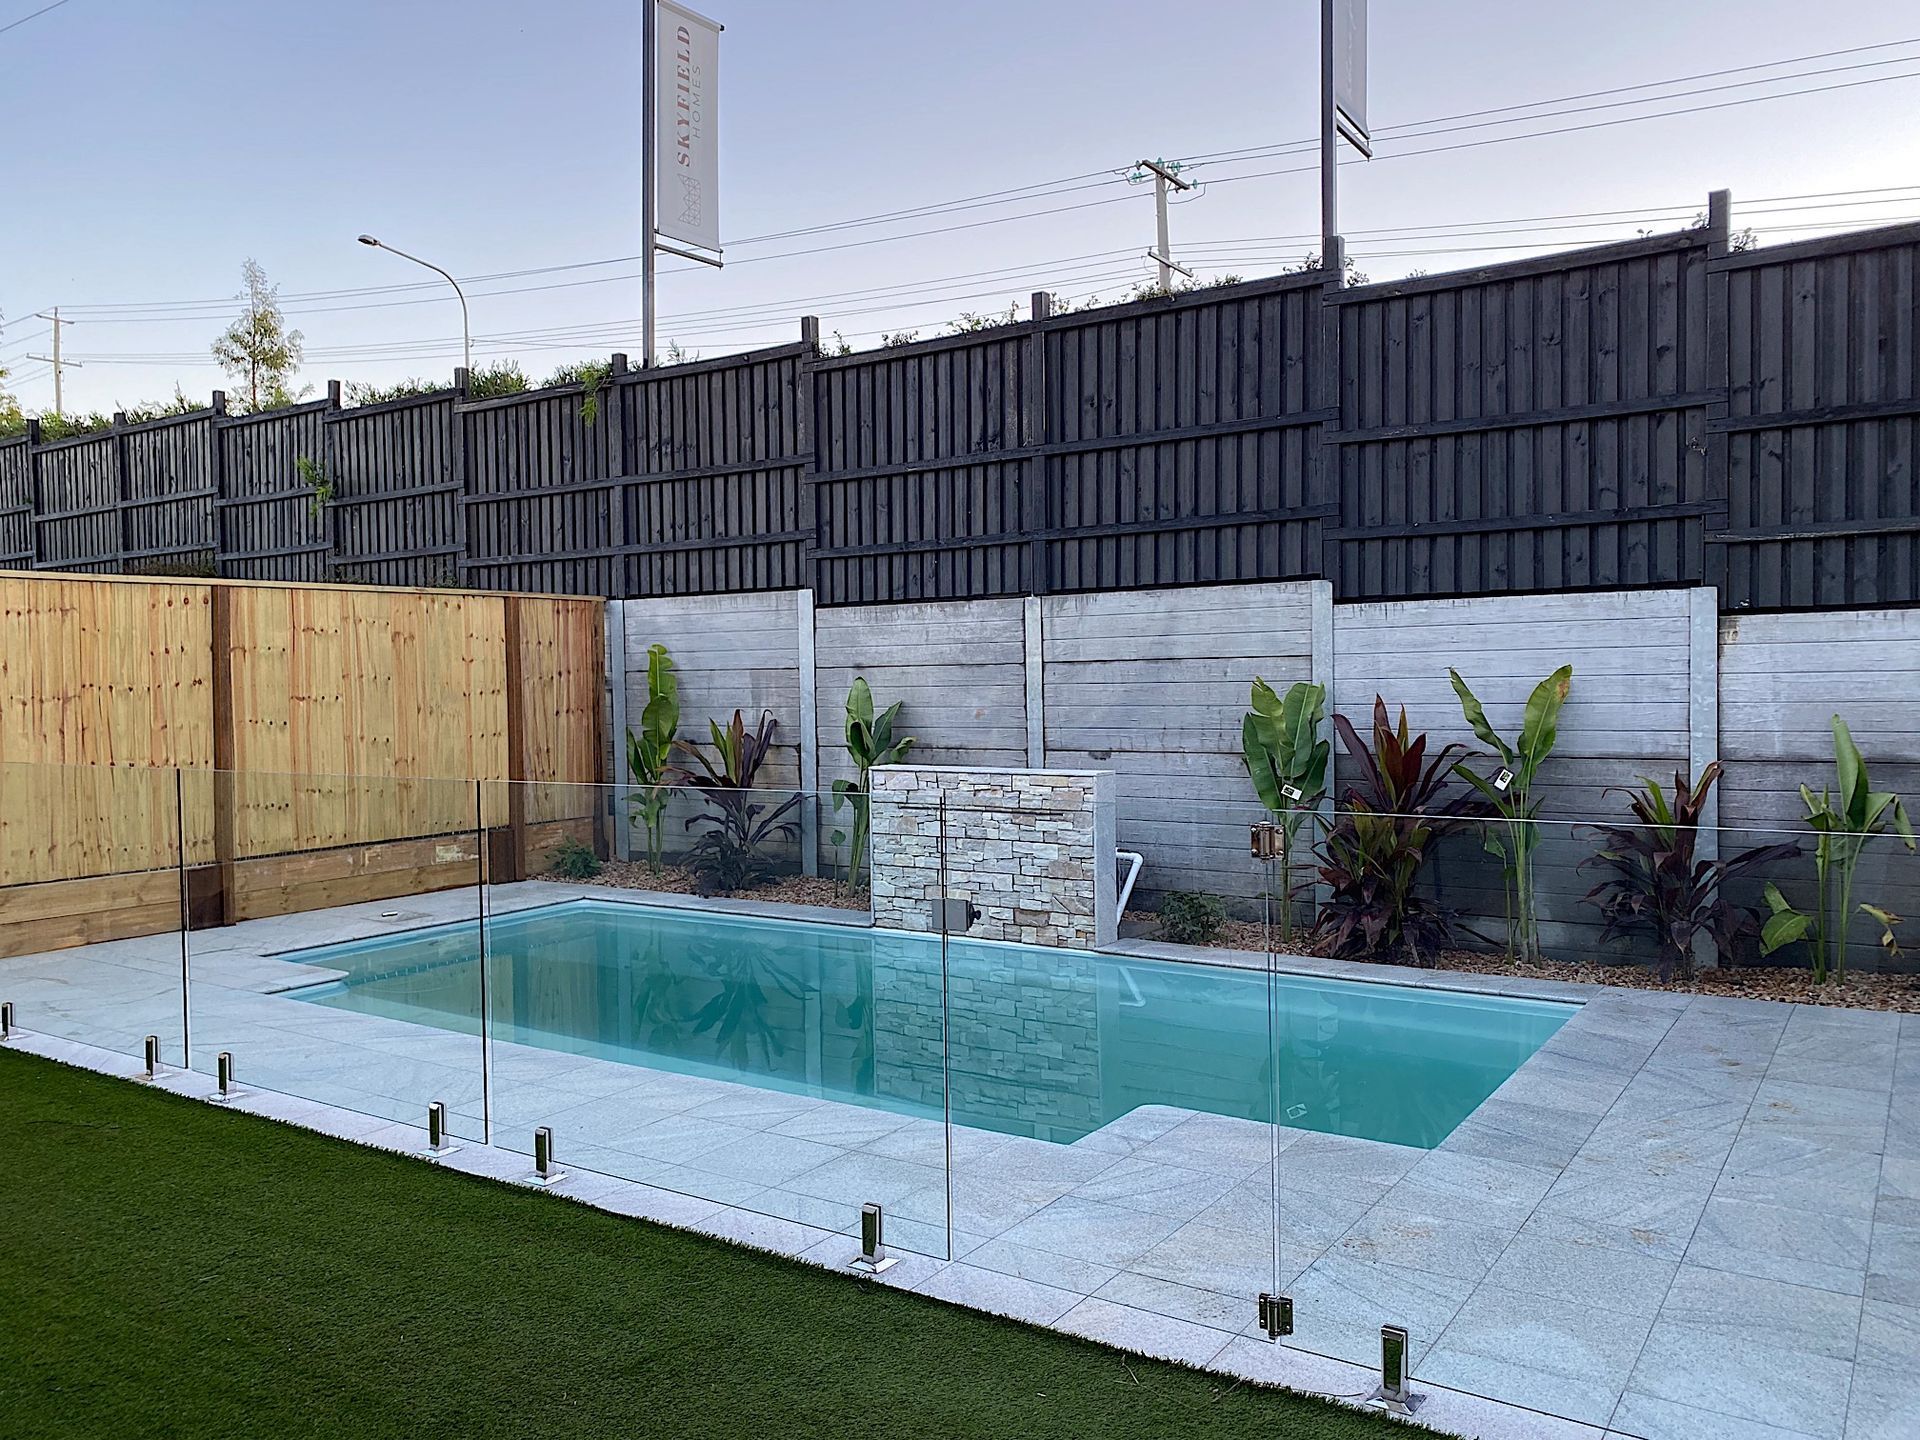
Caring for your swimming pool
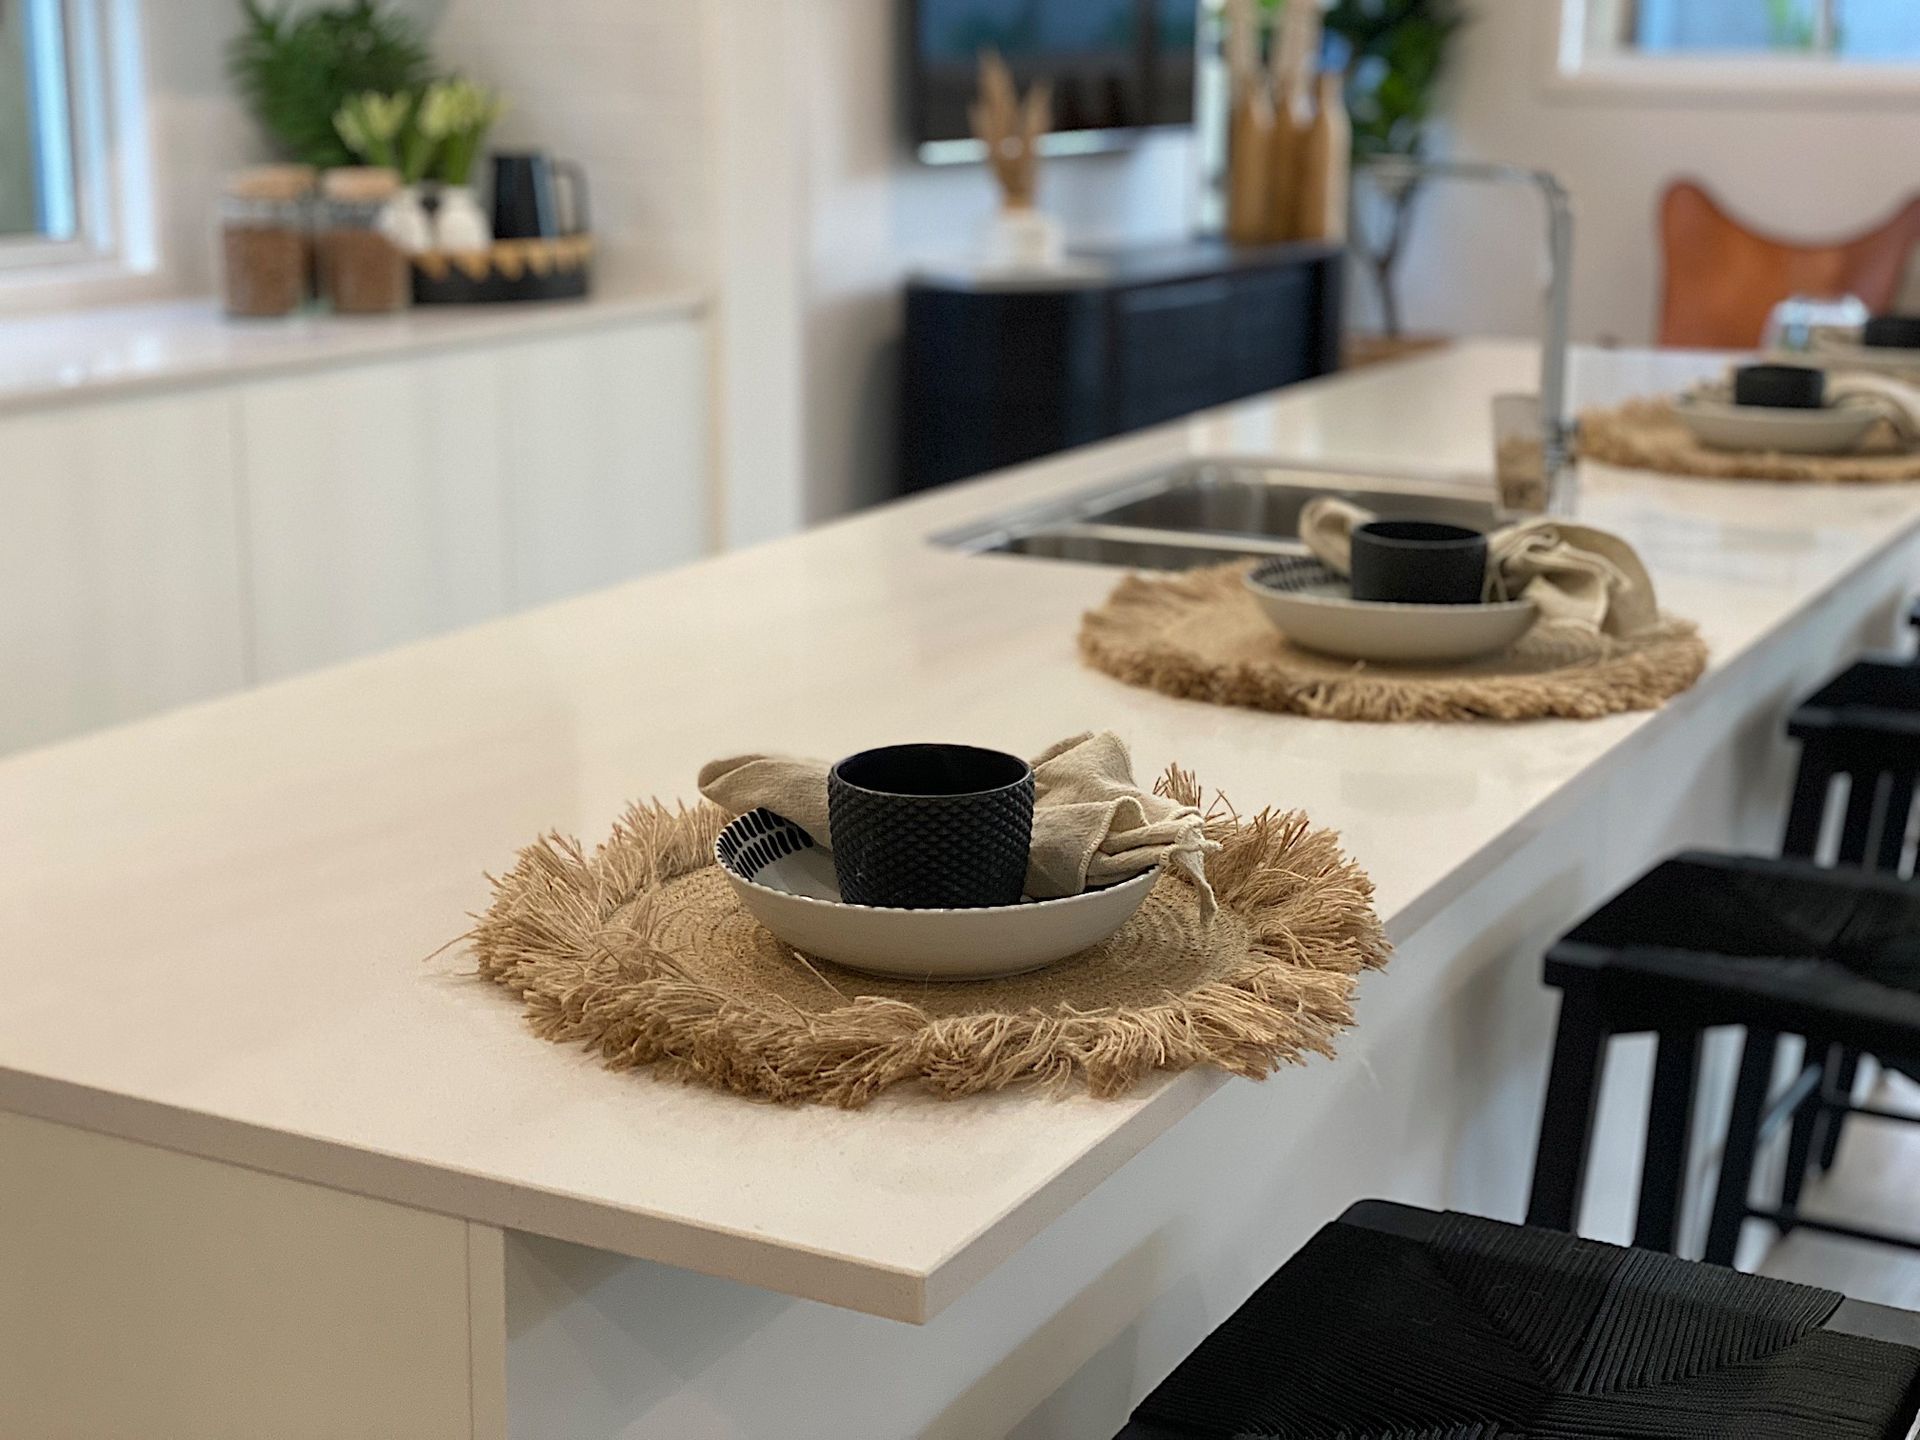
Looking after your stone bench tops

The 2032 Olympics, Construction & Labour Shortages

Could This Be the Time to Start Building Your Dream Home with The Markon Group?
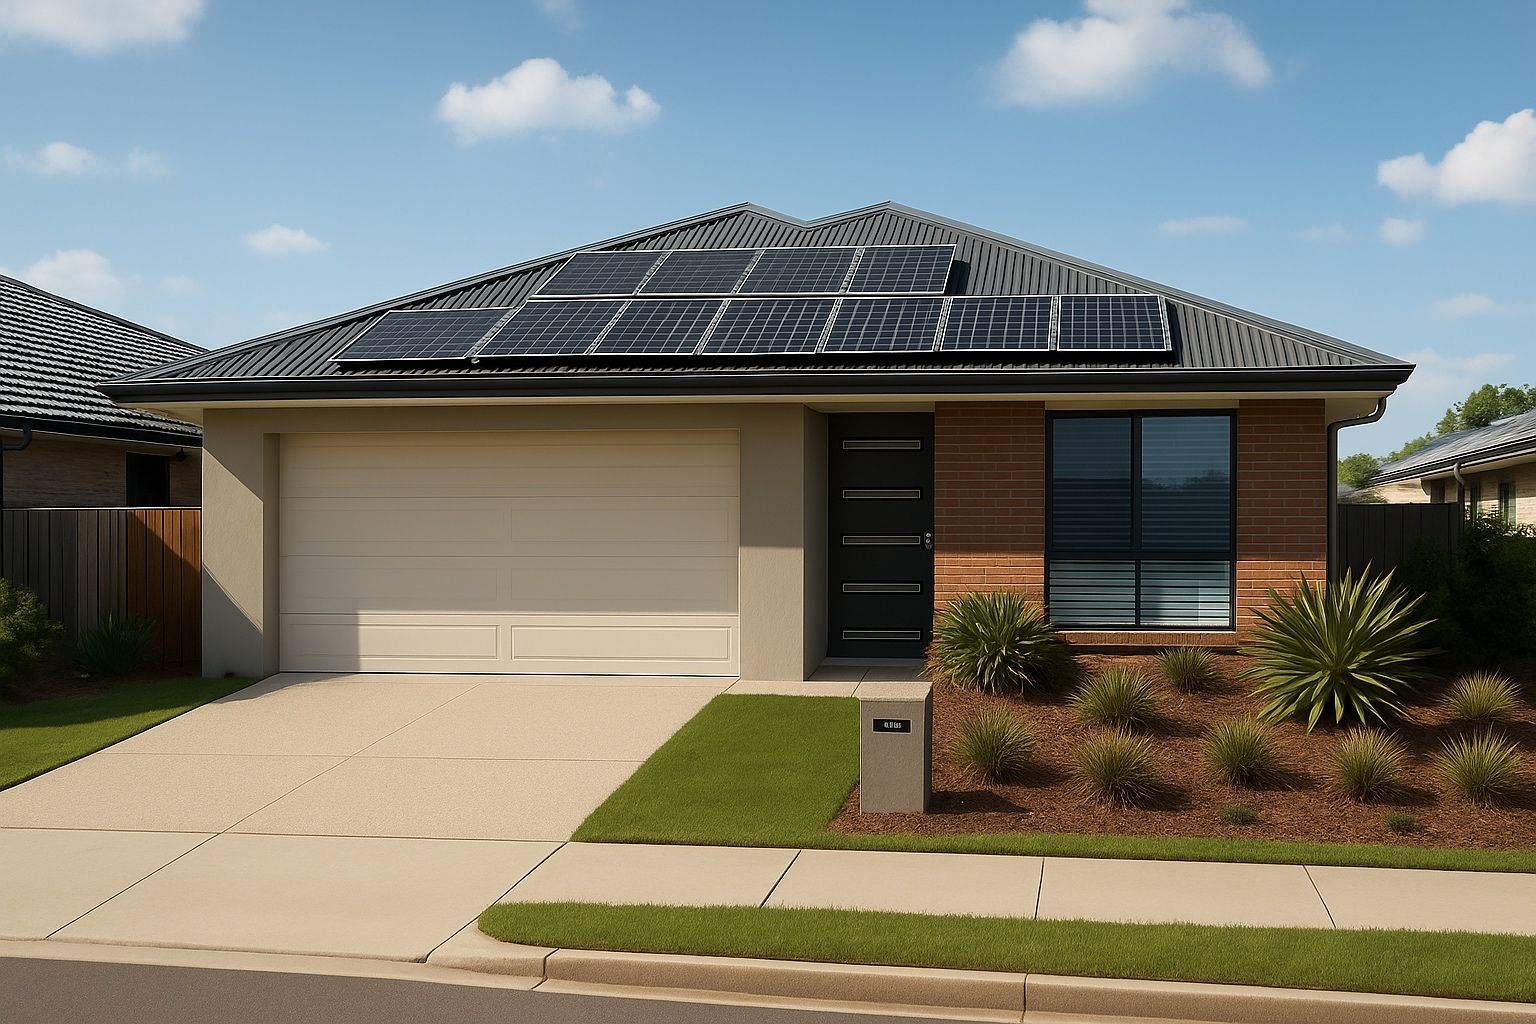
Your First Home Questions
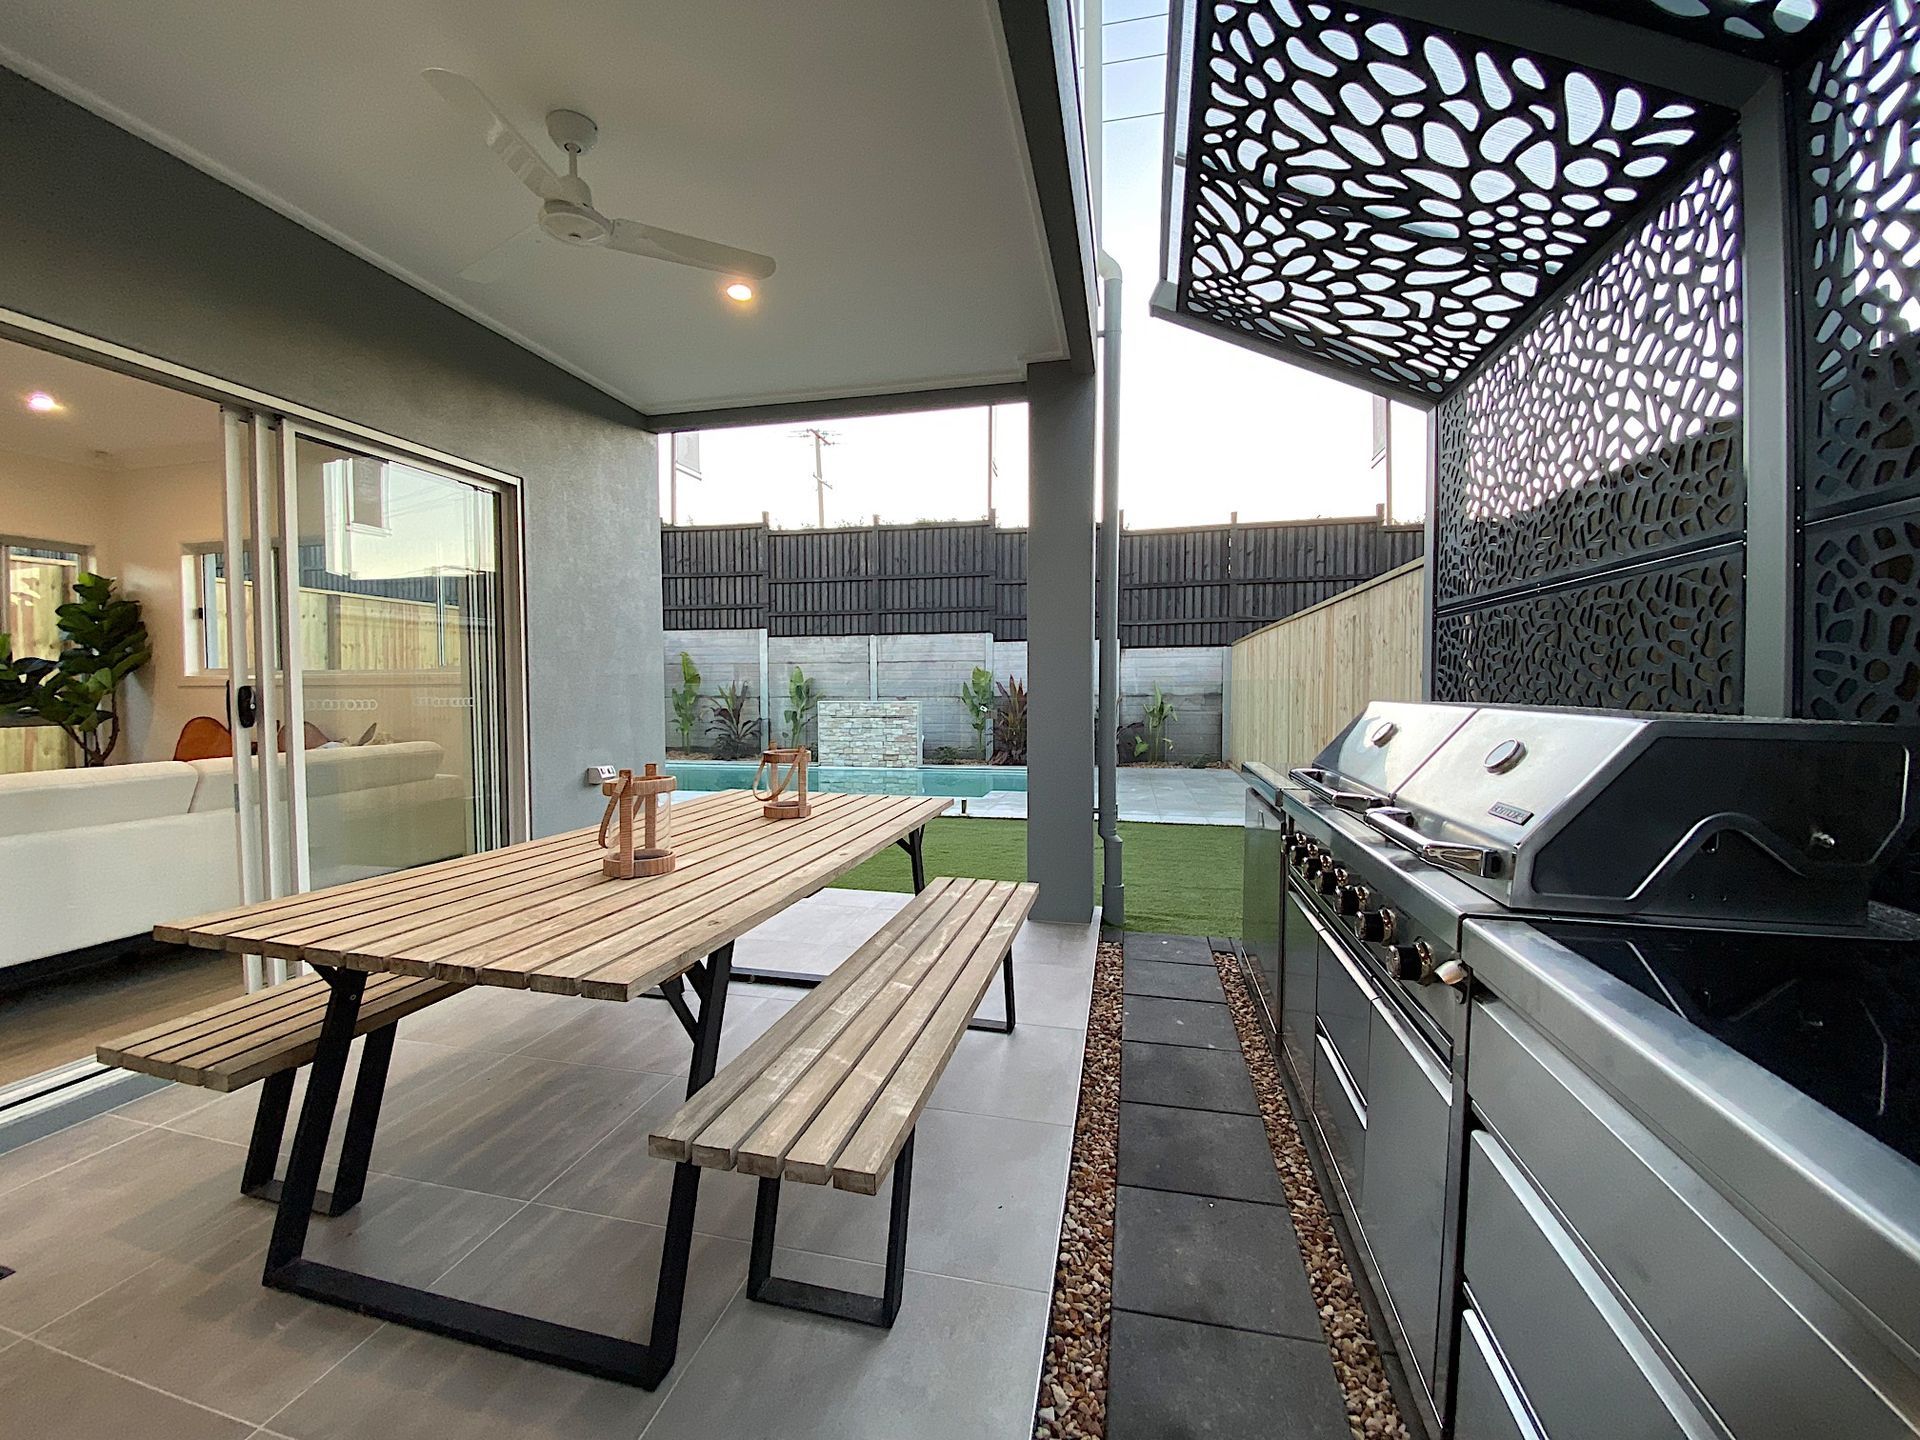
Get the BBQ fired up the families coming round !

Plan your power outlets